This is part 8 of the Cisco UCS Configuration Guide, covering the upgrade of the Cisco UCS ESXi drivers using the vSphere Update Manager (vUM).
Eight part series, describing how to configure a Cisco UCS from start to finish for a vSphere deployment:
- Cisco UCS Configuration Guide – Part 1 – Overview
- Cisco UCS Configuration Guide – Part 2 – Equipment
- Cisco UCS Configuration Guide – Part 3 – LAN
- Cisco UCS Configuration Guide – Part 4 – SAN
- Cisco UCS Configuration Guide – Part 5 – Server
- Cisco UCS Configuration Guide – Part 6 – Admin
- Cisco UCS Configuration Guide – Part 7 – Firmware Upgrade
- Cisco UCS Configuration Guide – Part 8 – ESXi Driver Upgrade
Overview
Upgrading the Cisco UCS Drivers for ESXi hosts has the following steps:
- Download the VMware drivers ISO image from Cisco.com.
- Upload required UCS ESXi drivers to vSphere Update Manager.
- Create a Hosts Baseline and attach it to an ESXi Cluster.
- Upgrade the UCS ESXi drivers by remediating the ESXi Cluster.
Requirements
- Valid Cisco Support login.
- Administrator access to vCenter Server.
- vUM, vSphere DRS, vMotion and ESXi Maintenance Mode.
- If you do not have vCenter Server, you will have to perform this manually via ESXi SSH using the “esxcli software vib” command.
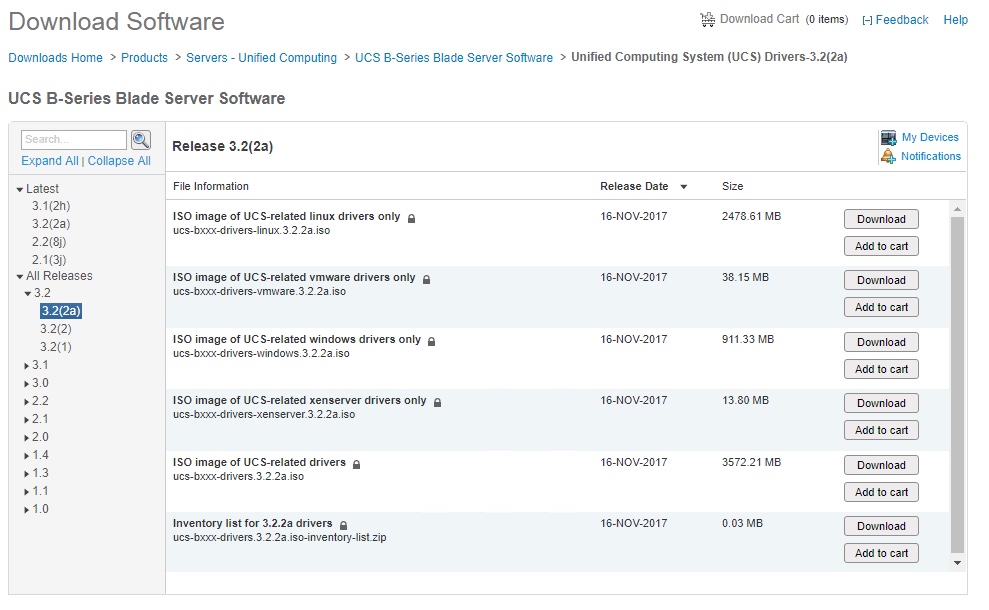
Download the Cisco UCS Firmware from Cisco.com
You will need a valid Cisco Support login to download this firmware.
- Open a Web browser to software.cisco.com.
- In the “Products” window, select “Servers – Unified Computing”.
- Then select “UCS B-Series Blade Server Software”.
- A “Download Software” screen will appear, select “Unified Computing System (UCS) Drivers”.
- A new window will appear displaying the versions of software for the “UCS B-Series Blade Server Software”.
- Select the version of firmware that matches your UCS Manager install, which in this example is “3.2(2a)”.
- There is one binary to download – “ISO Image of UCS-related-vmware-drivers-only” eg. “ucs-bxxx-drivers-vmware.3.2.2a.iso”.
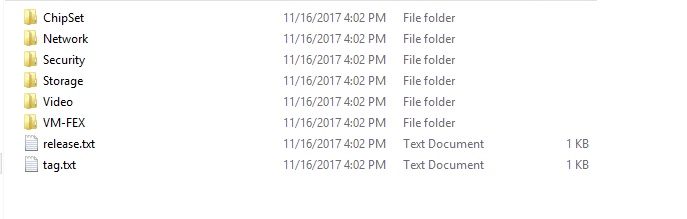
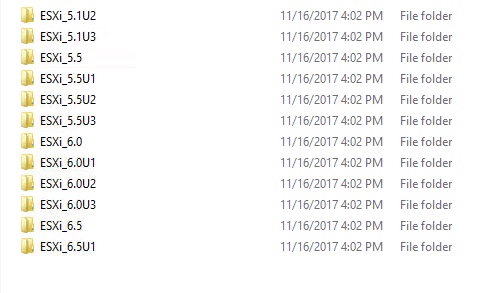
- Extract the ISO file to a temporary directory and browse each sub-directory for folders with the vSphere version that matches your install, which in this example is “ESXi_6.5U1”. If your major version of ESXi is not listed, then skip that sub-folder.
- From each of the matching sub-directory folders, copy the Offline Bundle ZIP files to a common folder, eg. “VMW-ESX-6.5.0-nenic-1.0.11.0-offline_bundle-6807538.zip”. These files will be imported into vSphere Update Manager.


Upload the Cisco UCS ESXi Drivers to vSphere Update Manager
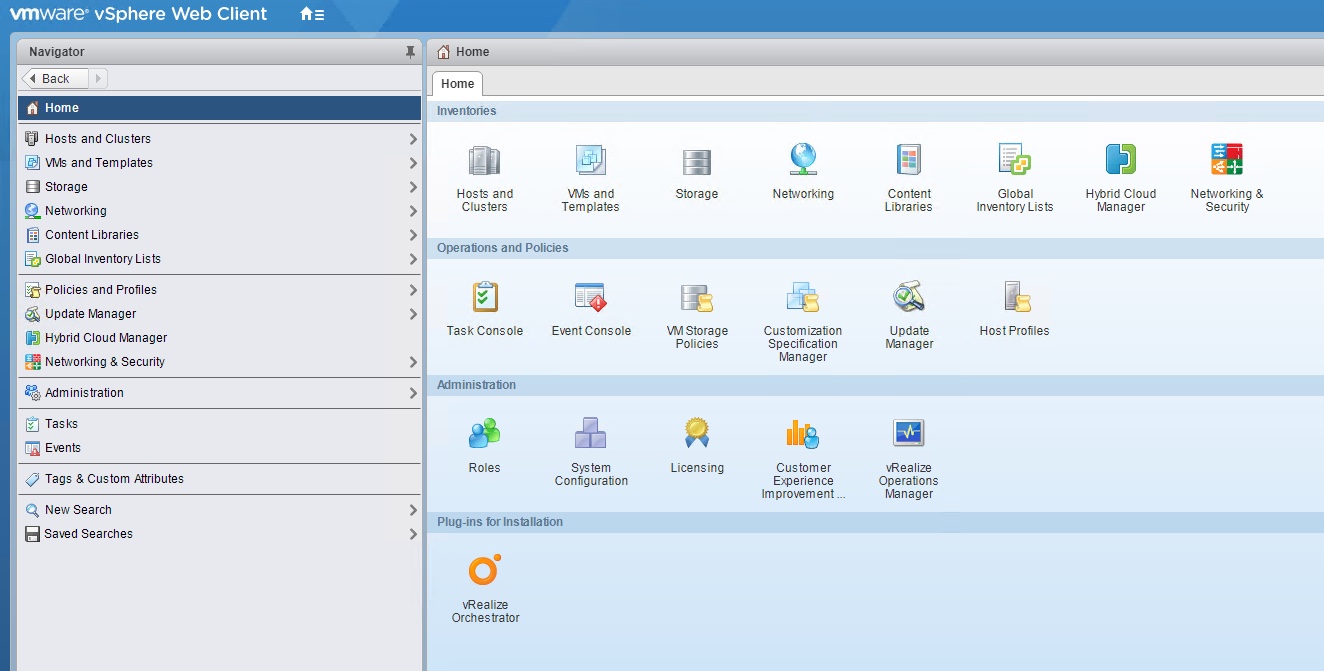
- Login into the vSphere Web Client of vCenter Server.
- Select the “Update Manager” icon from the “Home” page.
- Select the Update Manager instance where your Cisco UCS cluster resides.
- From the “Manage” tab, select the “Patch Repository” object.
- Press the “Import Patches” icon and browse to the common folder created in the previous section.
- Select the first Offline Bundle ZIP file and import it. Press “Next” and take note of the “Patch Name”, then press “Finish”.
- Repeat Step 6 for each of the files in the common folder until each file has been imported.
- The ESXi patches have now been uploaded to vUM.


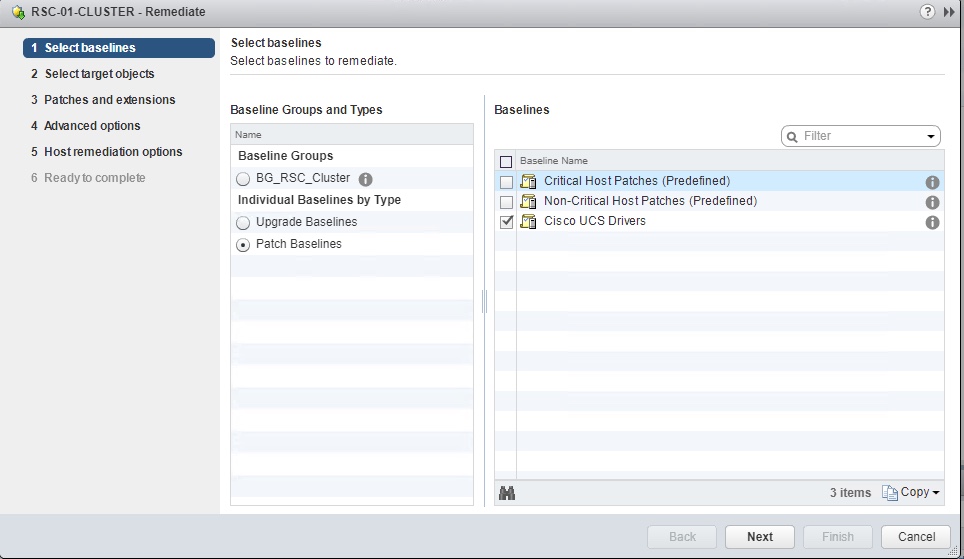
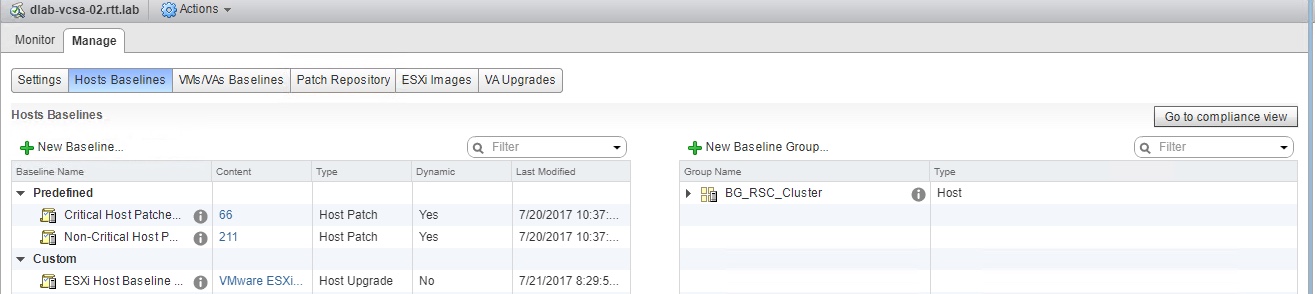
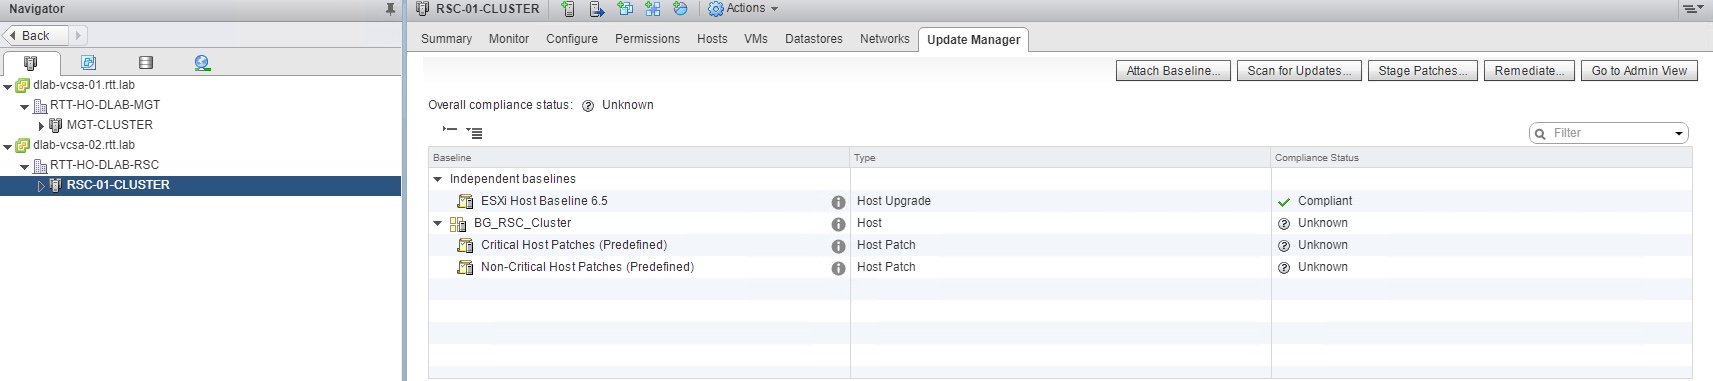
Create ESXi Host Baseline in vSphere Update Manager
- From the “Manage” tab, select the “Hosts Baselines” object.
- Press the “New Baseline” icon, enter the name (eg. “Cisco UCS Baseline”), select the “Host Patch” “Baseline type” and then press “Next”.
- Select the “Fixed” “Patch Option” and then press “Next”.
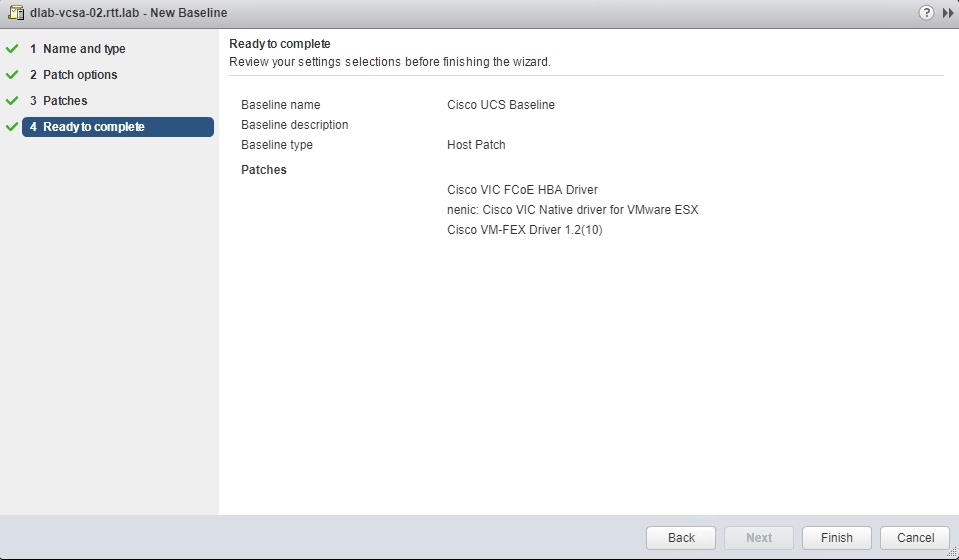
- Under “Patches”, use the “Search” function to locate the “Patch Names” recorded earlier. Tick each of those patches and then press “Next”.
- Review your settings and then press “Finish”.
- From the “Manage” tab, select the “Go to Compliance view” button.
- Select the Cisco UCS ESXi Cluster to be patched and select the “Attach Baseline”button.
- From the “Patch Baselines” list, select the “Cisco UCS Drivers” baseline created in Steps 1 to 5 and then press “OK”.
- This cluster is now ready to be upgraded by vUM Remediation.


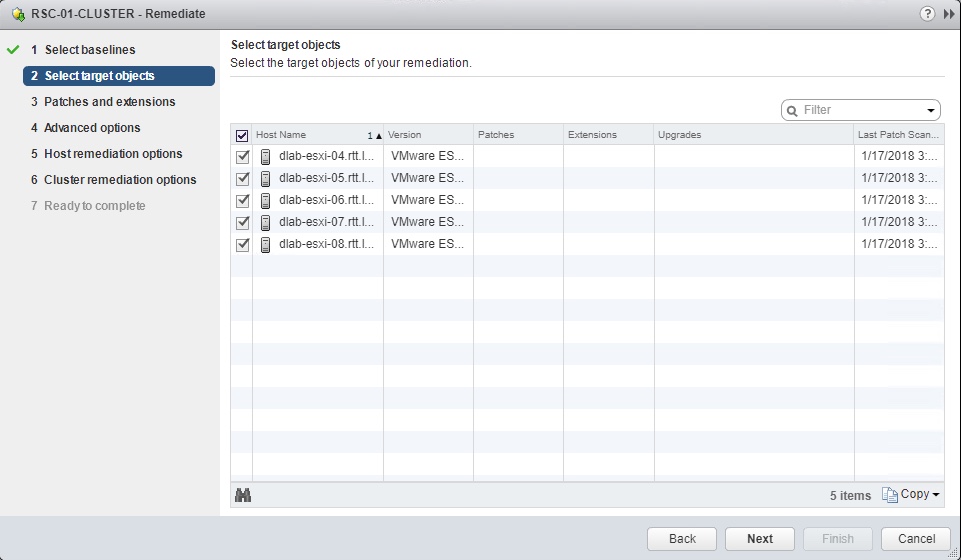
Use vSphere Update Manager to Upgrade (Remediate) the ESXi Hosts in the Cluster
- From the “Compliance View” of the Cisco UCS ESXi Cluster to be patched, press the “Scan for Updates” button.
- Tick the “Scan for” “Patches and Extensions” box and press “OK”.
- After the scan is complete, the “Cisco UCS Baseline” should be listed as “Non-Compliant”.
- Press the “Remediate” button and follow the wizard to start the cluster upgrade.
- vUM will now perform a rolling upgrade of the cluster by evacuating the VMs from each host and placing it in maintenance mode for the patch installation.
- Once completed, scan for updates again and the cluster should be listed as “Compliant”.