This is part 11 of the vCenter 5.1 to 5.5 Update 1c upgrade, detailing the upgrade of ESXi 5.1 to 5.5 and host remediation with vUM.
This is an eleven part series, describing how to upgrade from vCenter 5.1 to vCenter 5.5:
- vCenter 5.5 Upgrade with Windows Server 2012 R2 – Part 1 – Preparation
- vCenter 5.5 Upgrade with Windows Server 2012 R2 – Part 2 – OS Build
- vCenter 5.5 Upgrade with Windows Server 2012 R2 – Part 3 – vCenter Install
- vCenter 5.5 Upgrade with Windows Server 2012 R2 – Part 4 – Cleanup
- vCenter 5.5 Upgrade with Windows Server 2012 R2 – Part 5 – Integrating vUM and Syslog
- vCenter 5.5 Upgrade with Windows Server 2012 R2 – Part 6 – Integrating vC Ops
- vCenter 5.5 Upgrade with Windows Server 2012 R2 – Part 7 – Integrating vIN
- vCenter 5.5 Upgrade with Windows Server 2012 R2 – Part 8 – Upgrading and Integrating vCM
- vCenter 5.5 Upgrade with Windows Server 2012 R2 – Part 9 – Upgrading and Integrating vCO Appliance
- vCenter 5.5 Upgrade with Windows Server 2012 R2 – Part 10 – Upgrading and Integrating CBM
- vCenter 5.5 Upgrade with Windows Server 2012 R2 – Part 11 – Upgrading ESXi
Prerequisites
- You have a licenced and functioning version of vCenter 5.5 with vUM.
- You have administrator access to vCenter and ESXi (root account).
- You have have the ESXi 5.5 Update 1 Driver Rollup 2 ISO image.
- You are booting from DAS, SAN or USB. You are not using AutoDeploy (PXE boot).
Upgrade ESXi 5.1 to 5.5 Update 1
- Place the ESXi 5.1 host in “Maintenance Mode”.
- Mount the ESXi 5.5 Update 1 Driver Rollup 2 ISO image to the host.
- Connect to the DCUI console of the host.
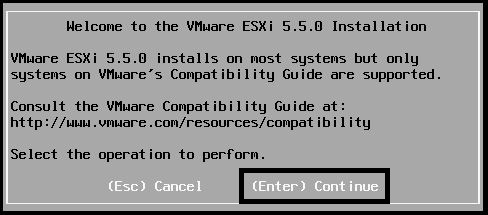
- Reboot the ESXi 5.1 host and allow the host to boot from the ISO image.
- Wait for the “Welcome to VMware ESXi 5.5.0 Installation” message to appear. Press “Enter” to continue.
- Press “F11” to accept the EULA.
- Select your boot “Storage Device” and press “Enter” to continue.
- Select “Upgrade ESXi, preserve VMFS datastore” and press “Enter”.
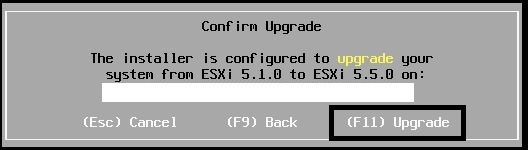
- Press “F11” to upgrade from ESXi 5.1 to ESXi 5.5.
- Press “Enter” to reboot the ESXi host.
- After the ESXi host has booted, verify that the message “VMware ESXi 5.5.0 (VMKernel Release Build xyz)” appears on the DCUI Console.


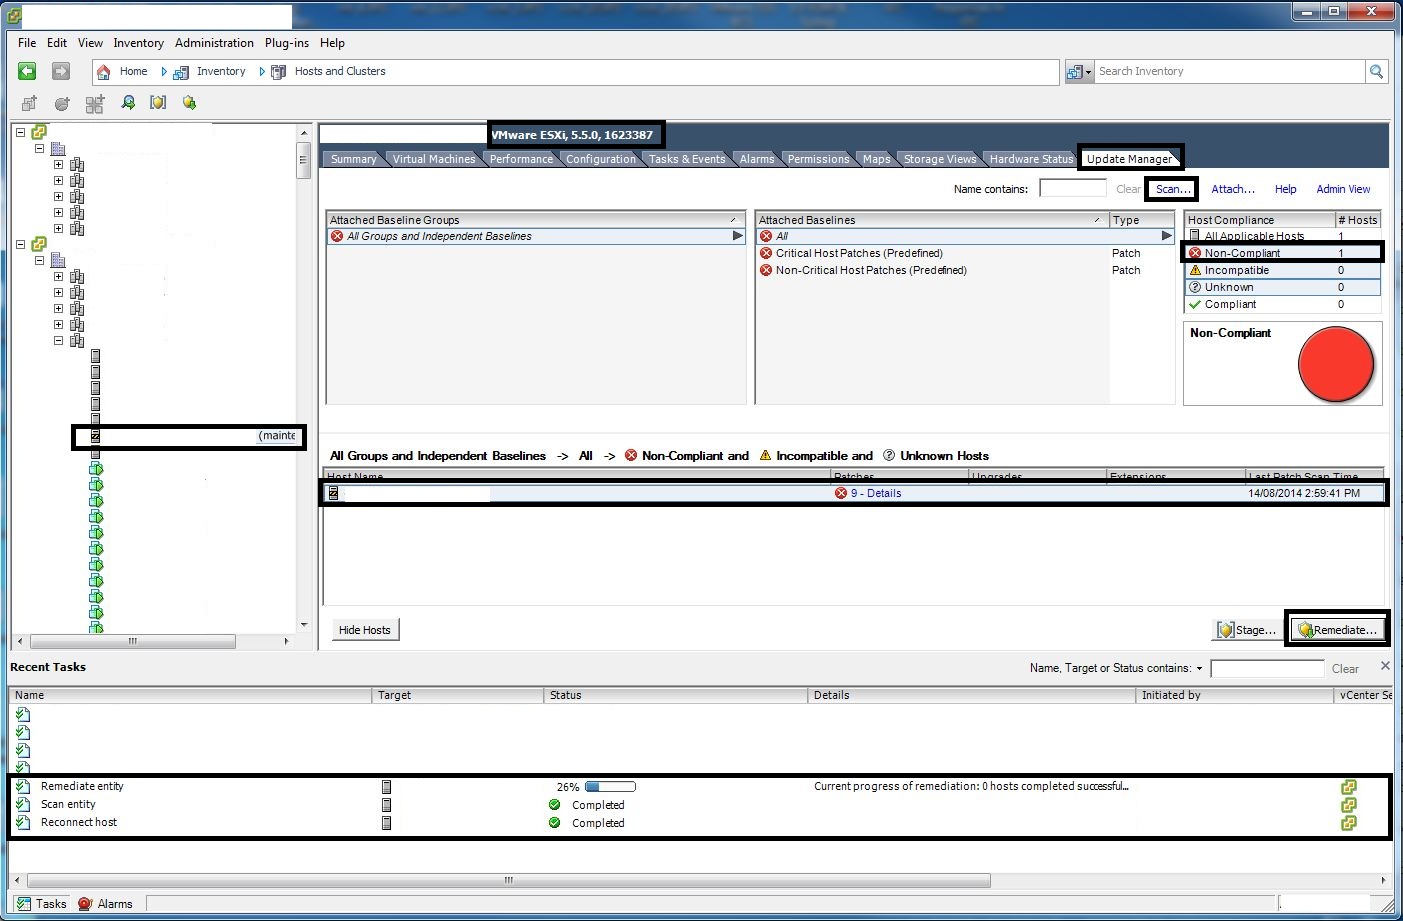
Use vUM to apply the latest ESXi 5.5 Patches
- Connect to vCenter using the vSphere C# Client as an administrator. You currently cannot use the vSphere Web Client to Remediate hosts with vUM.
- Make sure that the ESXi 5.5 host you just upgraded is connected to vCenter. If the host has not connected, select the host and right mouse click and select “Connect”.
- Select the upgraded host and verify that the window shows the version as “VMware ESXi, 5.5.0, xyz”.
- Verify that the host is still in “Maintenance Mode”.
- Select the “Update Manager” tab and press the “Scan” button.
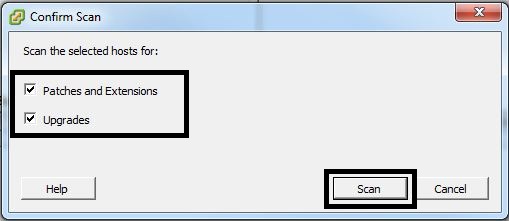
- Ensure that “Scan the selected hosts for:” “Patches and Extensions” and “Upgrades” is selected. Press the “Scan” button.
- After the scan is complete, the “Host Compliance” should be “Non-Compliant”.
- Press the “Remediate” button.
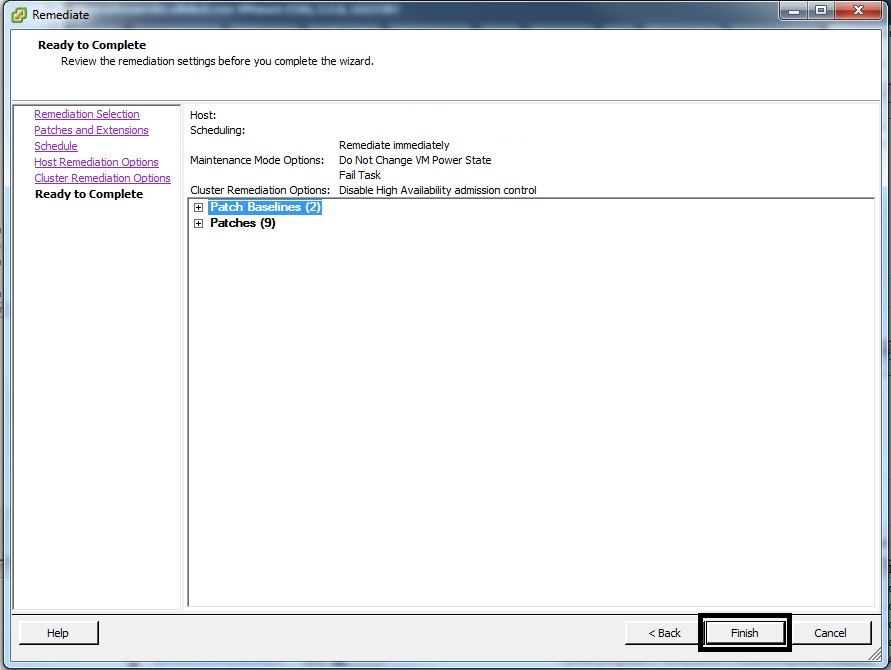
- Ensure that “Critical Host Patches (Predefined)” and “Non-Critical Host Patches (Predefined)” is selected and press the “Next” button.
- Ensure that all of the “Patches” are selected and press the “Next” button.
- Select “Immediately” for “Remediate the selected hosts:” and press “Next”.
- Press “Next”.
- Select “Disable High Availability admission control if it is enabled for any of the selected clusters” and press “Next”.
- Press “Finish”.
- Wait for the “Remediate entity” task to complete (ESXi host will reboot during this process).
- Verify that the build number has increased and that the “Host Compliance” state is now “Compliant”.
- The ESXi 5.5 upgrade process is now complete, exit “Maintenance Mode” and allow DRS to move workloads to this host.