 This is part 9 of the vCenter 5.1 to 5.5 Update 1c upgrade, detailing the upgrade and reintegration of vCO Appliance.
This is an eleven part series, describing how to upgrade from vCenter 5.1 to vCenter 5.5:
- vCenter 5.5 Upgrade with Windows Server 2012 R2 – Part 1 – Preparation
- vCenter 5.5 Upgrade with Windows Server 2012 R2 – Part 2 – OS Build
- vCenter 5.5 Upgrade with Windows Server 2012 R2 – Part 3 – vCenter Install
- vCenter 5.5 Upgrade with Windows Server 2012 R2 – Part 4 – Cleanup
- vCenter 5.5 Upgrade with Windows Server 2012 R2 – Part 5 – Integrating vUM and Syslog
- vCenter 5.5 Upgrade with Windows Server 2012 R2 – Part 6 – Integrating vC Ops
- vCenter 5.5 Upgrade with Windows Server 2012 R2 – Part 7 – Integrating vIN
- vCenter 5.5 Upgrade with Windows Server 2012 R2 – Part 8 – Upgrading and Integrating vCM
- vCenter 5.5 Upgrade with Windows Server 2012 R2 – Part 9 – Upgrading and Integrating vCO Appliance
- vCenter 5.5 Upgrade with Windows Server 2012 R2 – Part 10 – Upgrading and Integrating CBM
- vCenter 5.5 Upgrade with Windows Server 2012 R2 – Part 11 – Upgrading ESXi
Prerequisites
- You have a licenced and functioning version of vCO Appliance.
- You have administrator access to vCenter and vCO (root & vmware accounts).
- You have have the vCO Appliance update ISO image.
Reintegrate vCO Appliance with vCenter 5.5
- Connect to the vCO Appliance with a Web Browser: http://<vCO IP Address>/.
- Press the “Orchestrator Configuration” link which will connect to http://<vCO IP Address>:8283/.
- Login as “vmware” with the correct password.
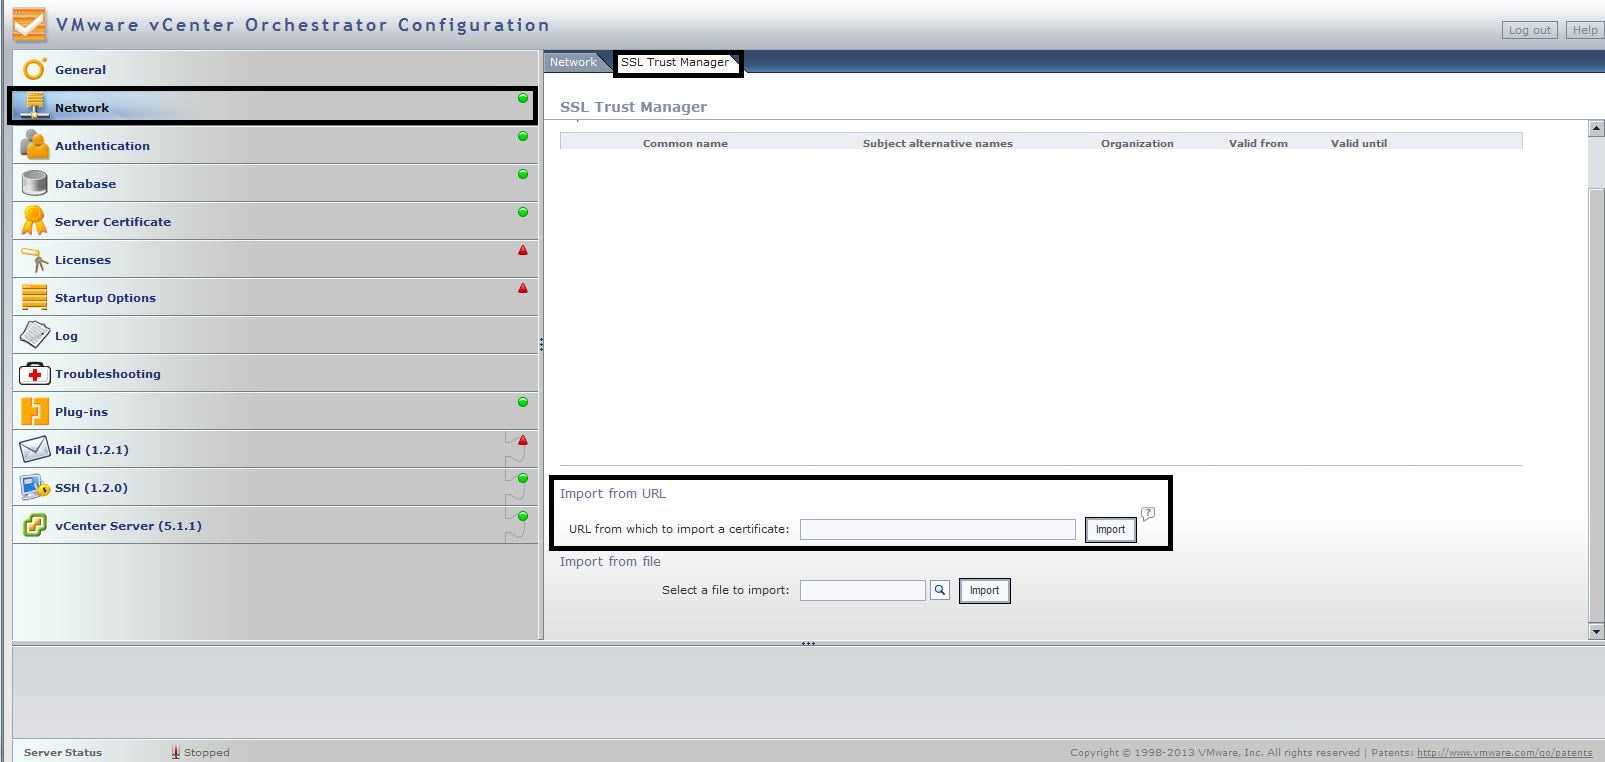
- Select the “Network” object and then the “SSL Trust Manager” tab and delete the “vCenter Server”, “SSO” and “Web Client” SSL certificates.
- Enter the new vCenter server URLs for vCenter Server, SSO and vSphere Web Client within the “URL from which to import a certificate” field and press the “Import” button.
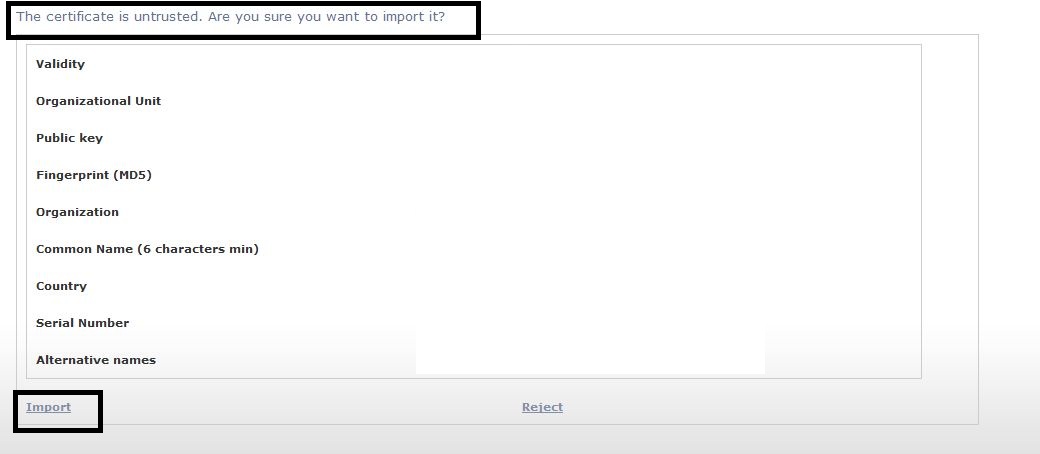
- Then press the “Import” button.
- Select the “vCenter Server” object and press the “Hosts” tab. Delete the registered vCenter objects by pressing the “Delete” buttons.
- Select the “New vCenter Server Host” tab and enter each vCenter 5.5 host by completing the “Host” field and entering the administrator service account in the “Username” and “Password” fields. Then press “Apply Changes”.
- You can test that the integration is complete by running a vCO workflow and verifying it connects to vCenter and executes the workflow tasks.


Upgrade vCO Appliance to 5.5
- Mount the vCO update ISO image to the CDROM of the vCO Appliance.
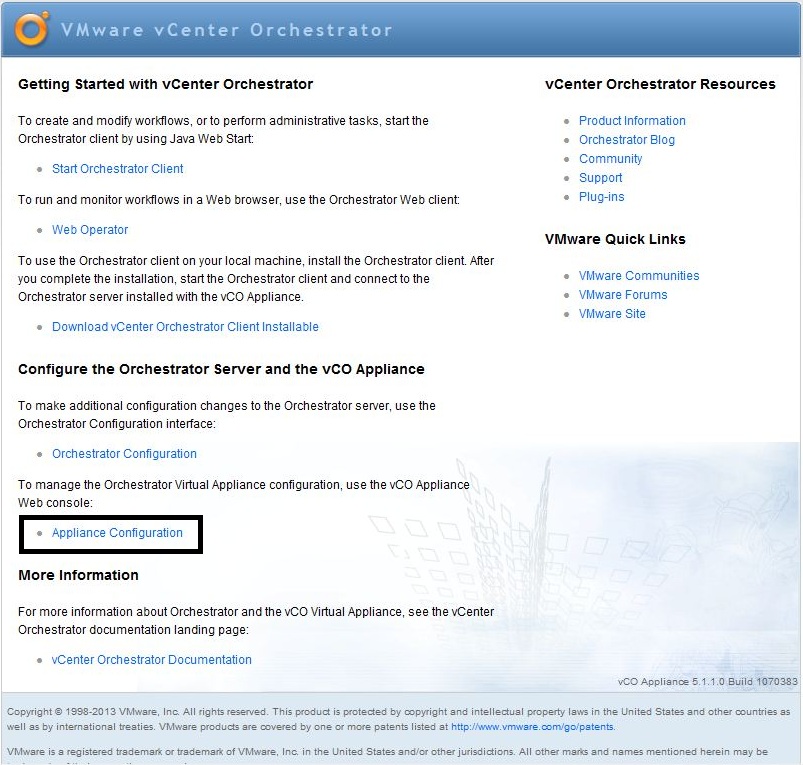
- Connect to the vCO Appliance with a Web Browser: http://<vCO IP Address>/.
- Press the “Appliance Configuration” link which will connect to http://<vCO IP Address>:5480/.
- Login as “root” with the correct password.
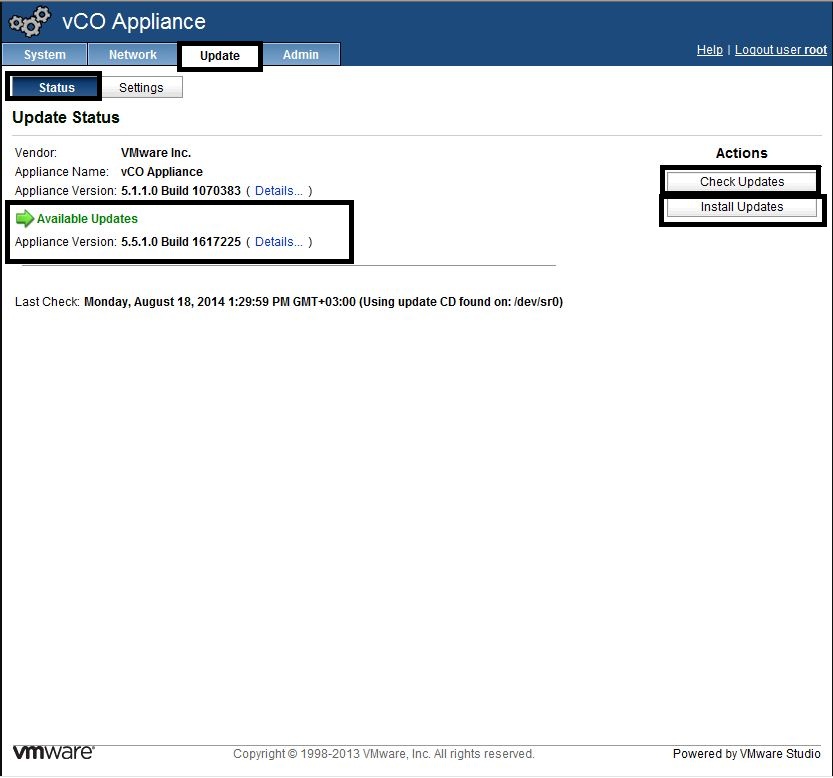
- Press the “System” tab and check the vCO version under the “Information” object.
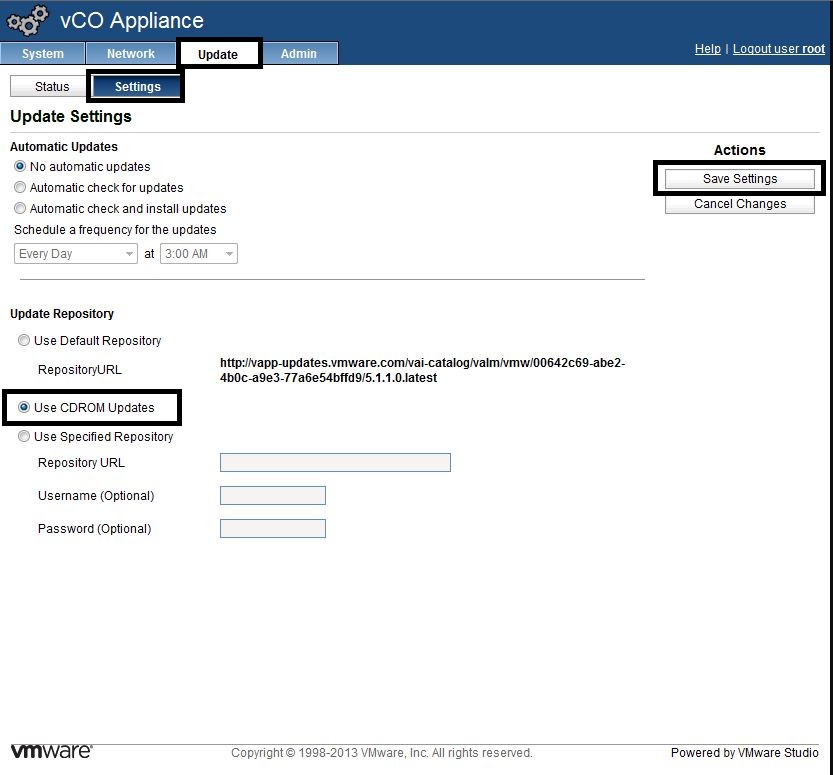
- Press the “Update” tab and then the “Settings” button and set the “Update Repository” to “Use CDROM Updates” and press “Save Settings”.
- The press the “Status” button and “Check Updates”. Once the “Available Updates” message appears, press “Install Updates”.
- When the “EULA” appears, press “Accept”.
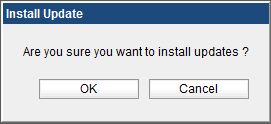
- Press “OK” to “Do you want to install updates?”.
- Wait for the “Installing Updates” message to complete.
- Reboot the vCO Appliance by pushing the “Reboot” button under the “System” tab.
- Login and verify that the version information has updated to 5.5.1.0 under the “System” tab.
- Check that vCO is still alarm free by logging into the “Orchestration Configuration” interface.
- Test that workflows still execute by running a vCO workflow and verifying that vCenter executes the workflow tasks.


![]()
