 Five months ago I built my home lab with VSAN and performance tested it (with the default policy). It turns out I was missing a key part of the configuration: the “Service Provider URLs”. Here is the complete VMware Virtual SAN configuration process for a home lab.
Requirements
- Working vSphere solution with vCenter 5.5 VSAN beta or above and ESXi 5.5 VSAN beta or above
- 3 hosts with SSD and SATA JBOD (1 + 1 minimum)
- Virtual SAN Licences (per CPU)
- Administrator access to the vSphere Web Client
Assumptions
- You are configuring this on a home lab, otherwise you will have to match this process to an enterprise design; that is, more disks, 10Gb Ethernet interfaces and LAN switches, Network Resource Pools, etc.
- Virtual SAN Observer not covered here
Configuration Procedure
- Login to the vSphere Web Client as an administrator.
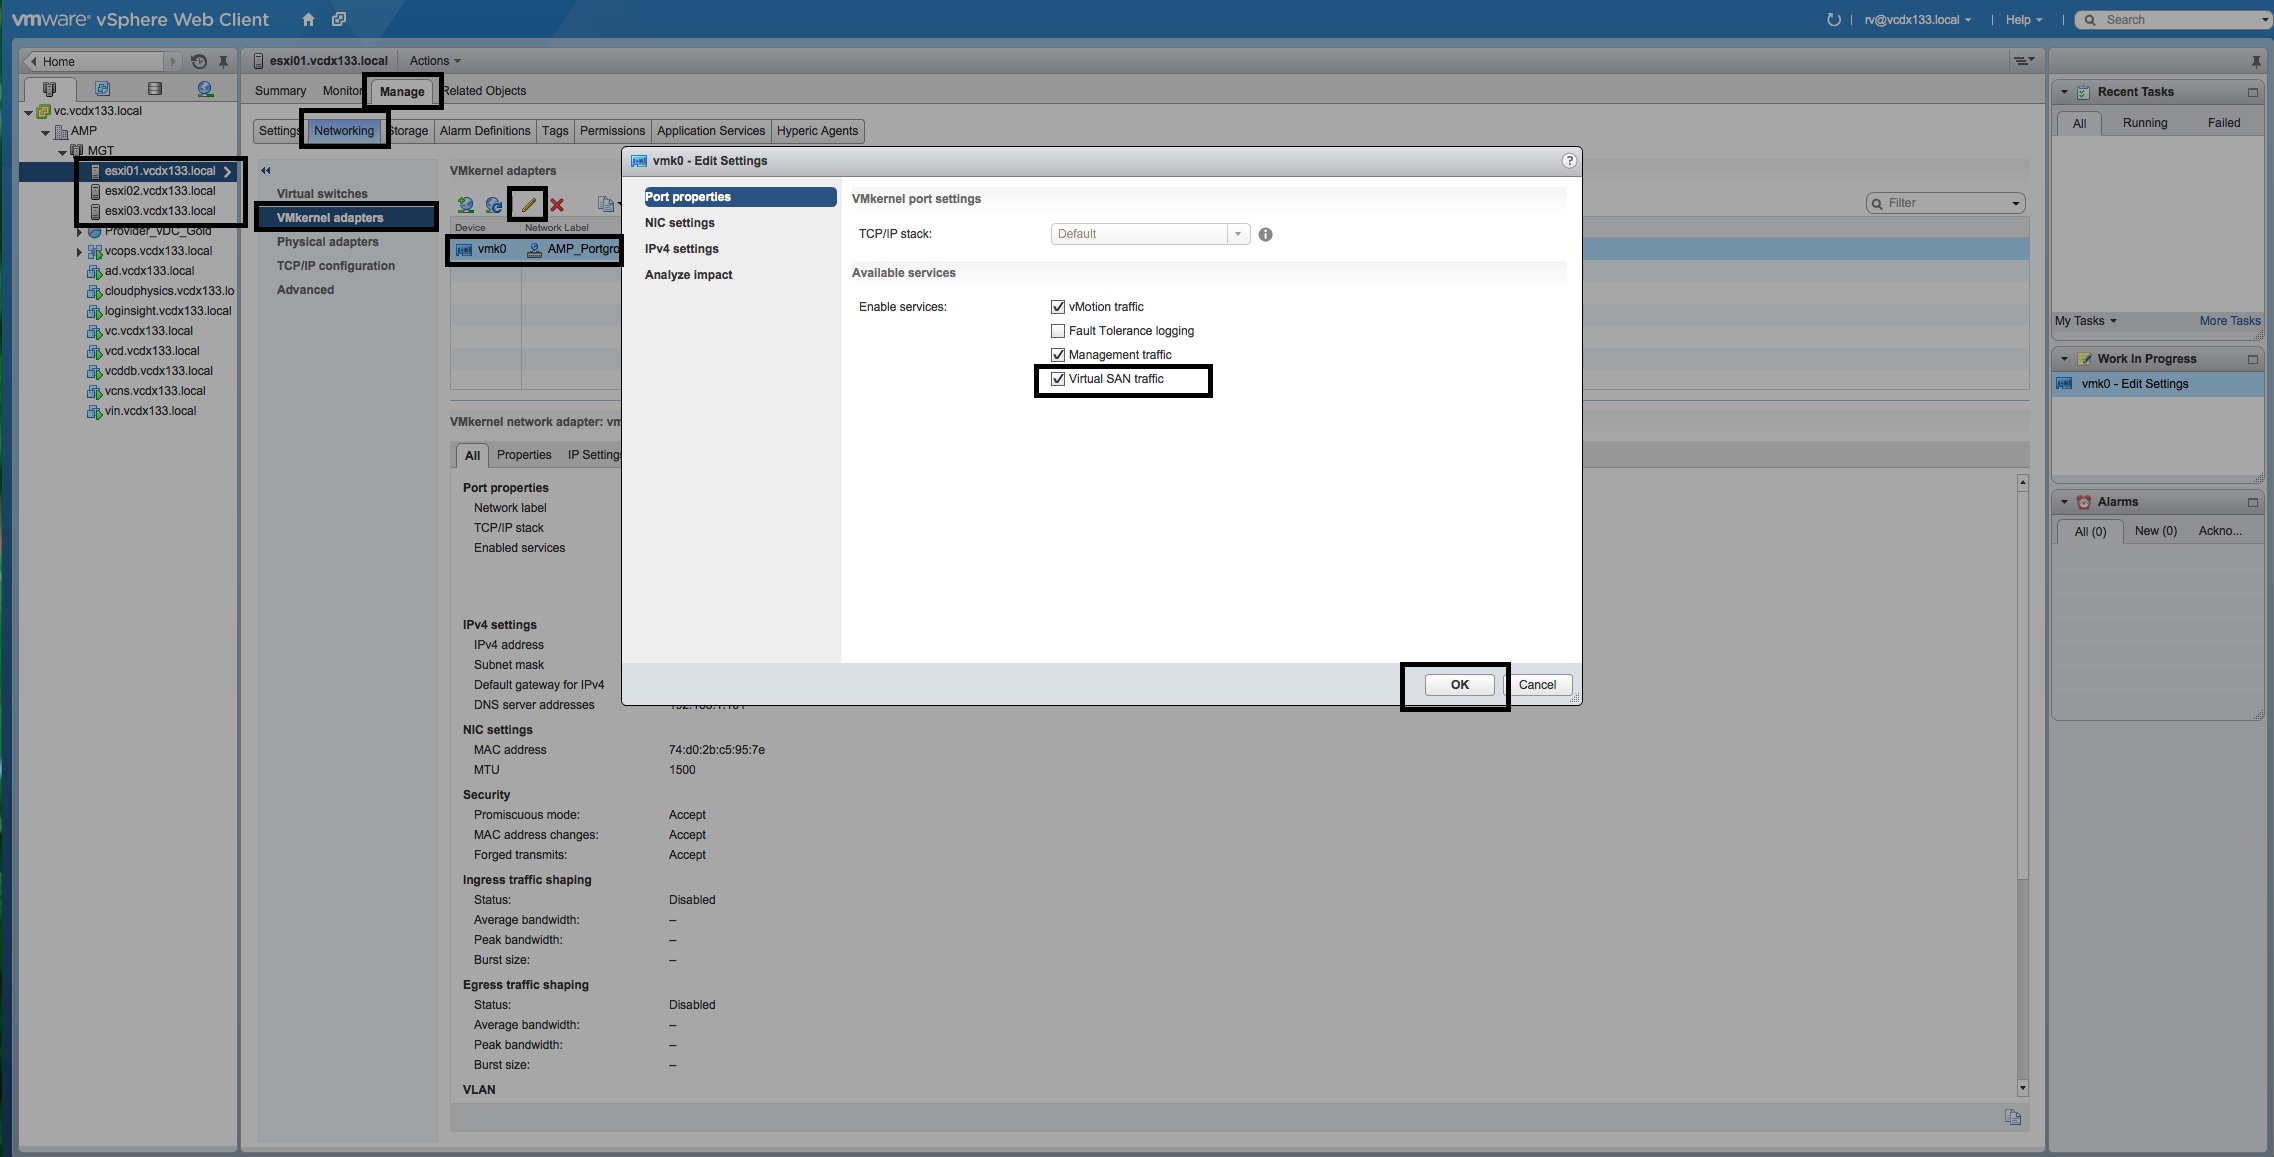
- Enable “Virtual SAN traffic” on the Management VMkernel (“vMotion traffic” as well) of each VSAN-capable ESXi host. The vSwitch can be vSS or vDS, it does not matter for a home lab.
- Add your three VSAN-capable ESXi hosts to a Cluster.
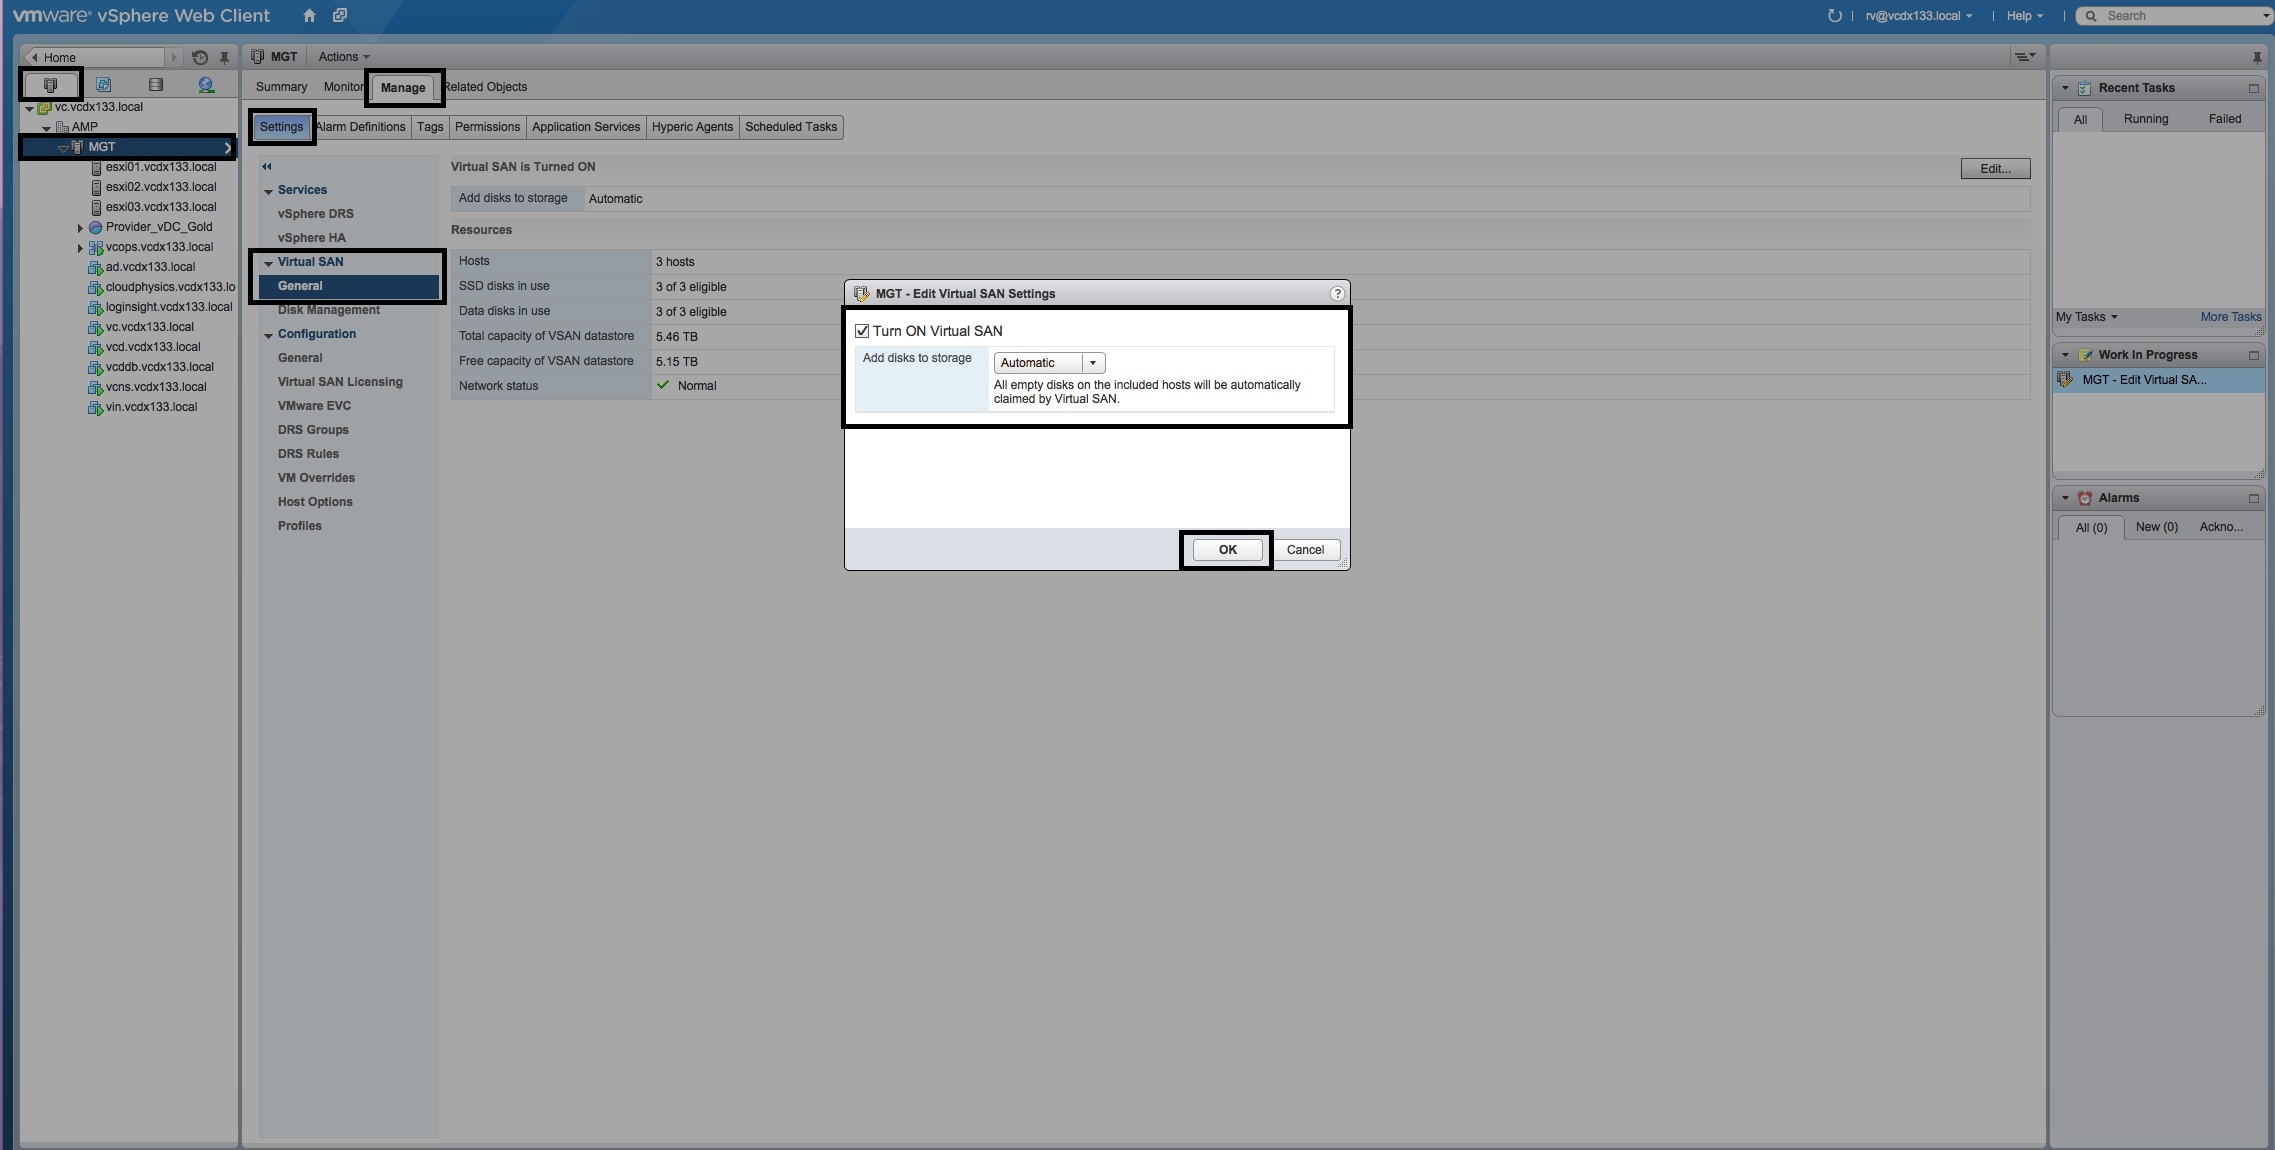
- “Turn ON Virtual SAN” in the Cluster with “Add disks to storage” in “Automatic” mode.
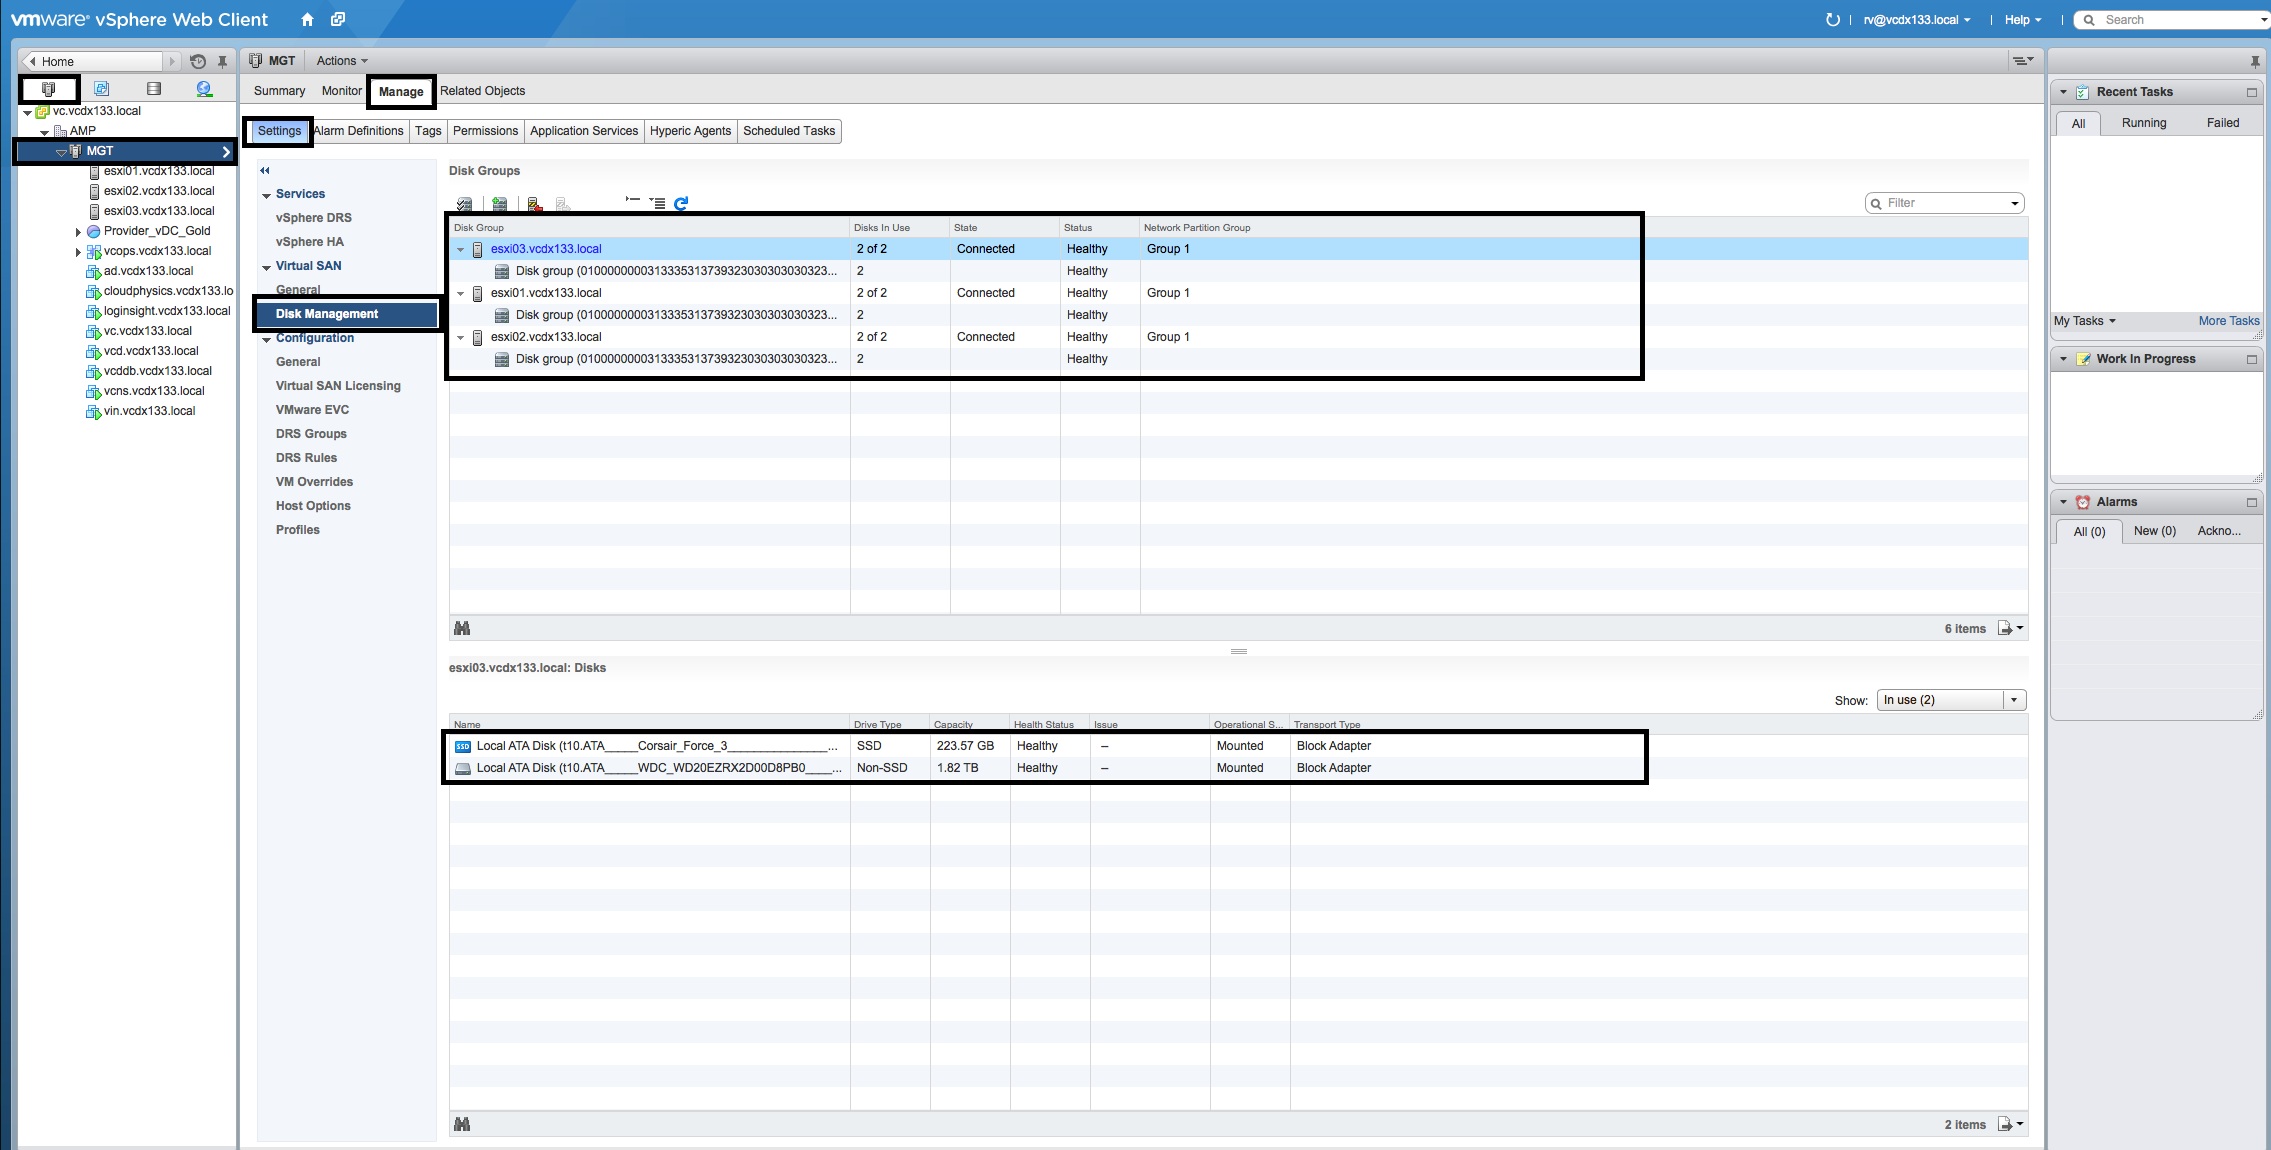
- Click “Disk Management” and verify that the SSD and SATA disks have been claimed. Verify that each host is “Connected” with “Status” “Healthy”.
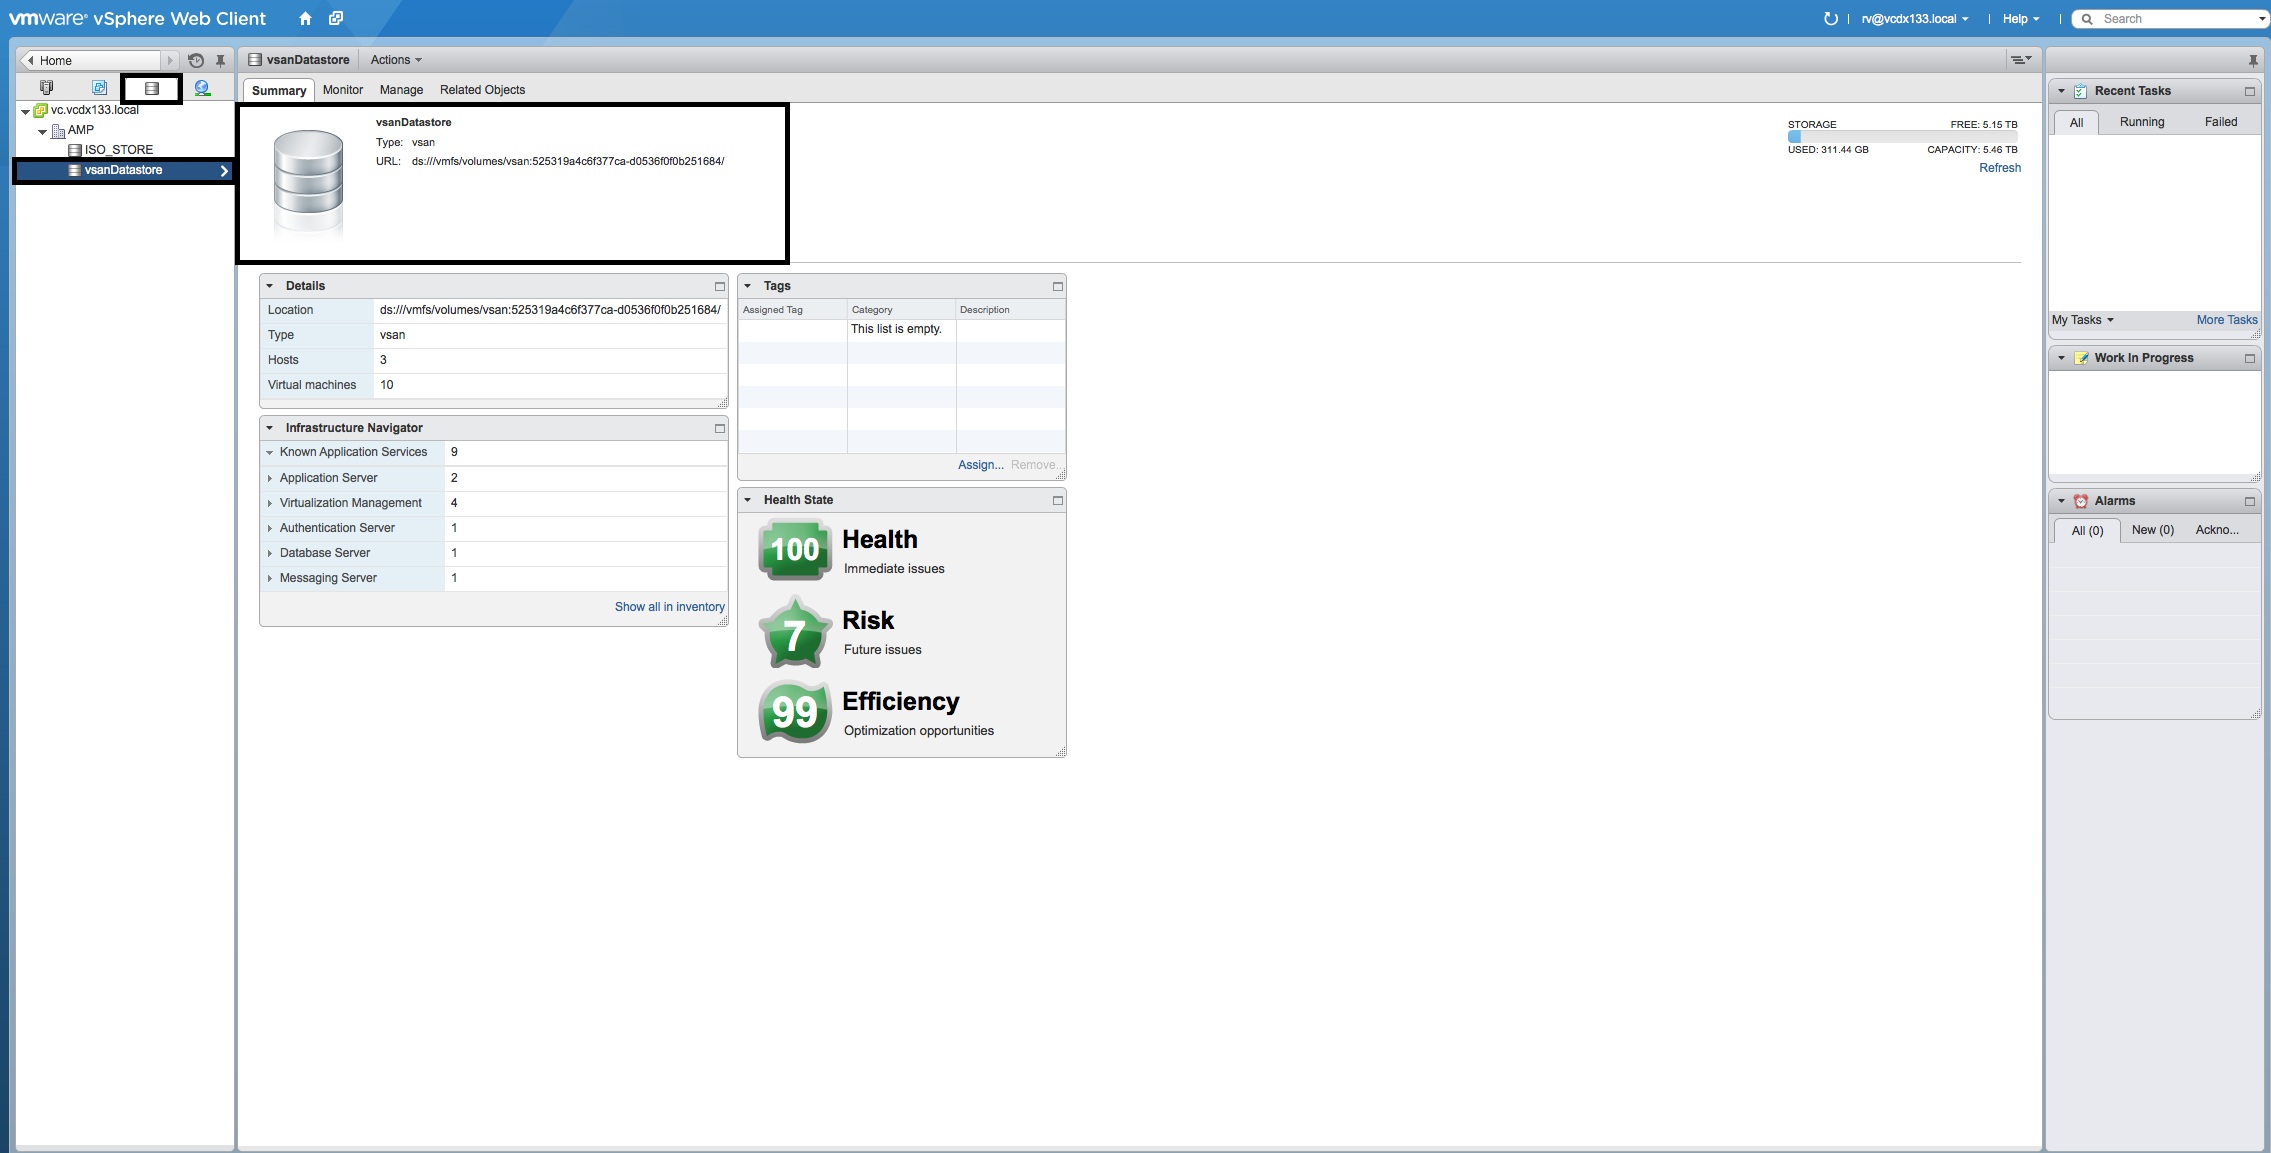
- Select the “Storage” tab and verify that a “vsanDatastore” object has been created.
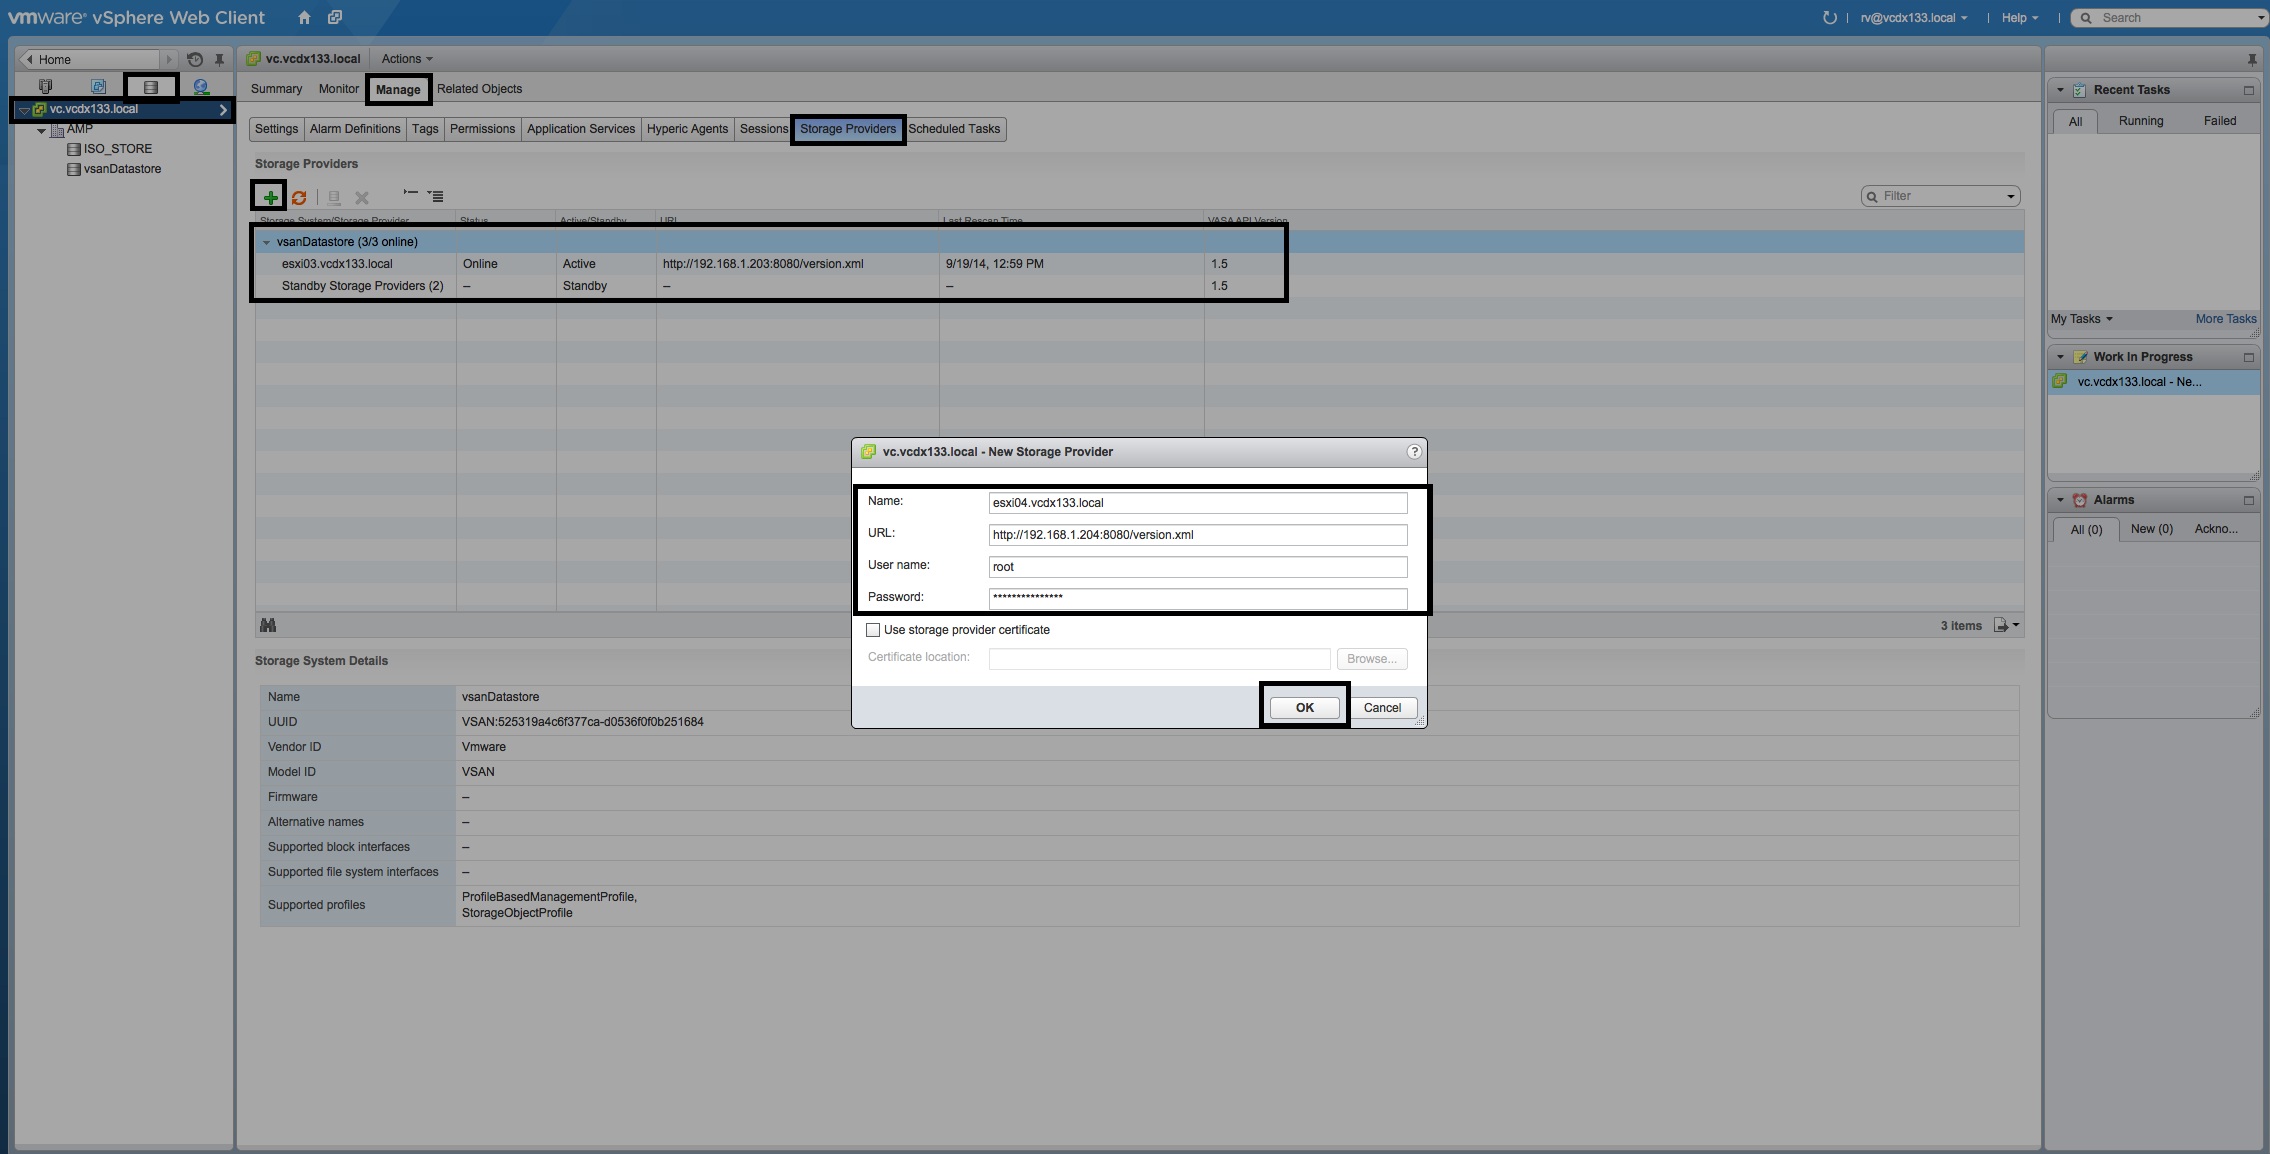
- Select the vCenter object and access the “Storage Providers” object from the “Manage” tab.
- Add each host as a Storage Provider with the following URL “http://<host IP>:8080/version.xml”, including the ESXi root credentials.
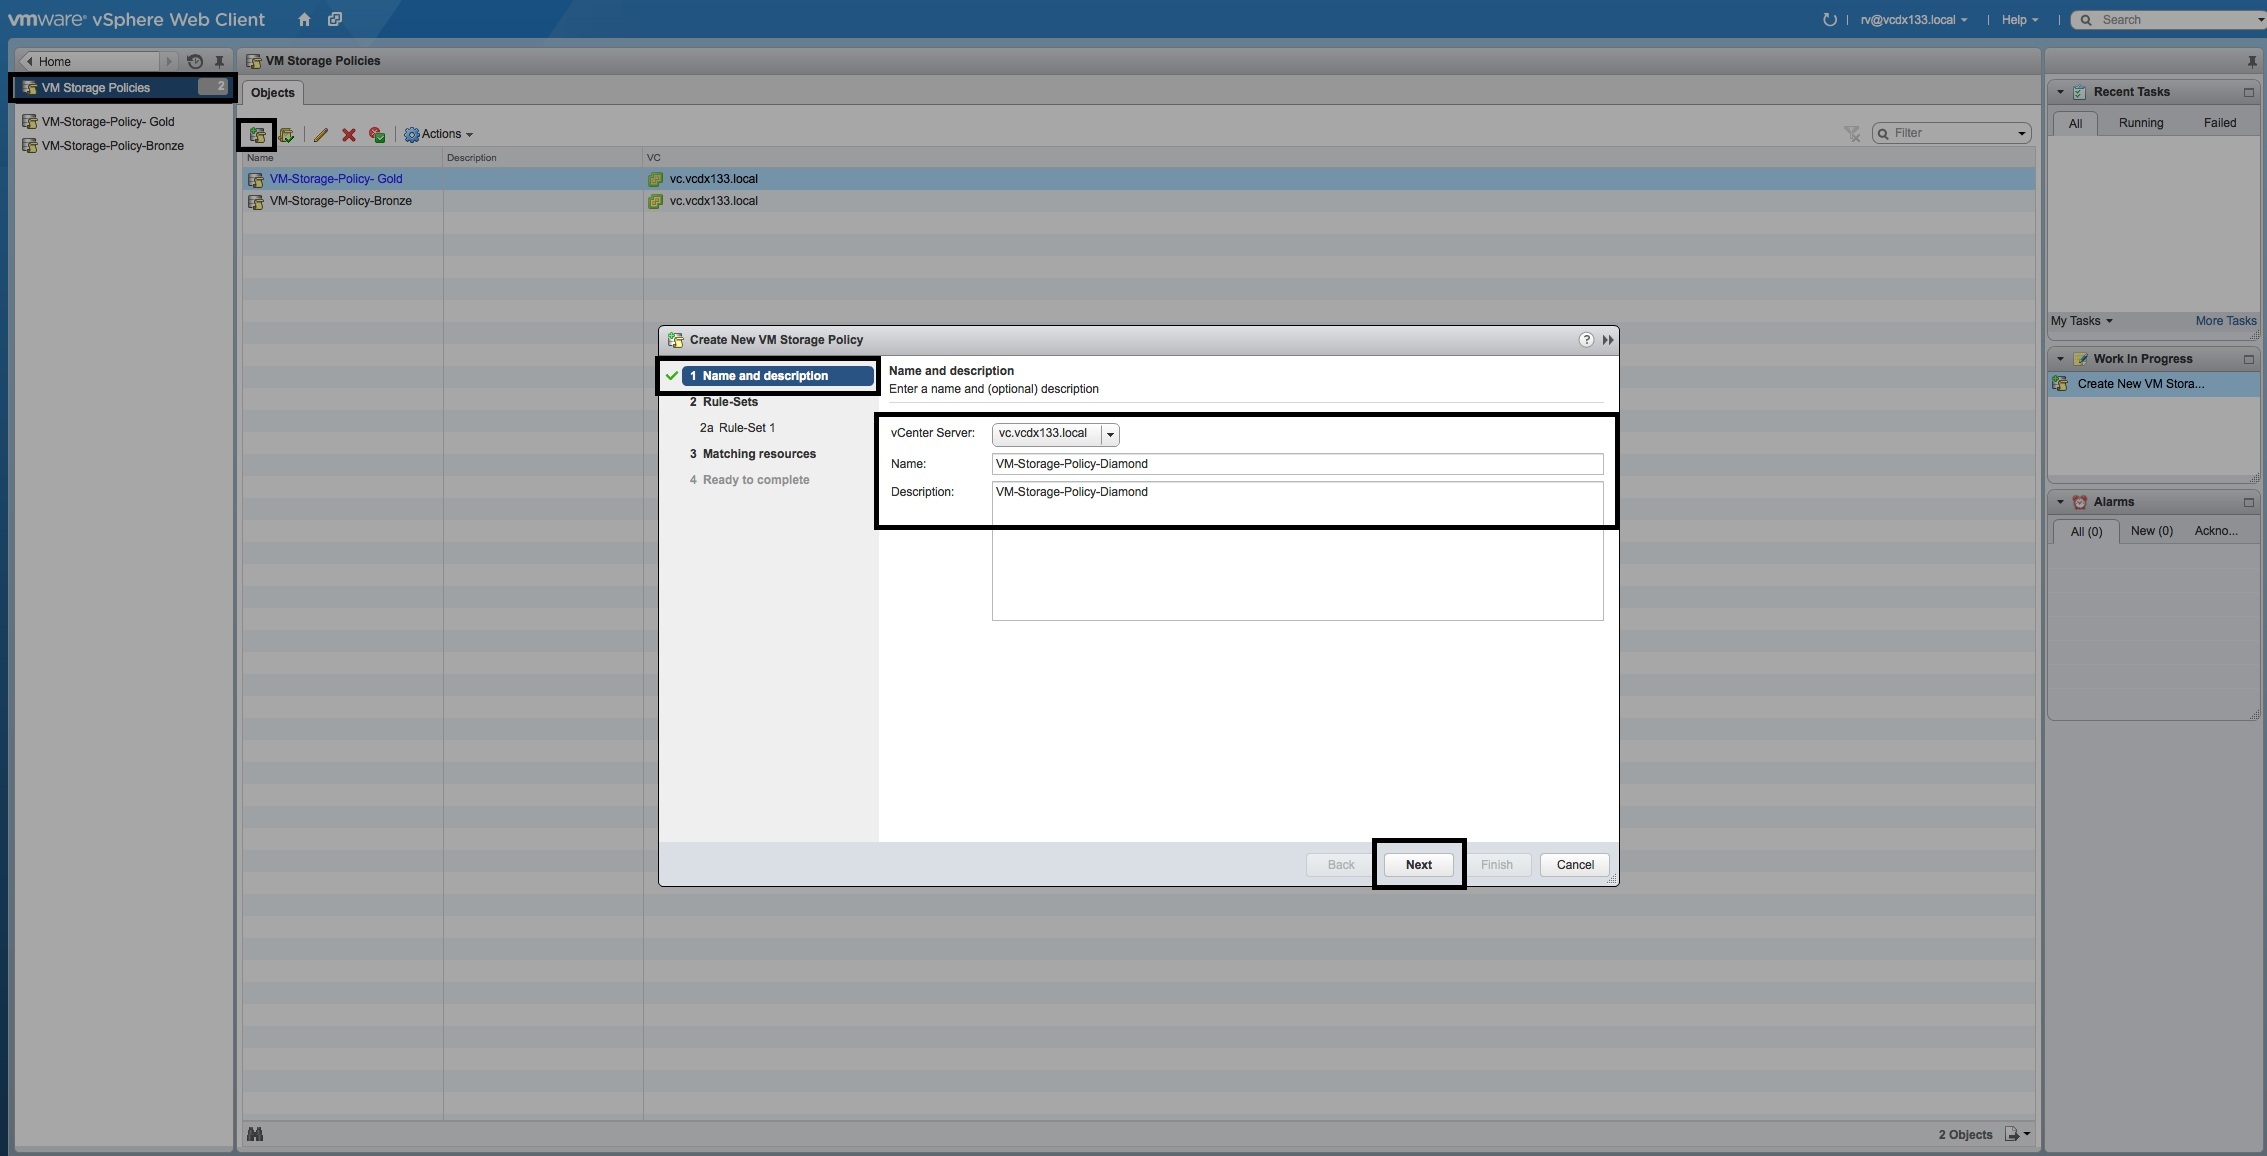
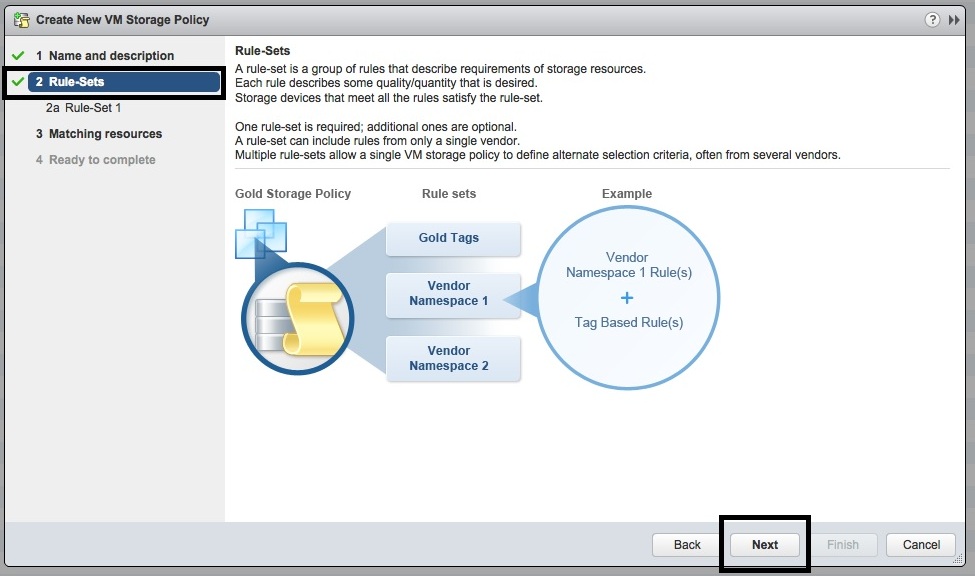
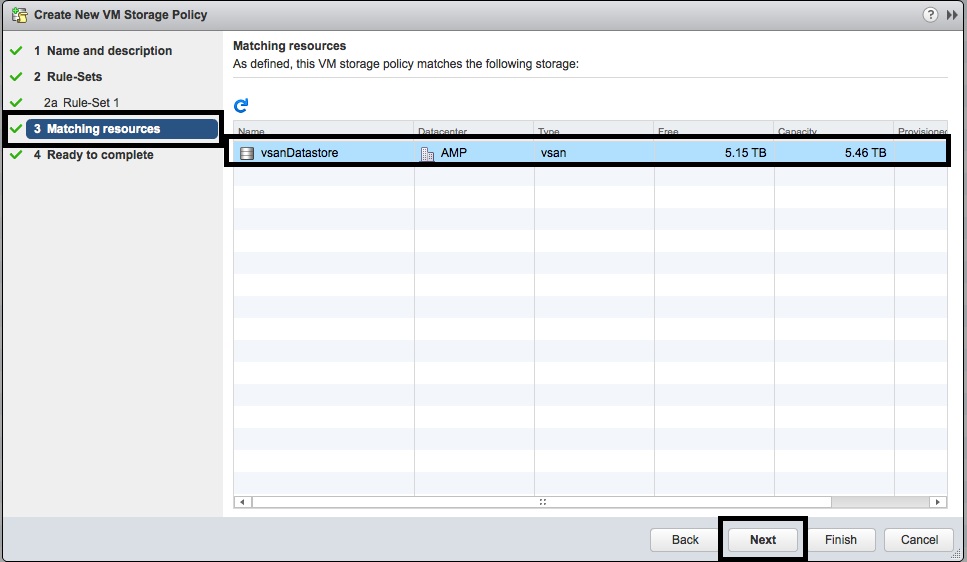
- Access the “VM Storage Policies” area and create a new “VM Storage Policy”.
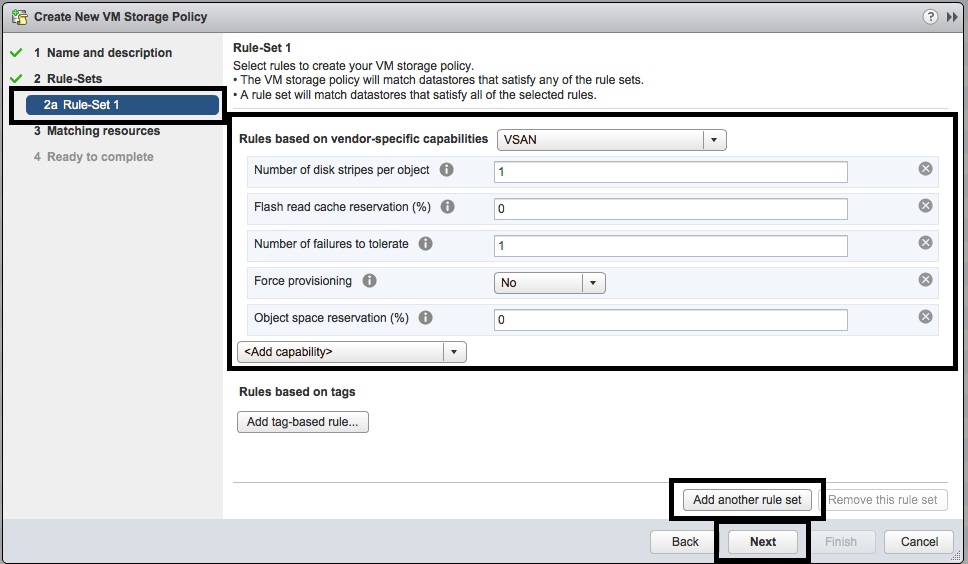
- Add the following VSAN Rules to your “Rule-Set(s)” to create the storage performance/protection policy that you want: “Flash read cache reservation (%)”, “Number of failures to tolerate”, “Number of disk stripes per object”, “Force provisioning”, “Object space reservation (%)”.
- Then select the “vsanDatastore” as the policy target.
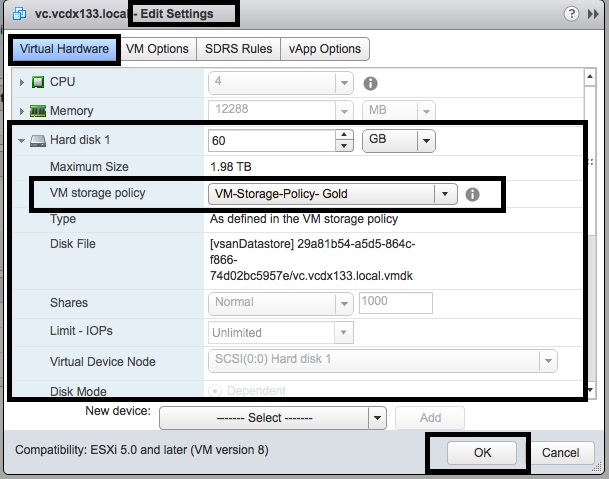
- Edit the settings of a virtual machine and select the “VM Storage Policy” for vDisks of the VM.

Additional Resources
