 This is Part 5 of the Nutanix XCP Deep-Dive, covering the manual installation of ESXi and CVM with Phoenix.
This will be a multi-part series, describing how to design, install, configure and troubleshoot an advanced Nutanix XCP solution from start to finish for vSphere, AHV and Hyper-V deployments:
- Nutanix XCP Deep-Dive – Part 1 – Overview
- Nutanix XCP Deep-Dive – Part 2 – Hardware Architecture
- Nutanix XCP Deep-Dive – Part 3 – Platform Installation
- Nutanix XCP Deep-Dive – Part 4 – Building a Nutanix SE Toolkit
- Nutanix XCP Deep-Dive – Part 5 – Installing ESXi Manually with Phoenix
- Nutanix XCP Deep-Dive – Part 6 – Installing ESXi with Foundation
- Nutanix XCP Deep-Dive – Part 7 – Installing AHV Manually
- Nutanix XCP Deep-Dive – Part 8 – Installing AHV with Foundation
- Nutanix XCP Deep-Dive – Part 9 – Installing Hyper-V Manually with Phoenix
- Nutanix XCP Deep-Dive – Part 10 – Installing Hyper-V with Foundation
- Nutanix XCP Deep-Dive – Part 11 – Benchmark Performance Testing
- Nutanix XCP Deep-Dive – Part 12 – ESXi Design Considerations
- Nutanix XCP Deep-Dive – Part 13 – AHV Design Considerations
- Nutanix XCP Deep-Dive – Part 14 – Hyper-V Design Considerations
- Nutanix XCP Deep-Dive – Part 15 – Data Center Facility Design Considerations
- Nutanix XCP Deep-Dive – Part 16 – The Risks
- Nutanix XCP Deep-Dive – Part 17 – CVM Autopathing with ESXi
- Nutanix XCP Deep-Dive – Part 18 – more to come as the series evolves (Cloud Connect to AWS and Azure, Prism Central, APIs, Metro, DR, etc.)
You would normally use Foundation to deploy a Nutanix cluster, however, you sometimes need to do this manually when Foundation is having issues.
Use-Case
You have been given a Nutanix XCP block to bring online and you have tried to use Foundation to deploy the cluster. No bueno.
So you have decided to follow the manual process of installing ESXi first and then customise each ESXi host with Phoenix to end up with three unconfigured Nutanix nodes (Node A, Node B and Node C). Note: Until a Nutanix Cluster is created, you will not be able to access the Prism UI.
Prerequisites
- You have your Nutanix SE toolkit complete with ESXi ISO (VMware-VMvisor-Installer-201501001-2403361.x86_64.iso) and Phoenix ESXi ISO (phoenix-2.0_ESX_NOS-4.0.2.1.iso).
- You have the Nutanix XCP block connected to your 1GbE LAN switch with your Nutanix SE Laptop.
- You have a DHCP server running from your Laptop with the same subnet as the installation requires.
- If you are using Foundation 2.1.x, you can generate the latest Phoenix for ESXi image with a command. For Phoenix 2.0 and below, you can download it from the Nutanix Portal.
Assumptions
Accessing the BIOS to set the IPMI IP Address
- Connect your VGA monitor and USB Keyboard to Node A.
- Power on Node A by pressing the Power-On button for Node A (located on bottom left mounting ear).
- Wait for the Nutanix logo to appear and press the “Delete” key to enter BIOS setup mode.
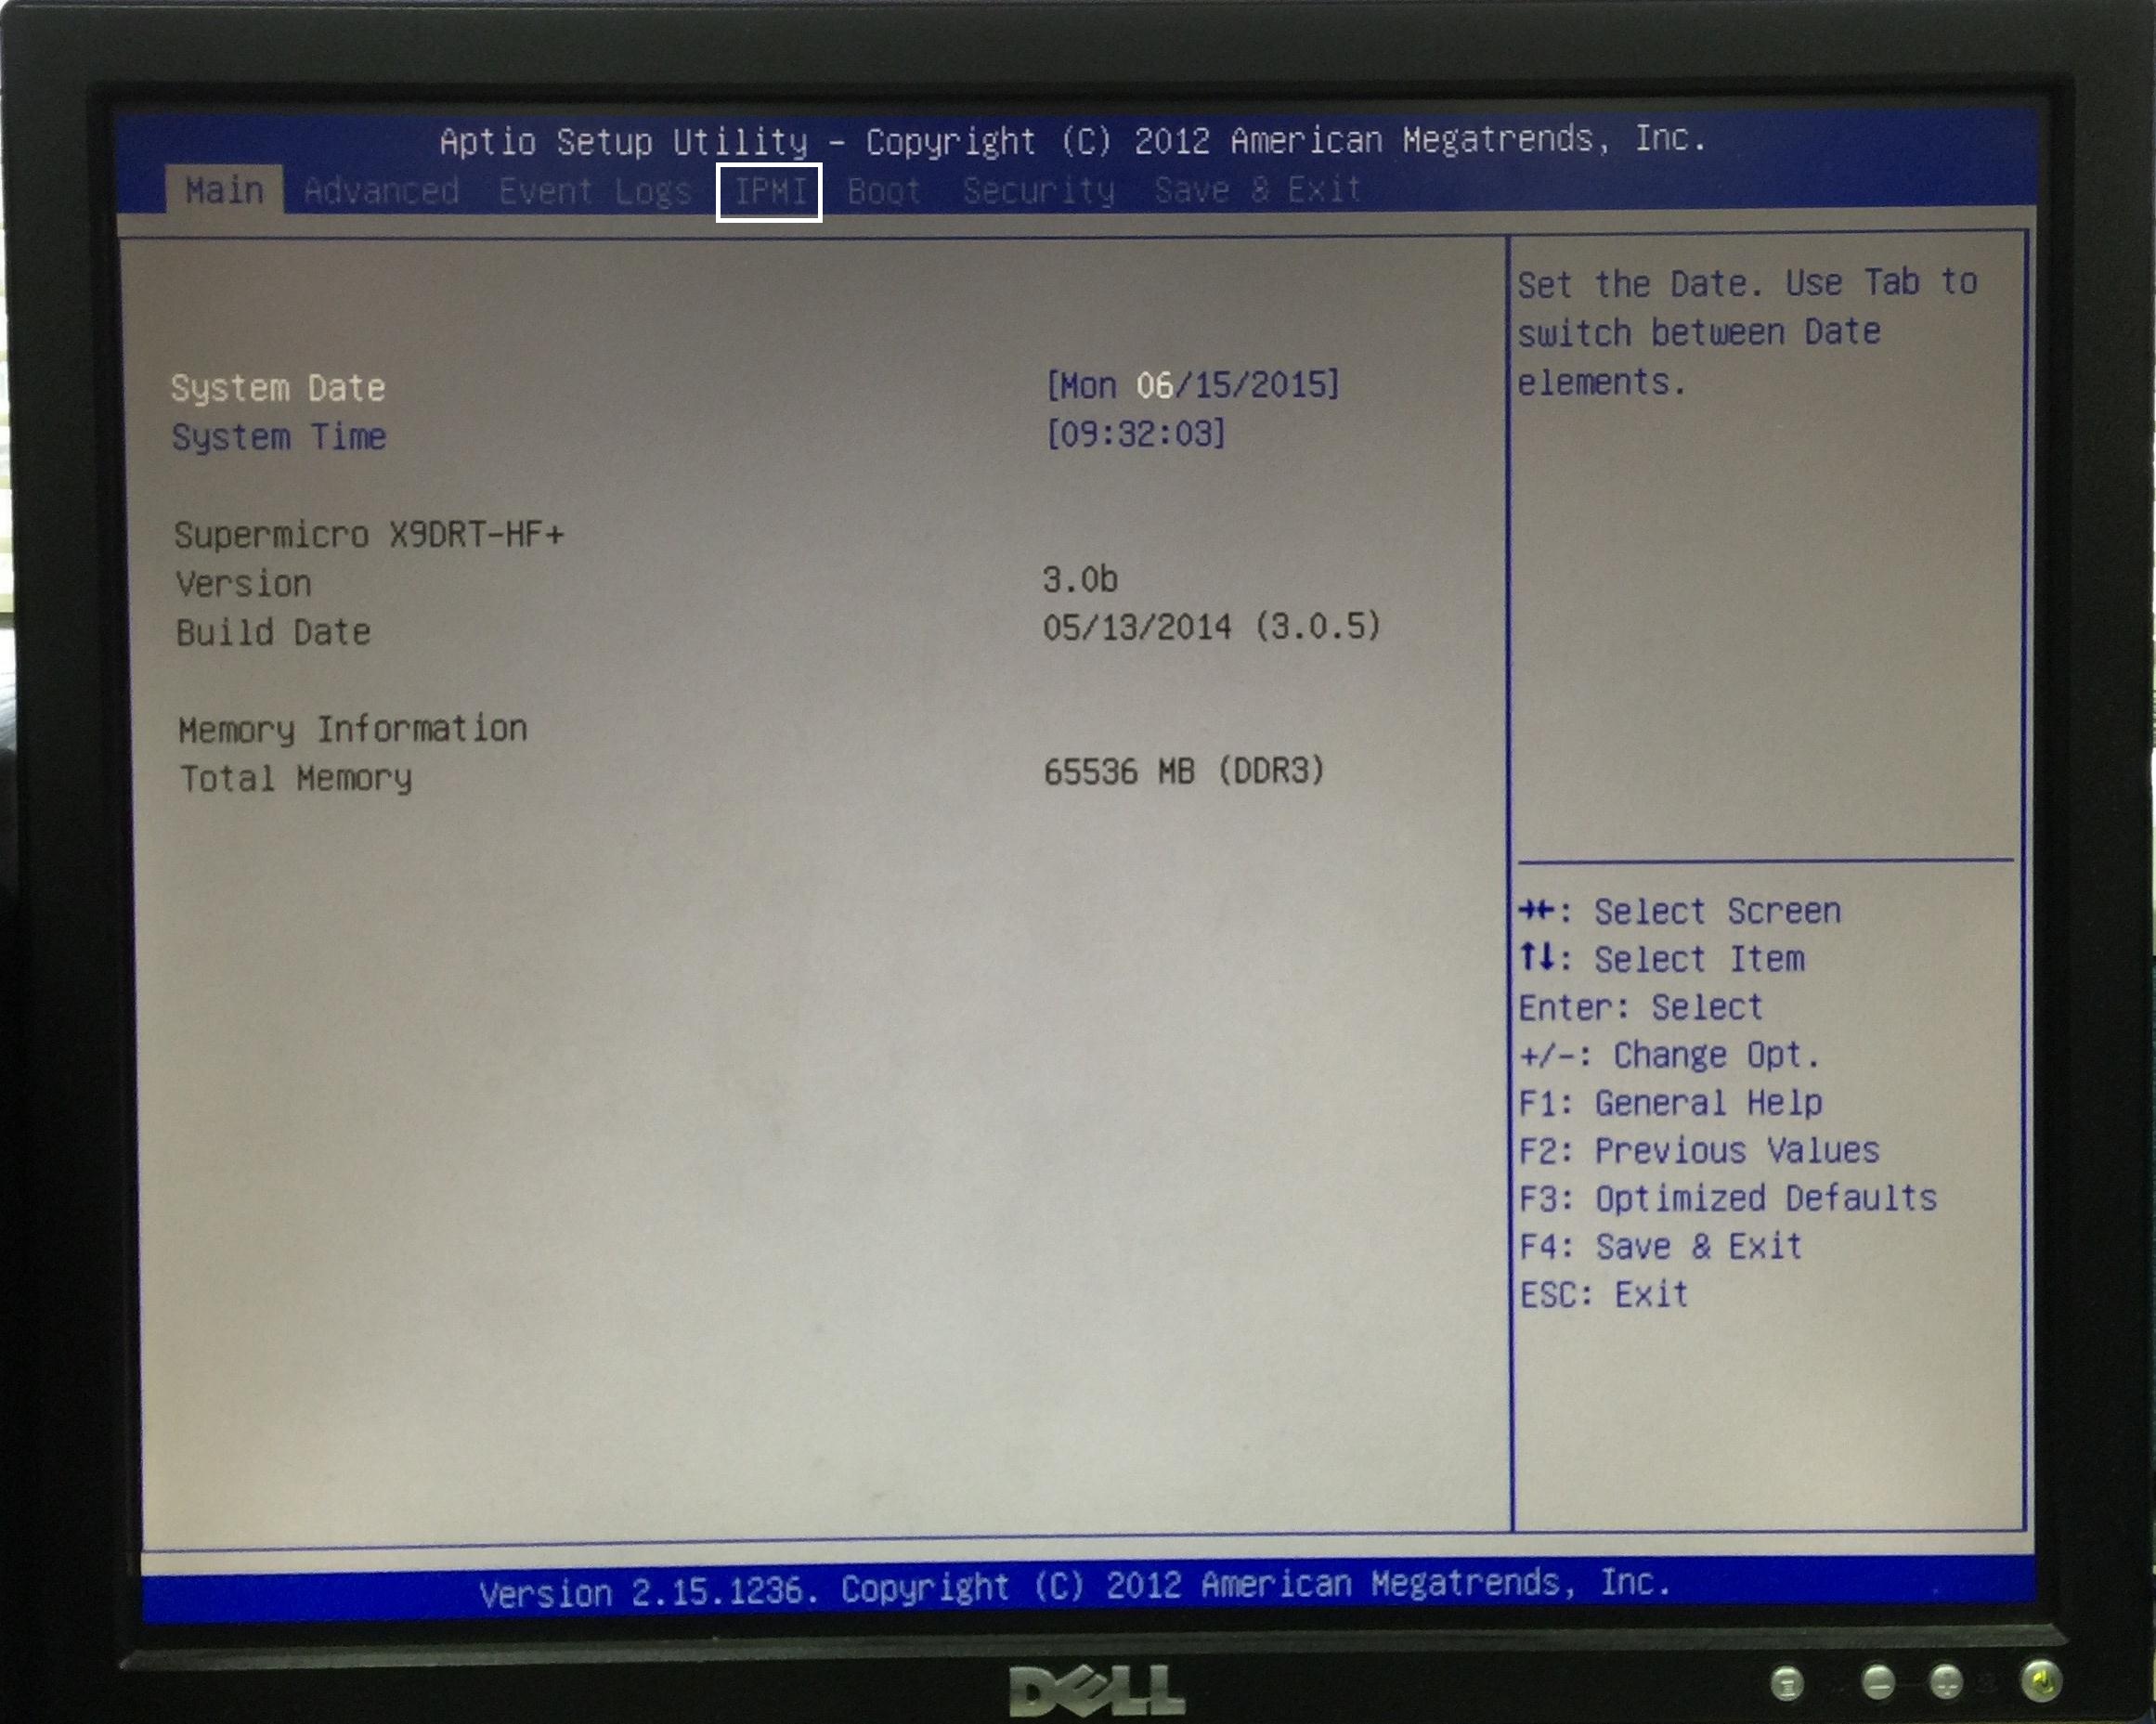
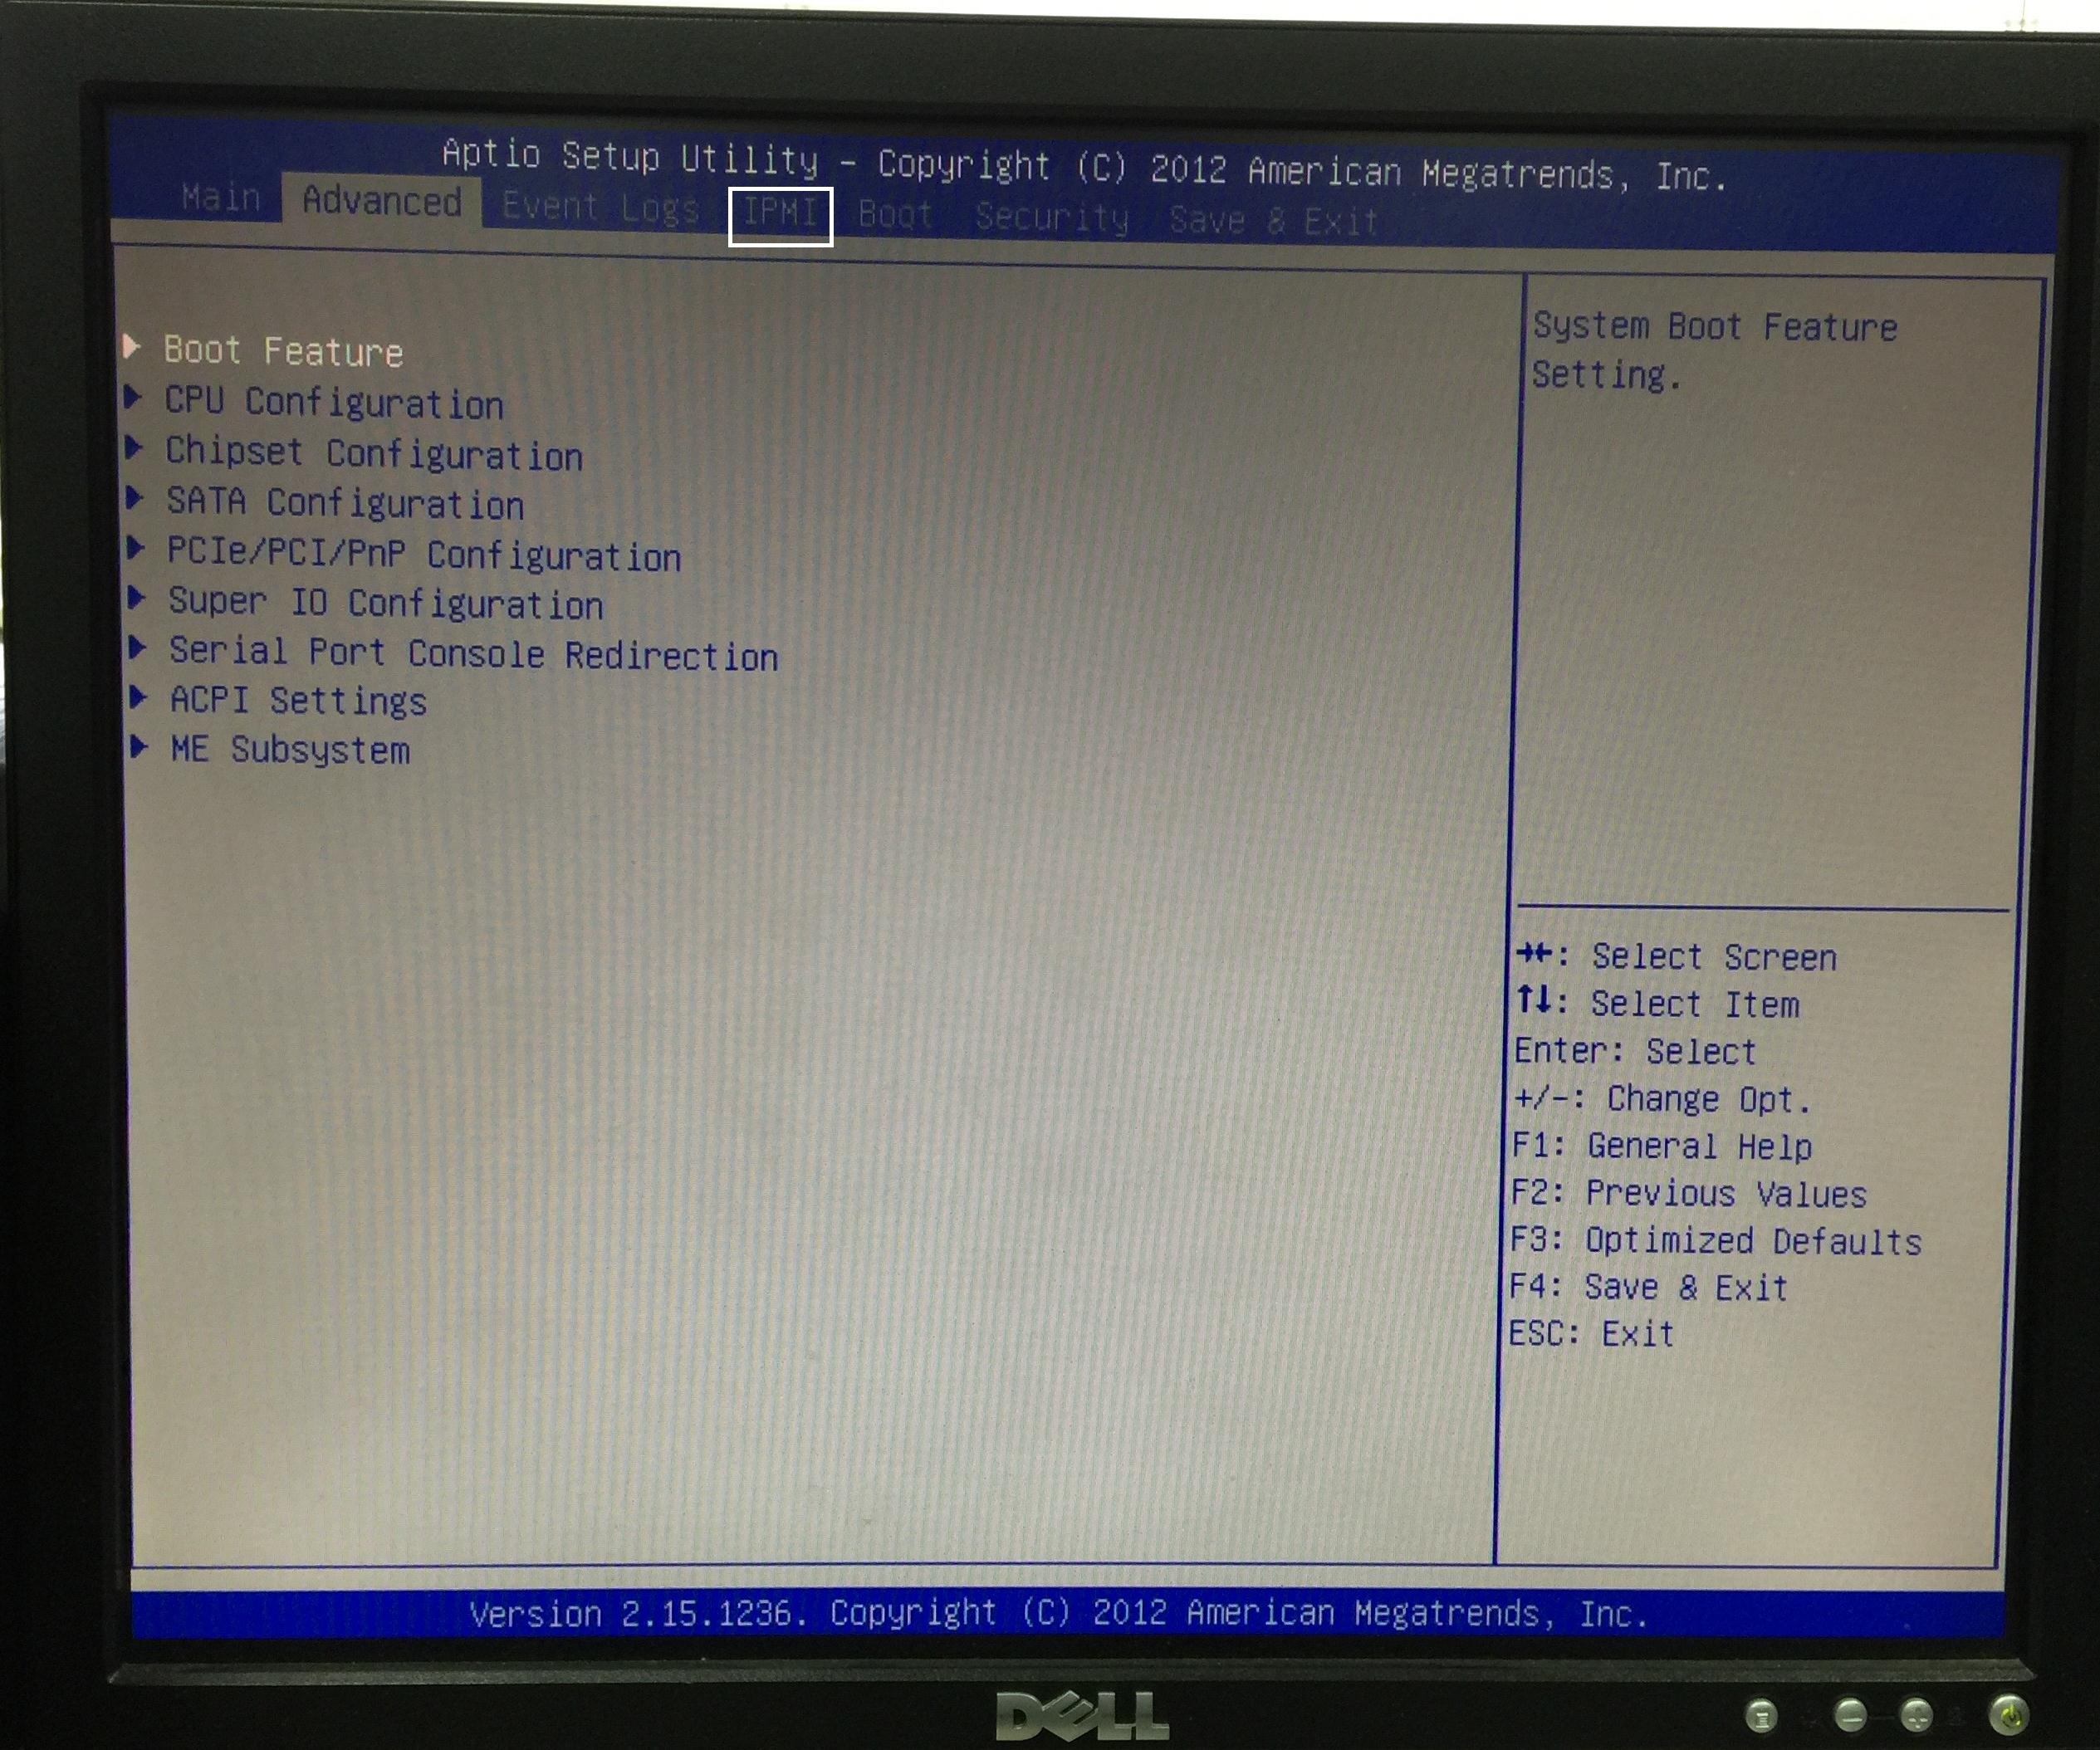
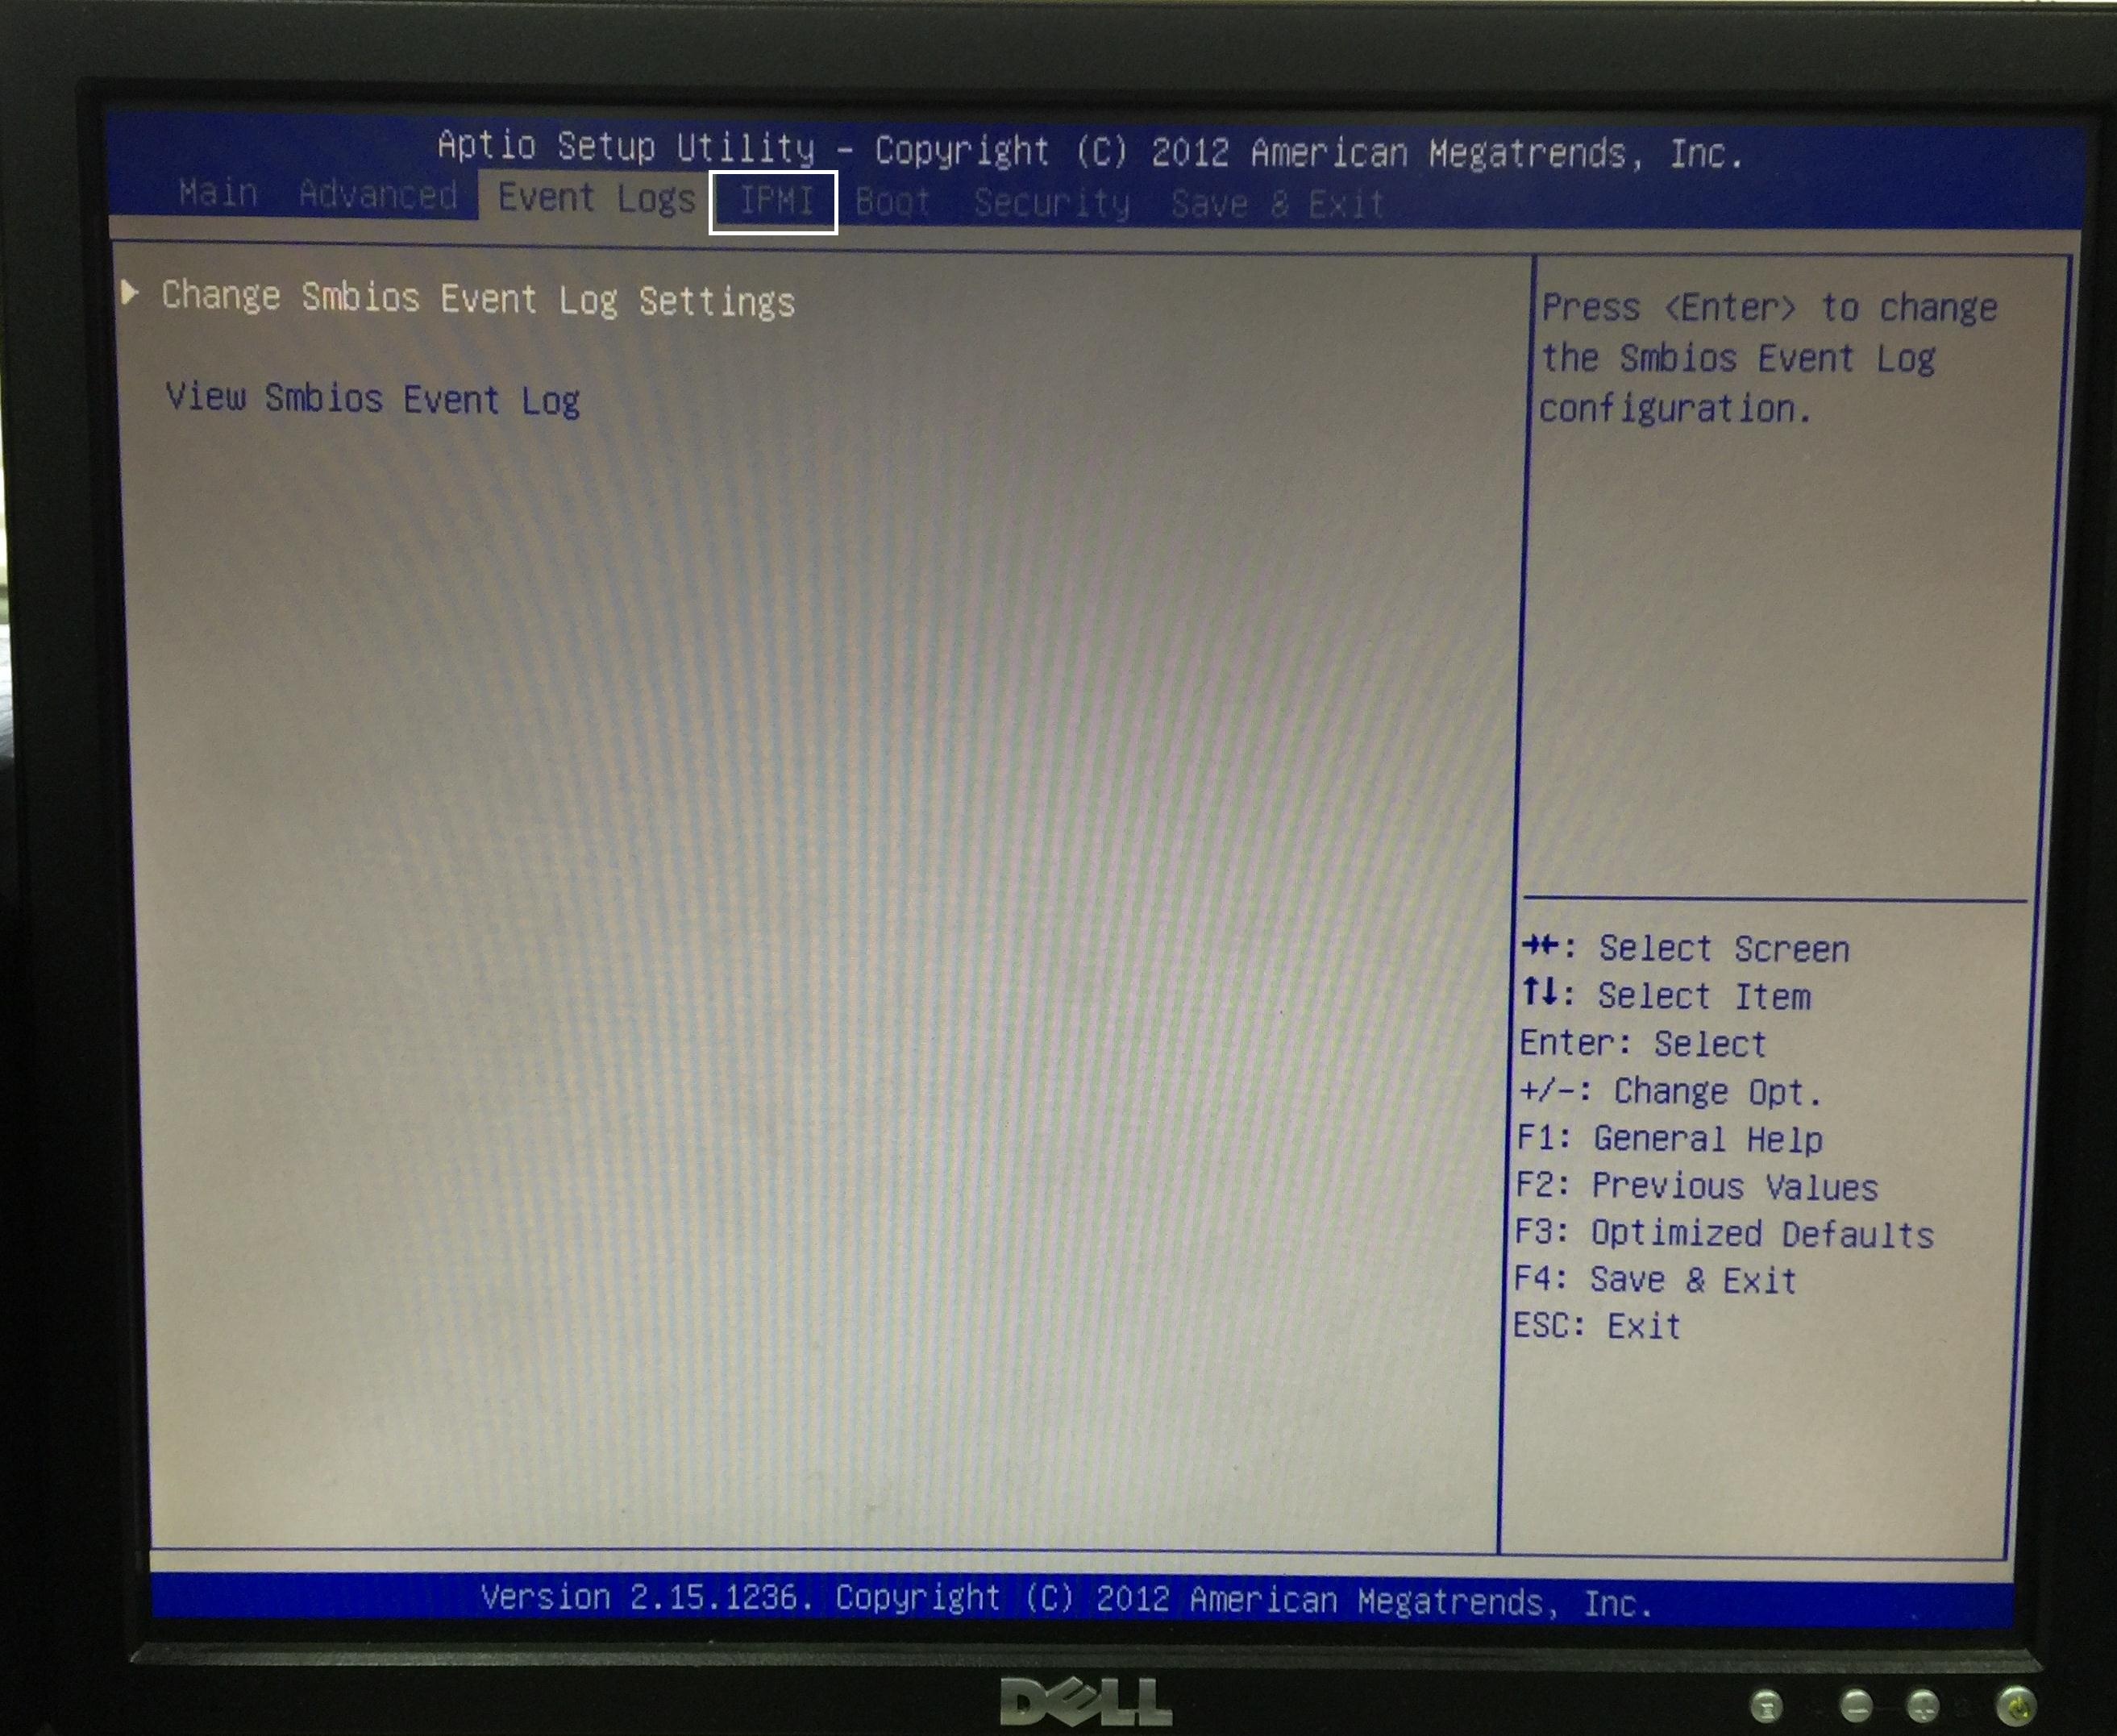
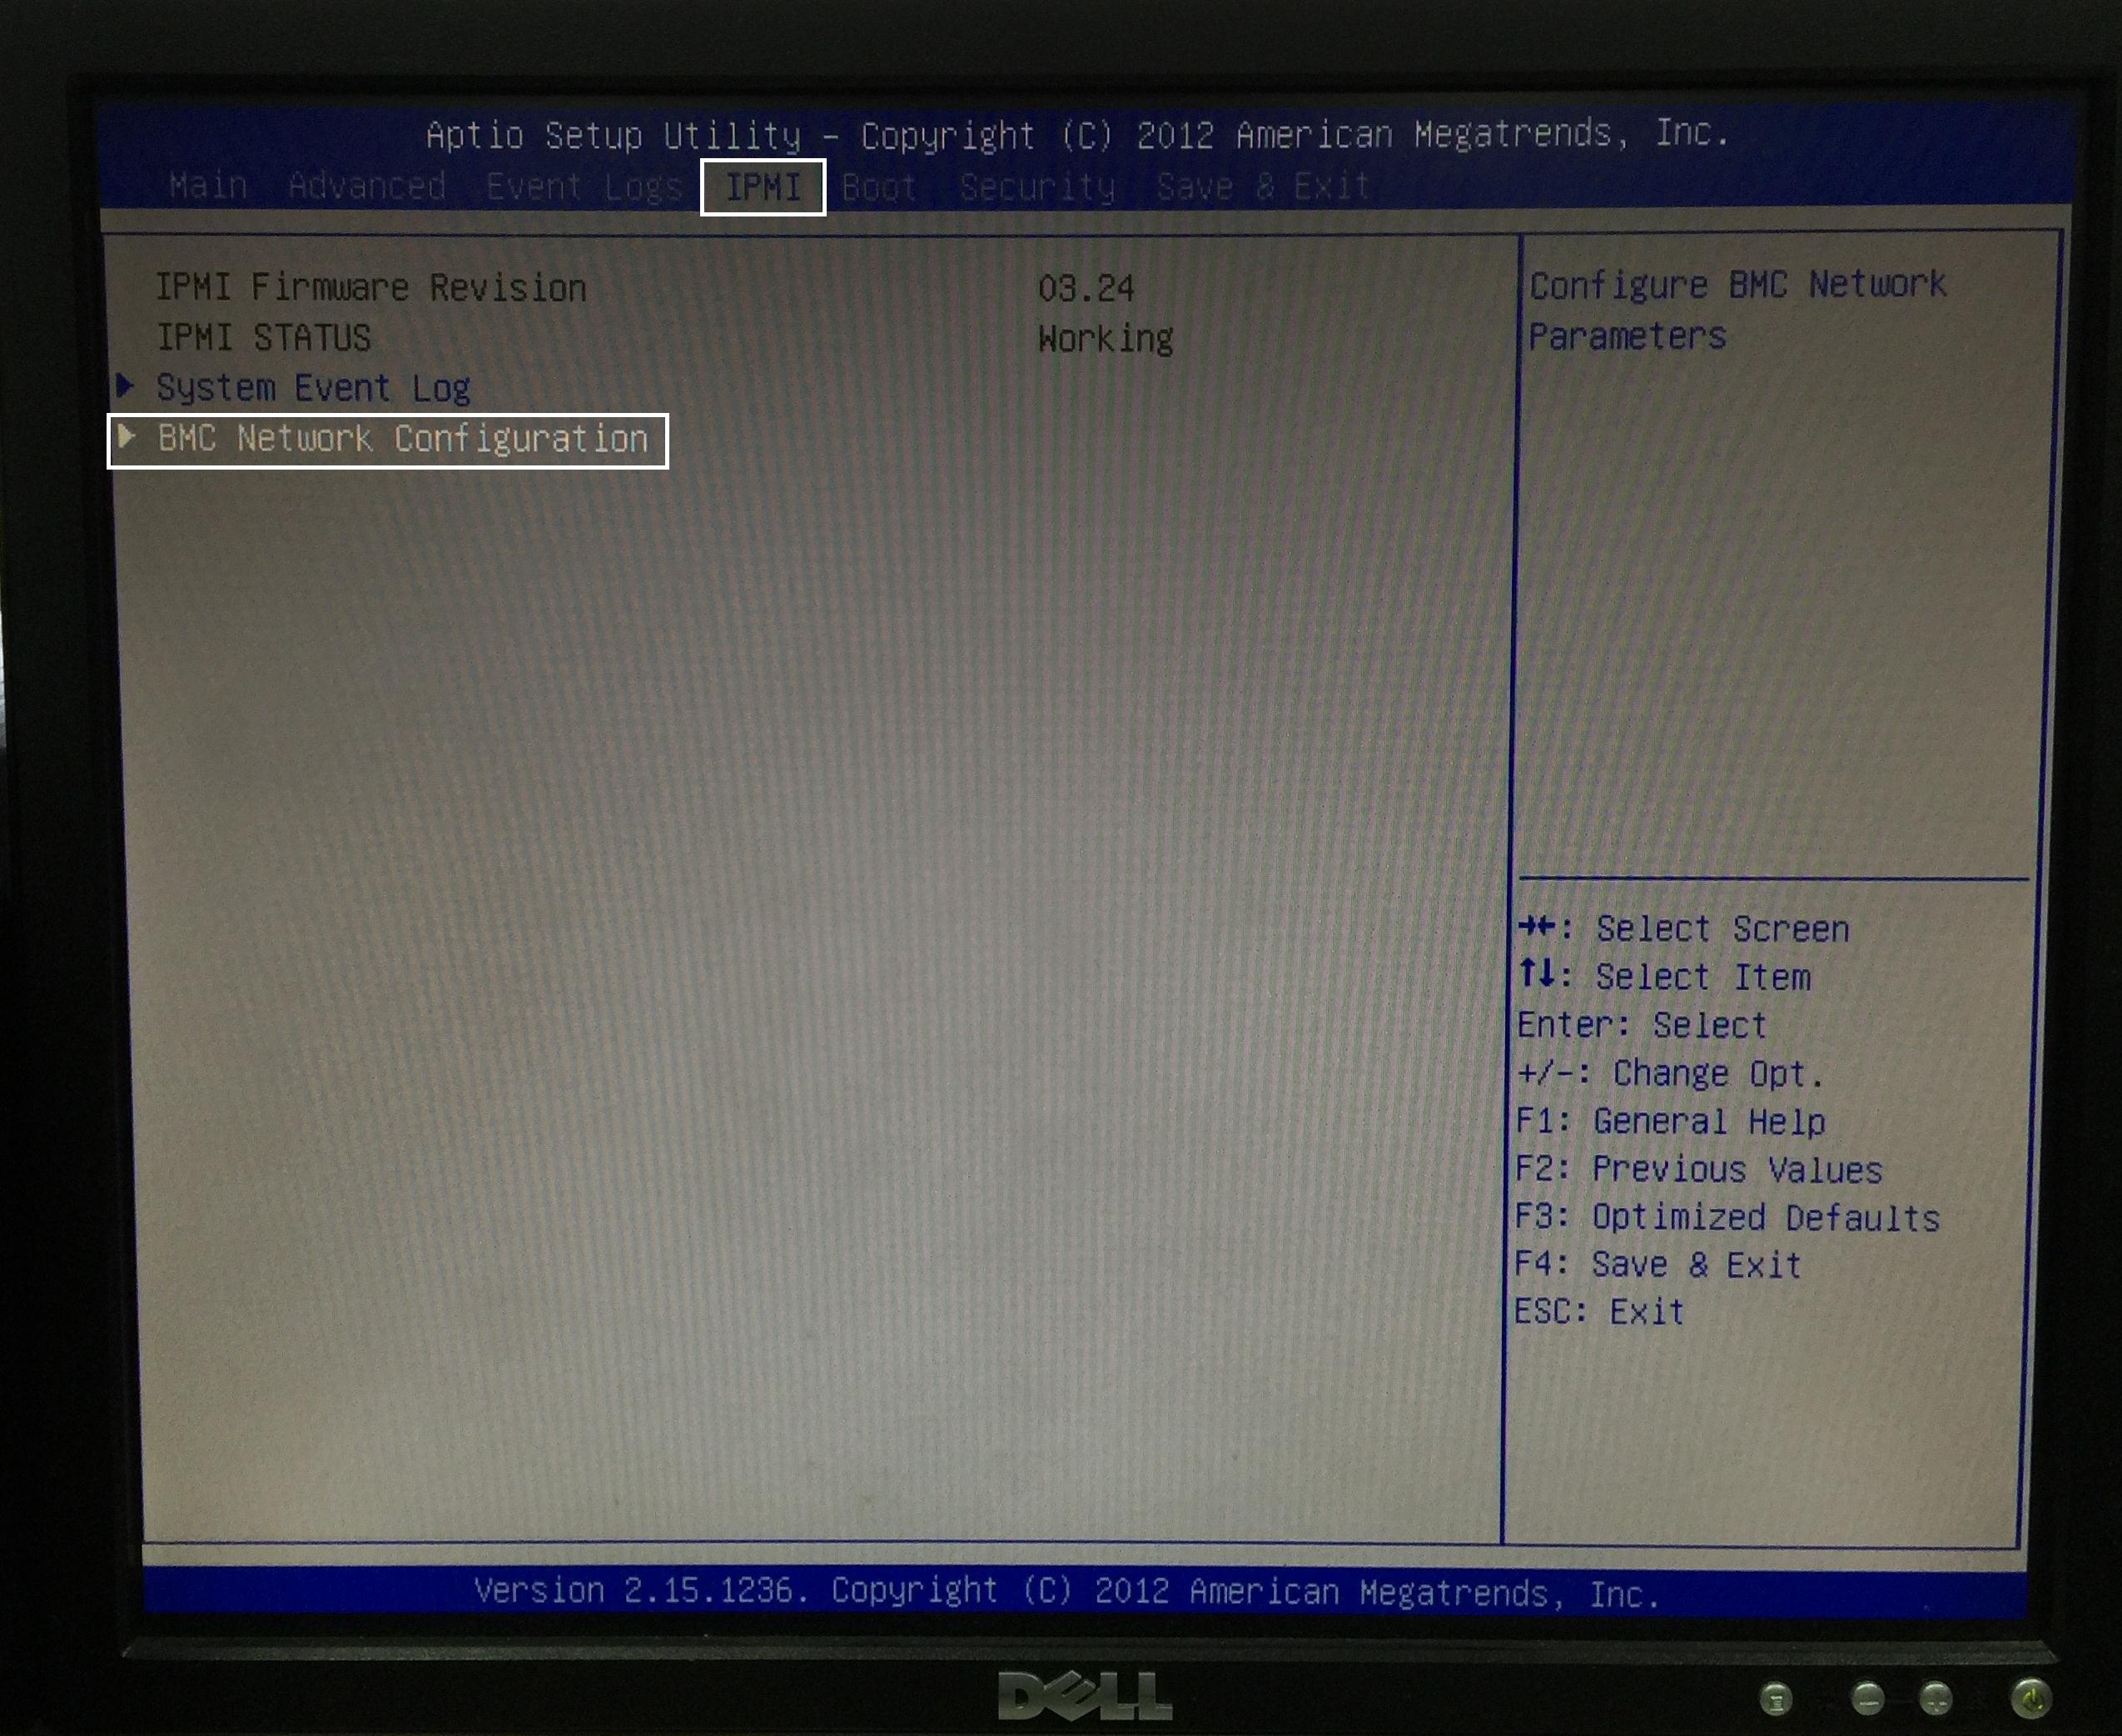
- Use the left/right arrow keys to navigate to the “IPMI” tab.
- Use the up/down arrow keys to navigate to the “BMC Network Configuration” object and press “Enter”.
- Select “Update IPMI LAN Configuration”, select “Yes” and press “Enter”.
- Select “Configuration Address Source”, select “Static” and press “Enter”.
- Select “Station IP Address”, “Subnet Mask” and “Router/Gateway IP Address” and configure the settings you want.
- Press “F4” or use the left/right arrow keys to navigate to the “Save & Exit” tab.
- From your Laptop, make sure you can ping the IP address you just configured and access the IPMI Login interface via your Web browser.
- Repeat steps 1 to 10 for Nodes B and C.
- You should now have three working IPMI IP addresses that you can access via your Web browser. Proceed to the next section.
- IMPORTANT: Do not modify any other BIOS parameters unless instructed to do so by Nutanix Support.
- Note: within a functioning ESXi node, you can make these changes by using the “ipmitool” from the ESXi SSH Shell.
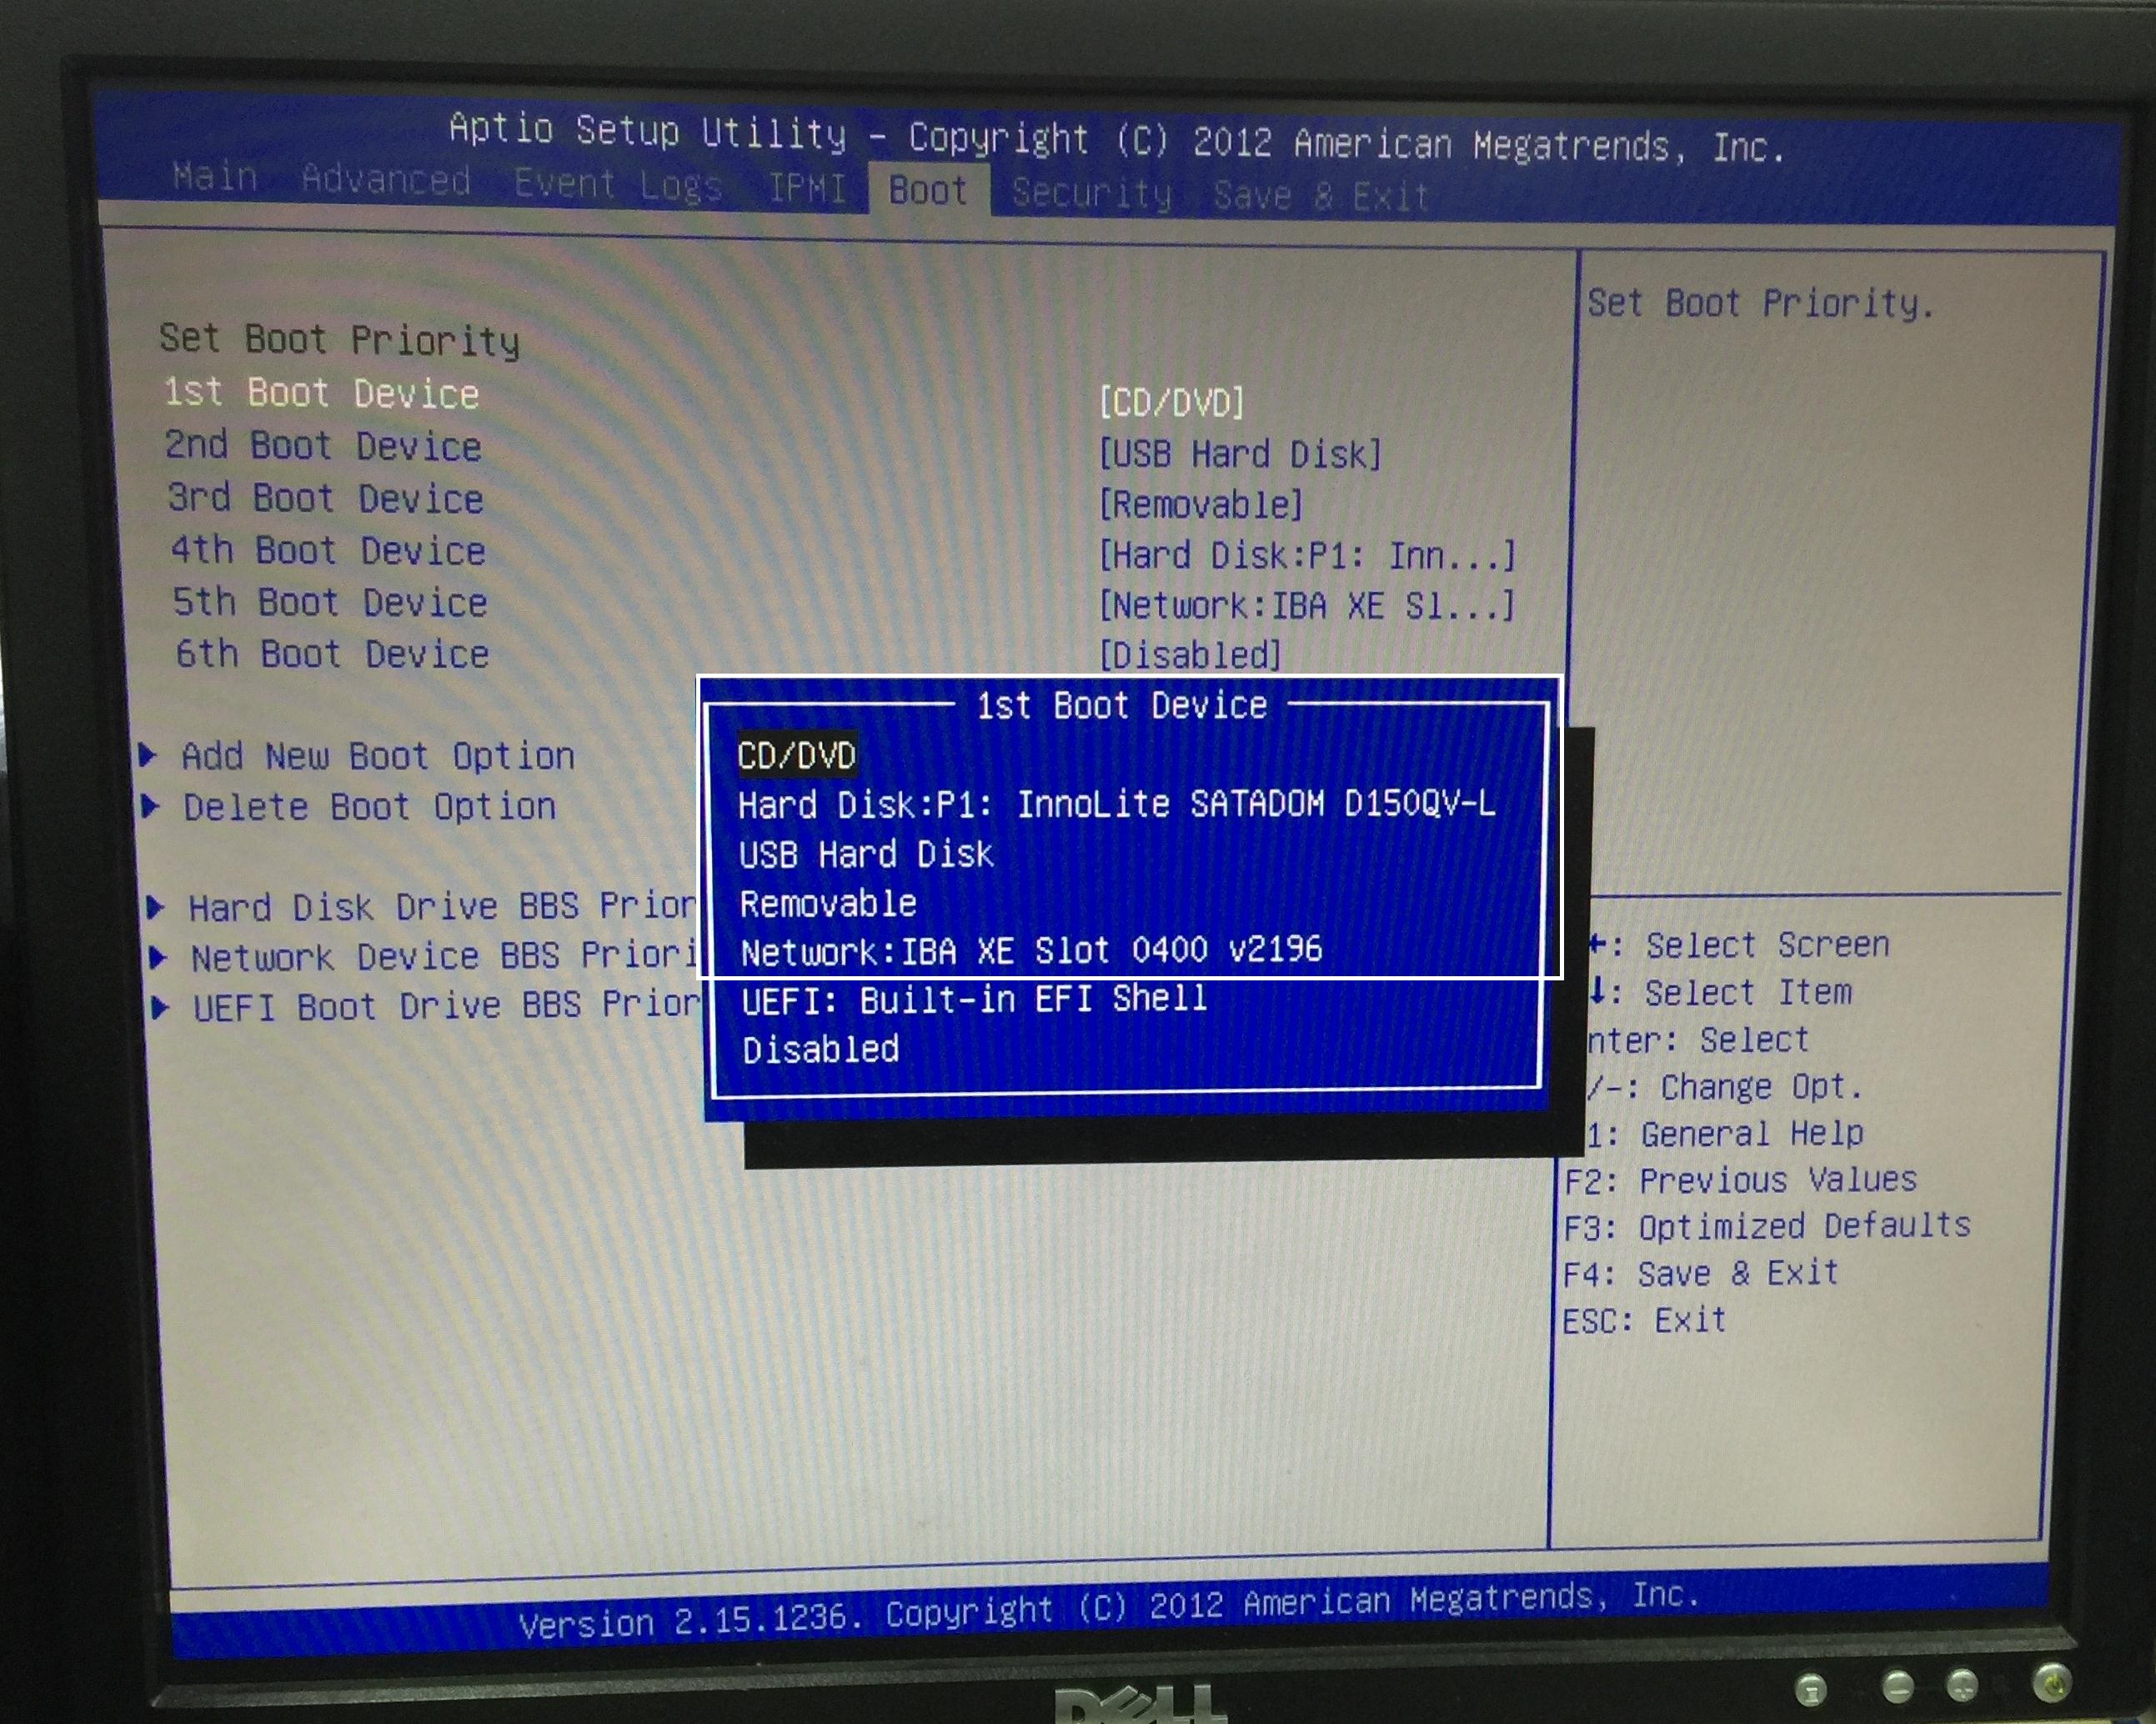
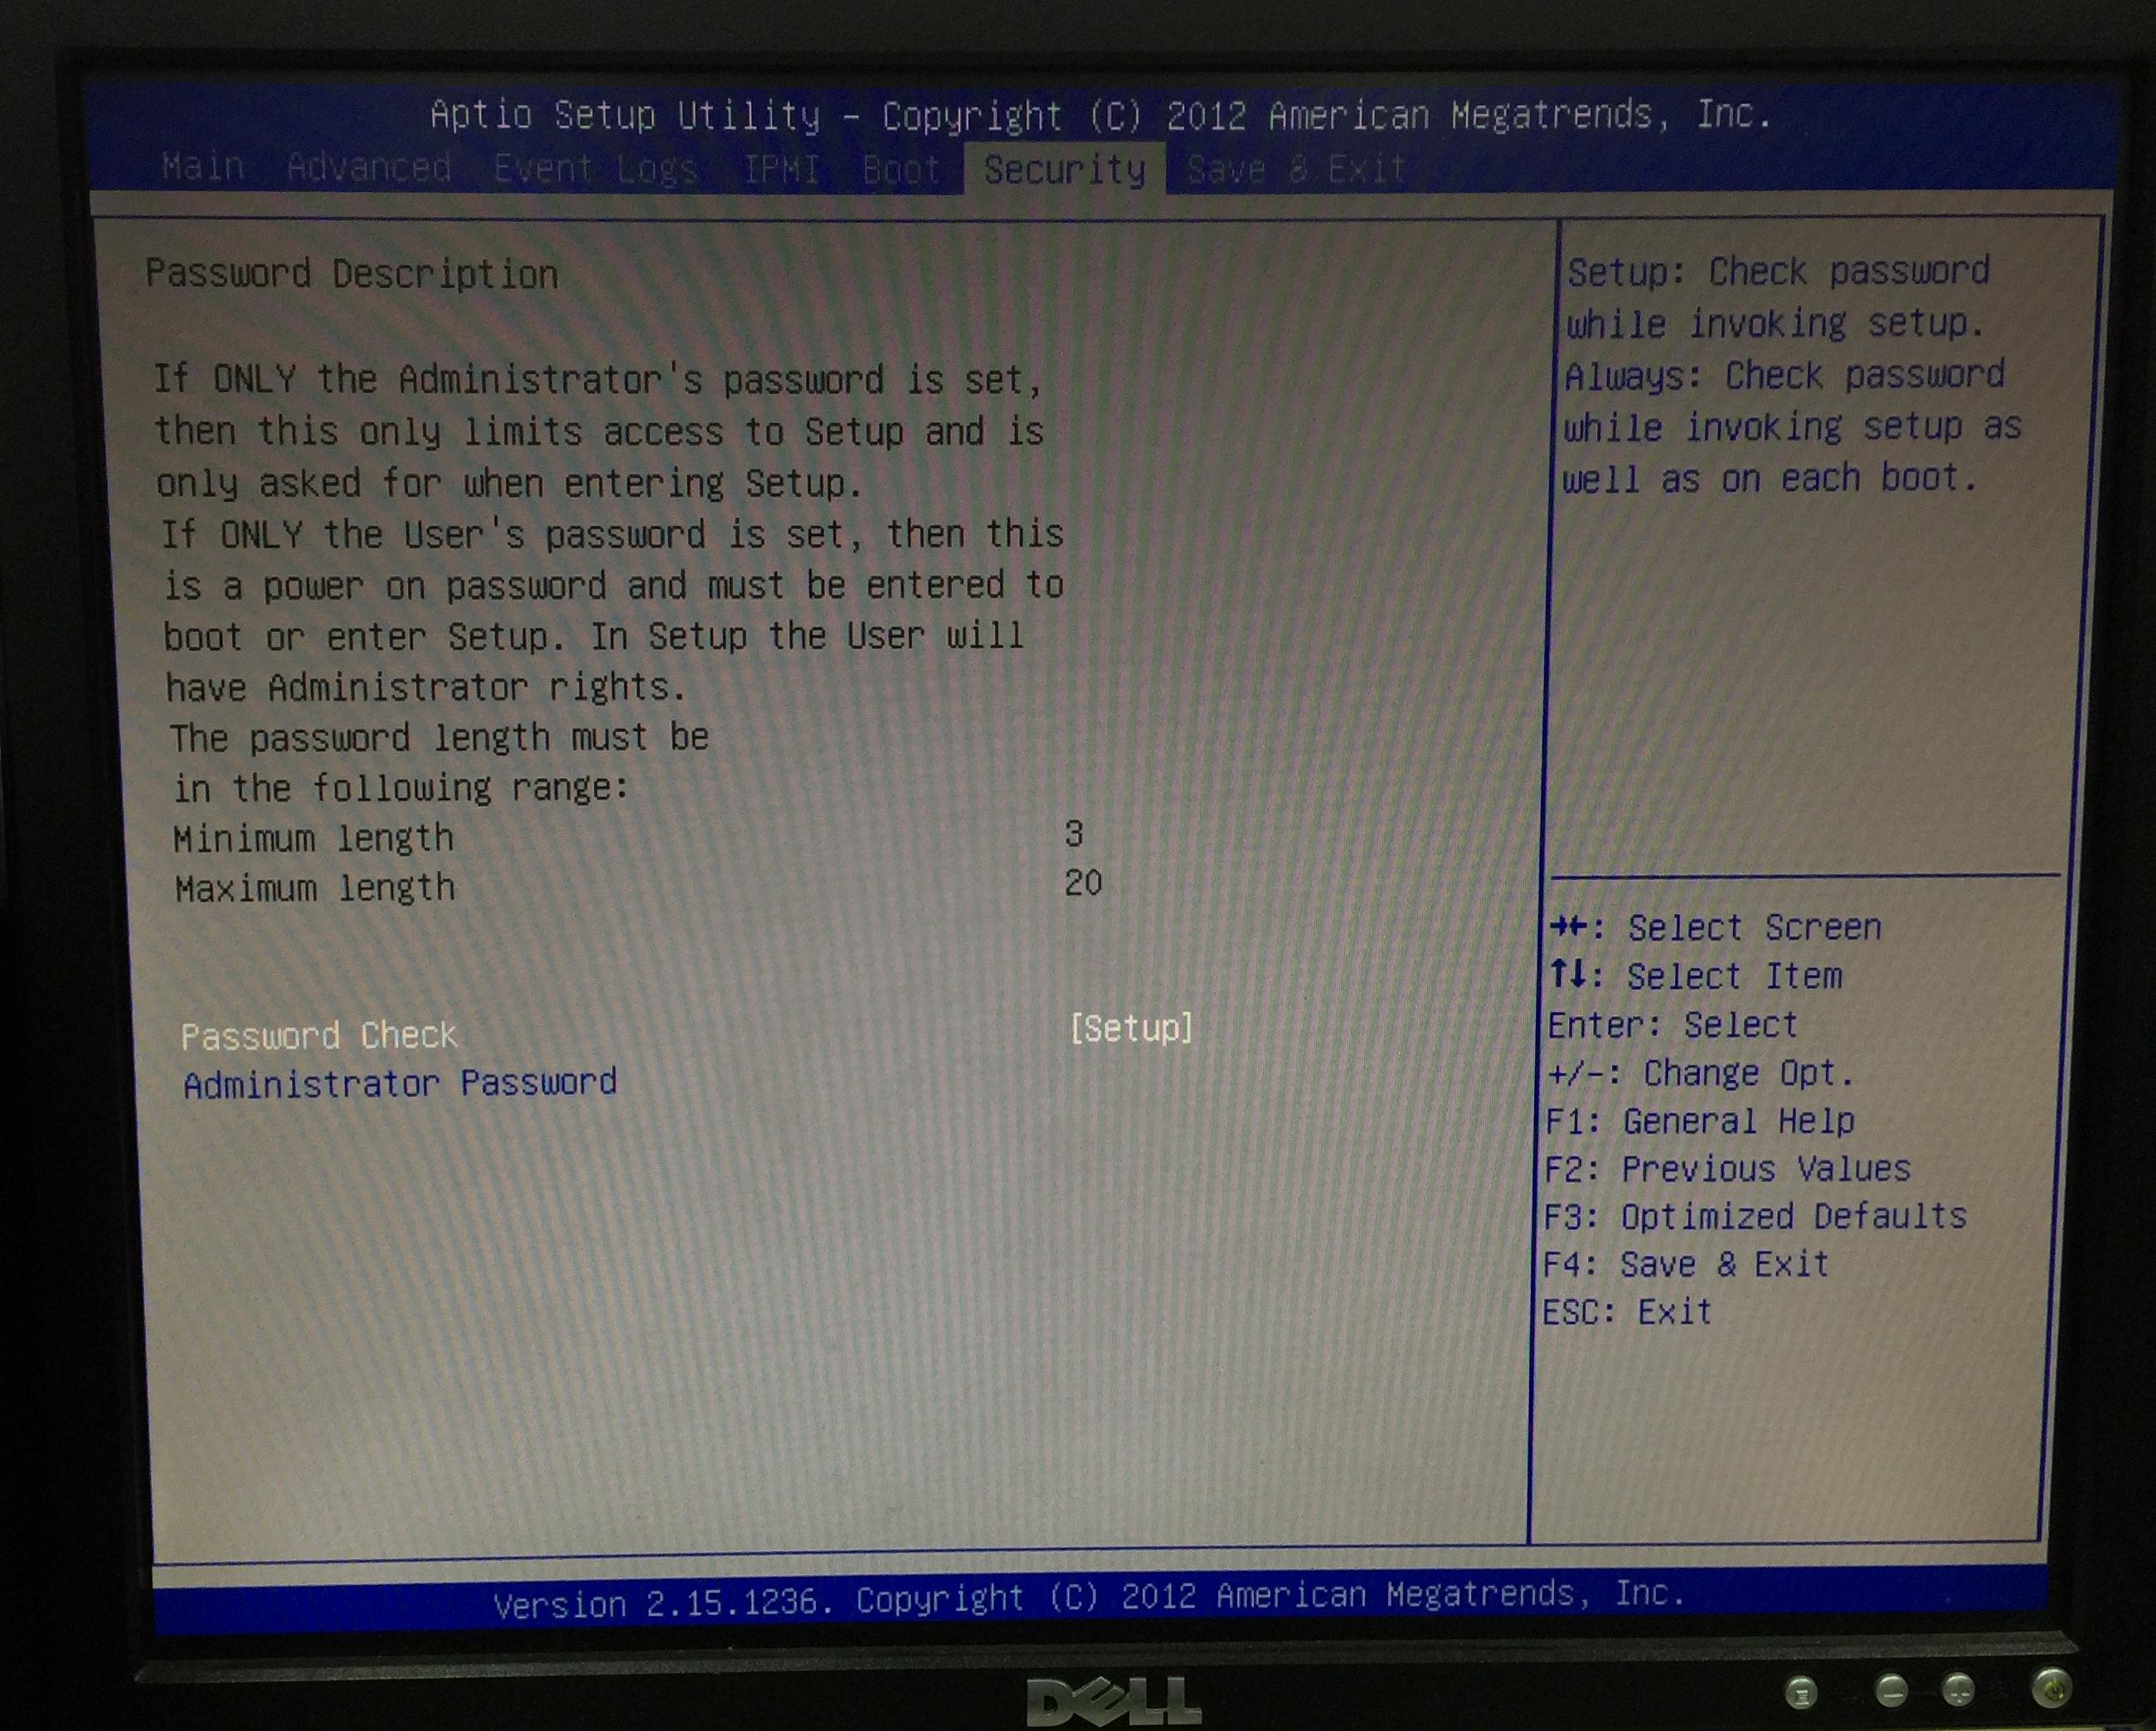
BIOS Screenshots:


Connecting to IPMI
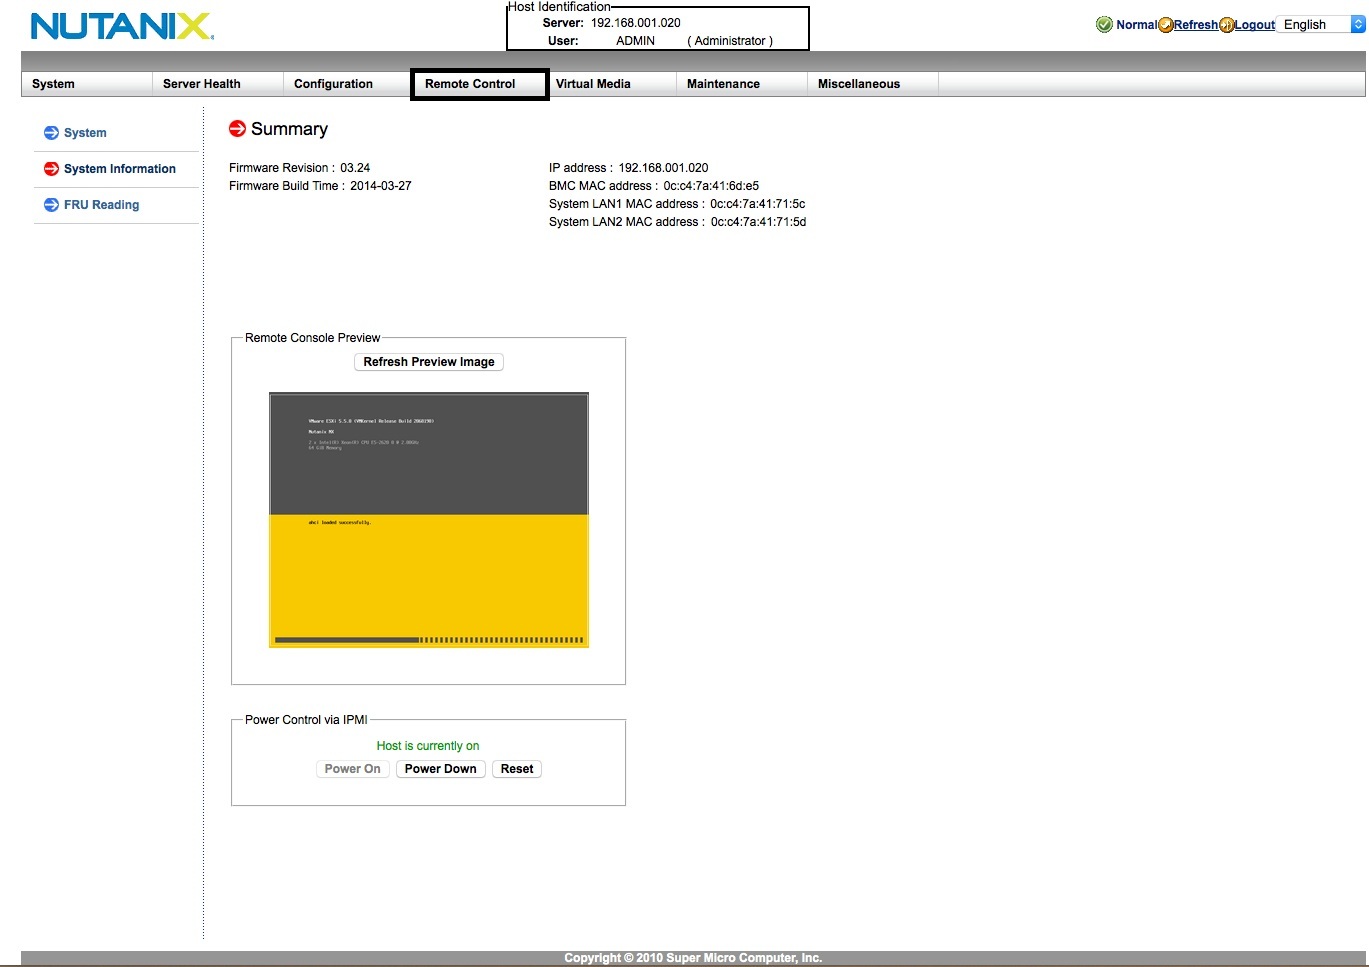
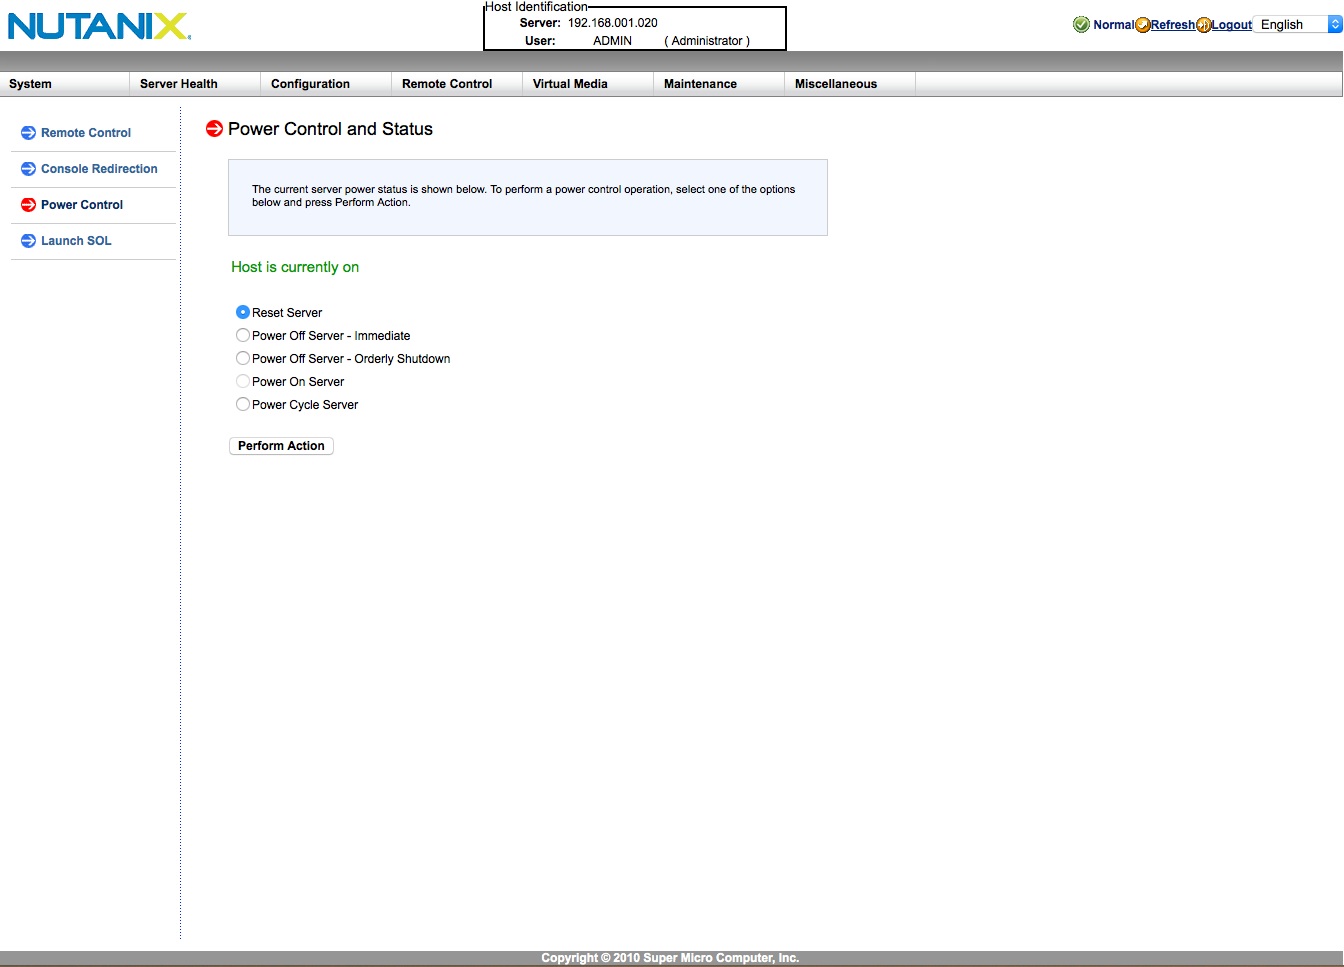
- From your Laptop open a Web browser and access the IPMI address of Node A (http:// <IPMI IP address>/).
- At the Nutanix IPMI login screen, use the credentials “ADMIN/ADMIN” and press “Login”.
- Select the “Remote Control” icon on the toolbar, press the “Console Redirection” object and then press the “Launch Console” button.
- Accept the Java security warnings and wait for the Console window to open. You may have to try different browsers and Java versions to get this working – it can be painful.
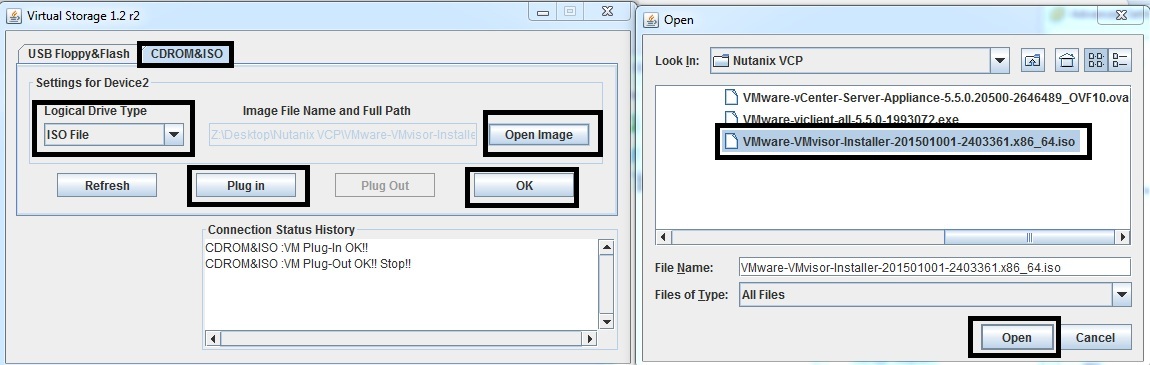
- Press the “Virtual Media” button on the Console toolbar and select “Virtual Storage”.
- In the Virtual Storage window, select the “CDROM&ISO” tab, “Logical Drive Type” to “ISO File” and “Open Image”.
- Browse to the ESXi ISO image (VMware-VMvisor-Installer-201501001-2403361.x86_64.iso in this case) and press the “Open” button.
- In the Virtual Storage window, press “Plug in” and make sure the “Connection Status History” shows “Plug-In OK” and then press the “OK” button.
- You are now ready to reset the Node and start the ESXi installation process.
- Repeat steps 1 to 9 for Nodes B and C.
- You should now have three Console windows (to Nutanix nodes) with the ESXi ISO mounted and ready for installation. Proceed to the next section.
IPMI Screenshots:


Installing ESXi 5.5
- From the previous section, you should have a Console window open with the ESXi ISO image mounted, ready to install.
- Press the “Virtual Media” button on the Console toolbar and select “Virtual Keyboard”. Depending upon your Laptop OS and system configuration, this maybe required for pressing the function keys during the install.
- Select the “Power Cycle Server” option from the “Power Control” icon on the Console toolbar.
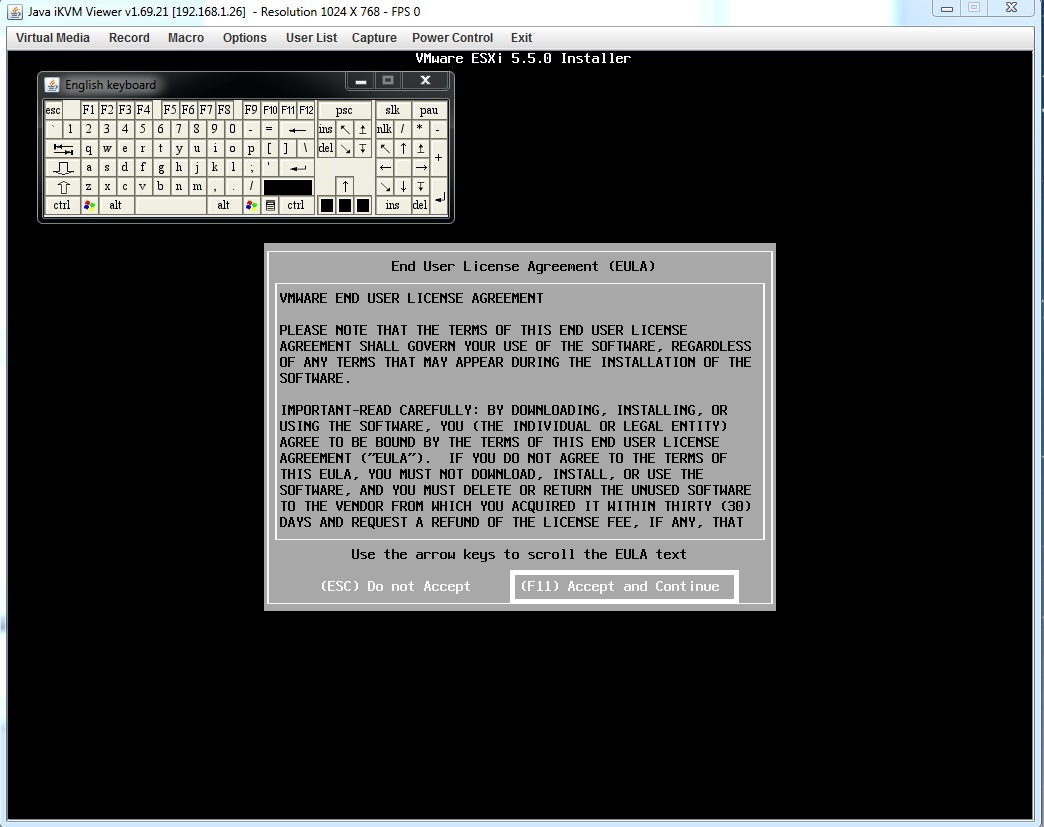
- Wait for the ESXi ISO image to boot and present the EULA screen. Press “F11” to accept and continue.
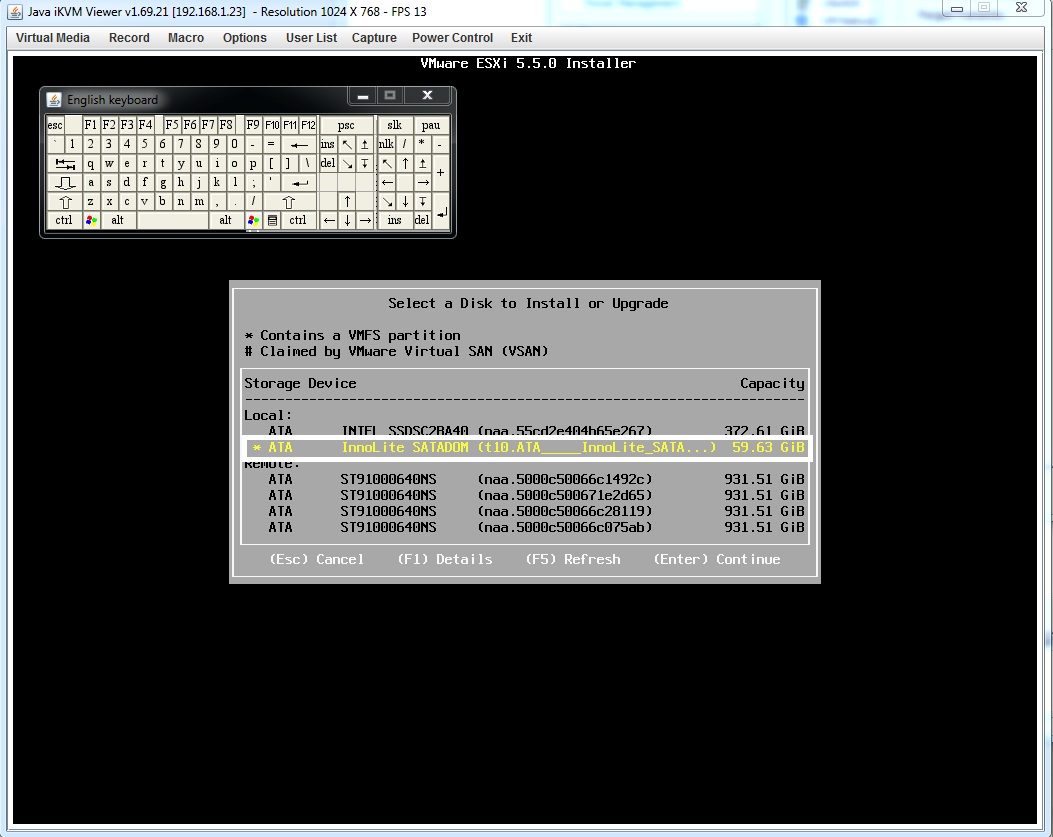
- In the “Select a Disk to Install or Upgrade” screen, select the “InnoLite SATADOM” storage device and press “Enter”.
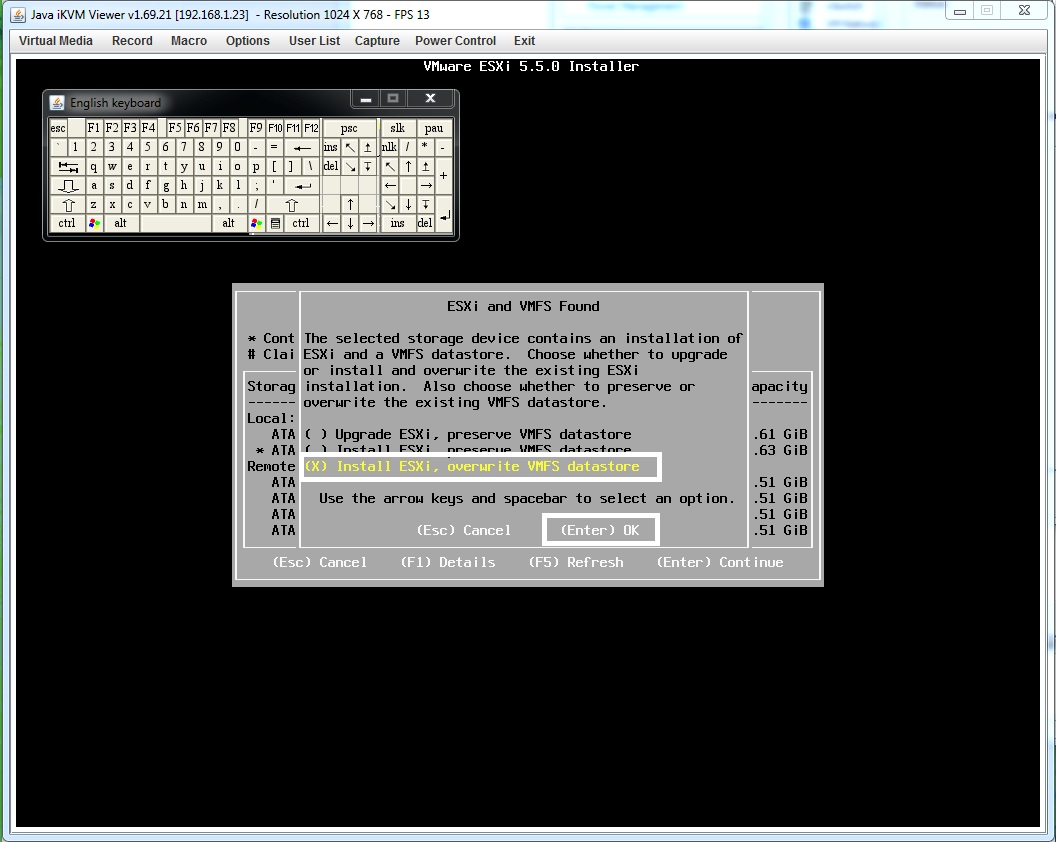
- If the “ESXi and VMFS Found” window appears, select “Install ESXi, overwrite VMFS datastore” and press “Enter”.
- In the “Keyboard layout” window, select “US Default” and press “Enter”.
- In the “Enter a root password” window, you must type “nutanix/4u” and press “Enter”. Otherwise CVM will not be able to connect to ESXi.
- In the “Confirm Install” window, press “F11” to install.
- Press the “Virtual Media” button on the Console toolbar and select “Virtual Storage”.
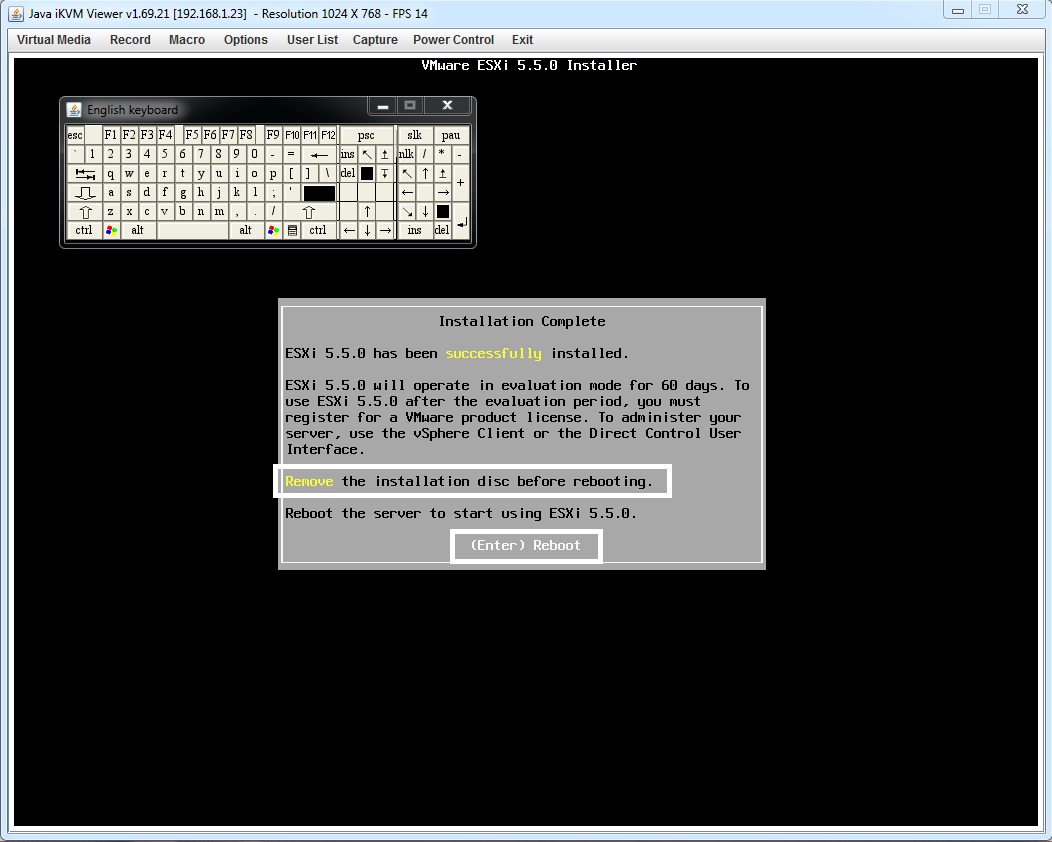
- Wait for the “Installation Complete” window to appear.
- In the Virtual Storage window, press “Plug out” and make sure the “Connection Status History” shows “Plug-Out OK” to unmount the ESXi ISO image.
- In the “Installation Complete” window, press “Enter” to reboot.
- Repeat steps 2 to 13 for Nodes B and C.
- You should now have three Nutanix Nodes with ESXi successfully installed. Proceed to the next section.
ESXi Install Screenshots:


Using Phoenix to install the Controller VM and Customise ESXi
- From the previous section, you should have a Console window open with ESXi successfully installed.
- Press the “Virtual Media” button on the Console toolbar and select “Virtual Storage”.
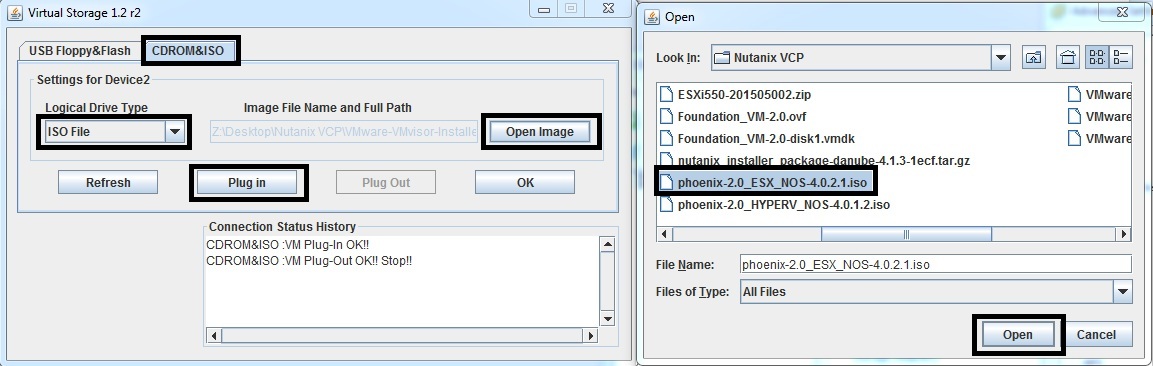
- In the Virtual Storage window, select the “CDROM&ISO” tab, “Logical Drive Type” to “ISO File” and “Open Image”.
- Browse to the Phoenix ESXi ISO (phoenix-2.0_ESX_NOS-4.0.2.1.iso in this case) and press the “Open” button.
- In the Virtual Storage window, press “Plug in” and make sure the “Connection Status History” shows “Plug-In OK” and then press the “OK” button.
- Select the “Power Cycle Server” option from the “Power Control” icon on the Console toolbar.
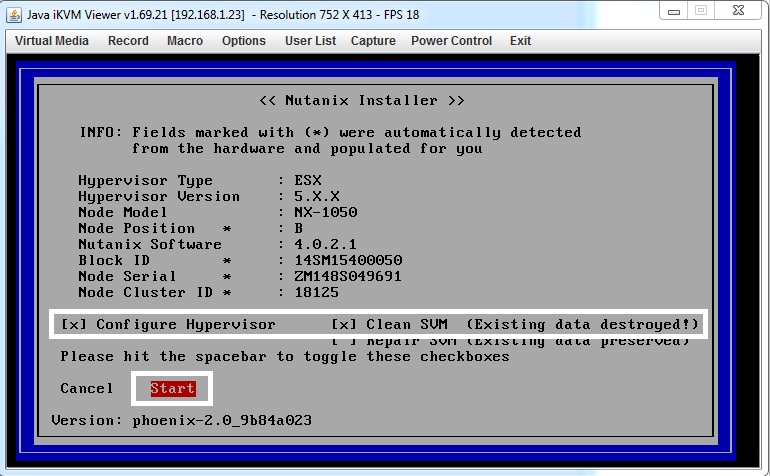
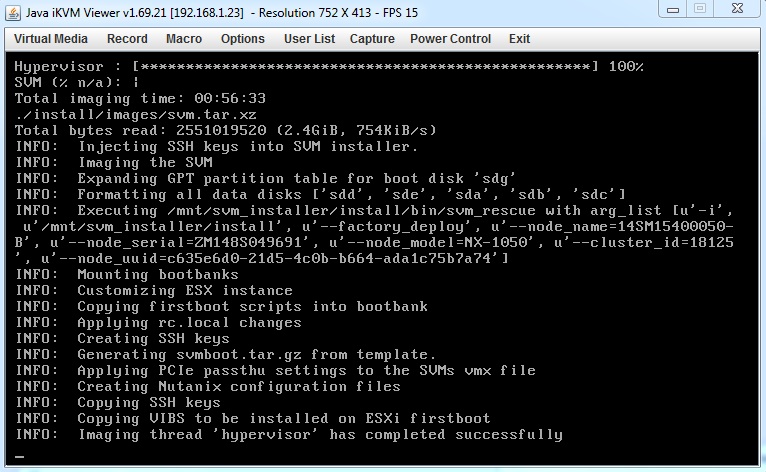
- Wait for the “Nutanix Installer” screen to appear, then select “Configure Hypervisor” and “Clean SVM” and then press the “Start” button.
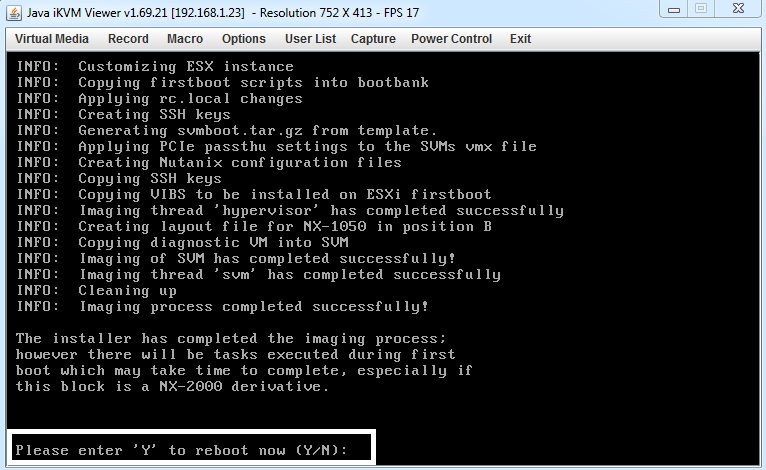
- Wait for the Nutanix Installation process to complete (“reboot now” message will appear).
- In the Virtual Storage window, press “Plug out” and make sure the “Connection Status History” shows “Plug-Out OK” to unmount the Phoenix ESXi ISO image.
- In the Console window, press “Y” and then “Enter” to reboot.
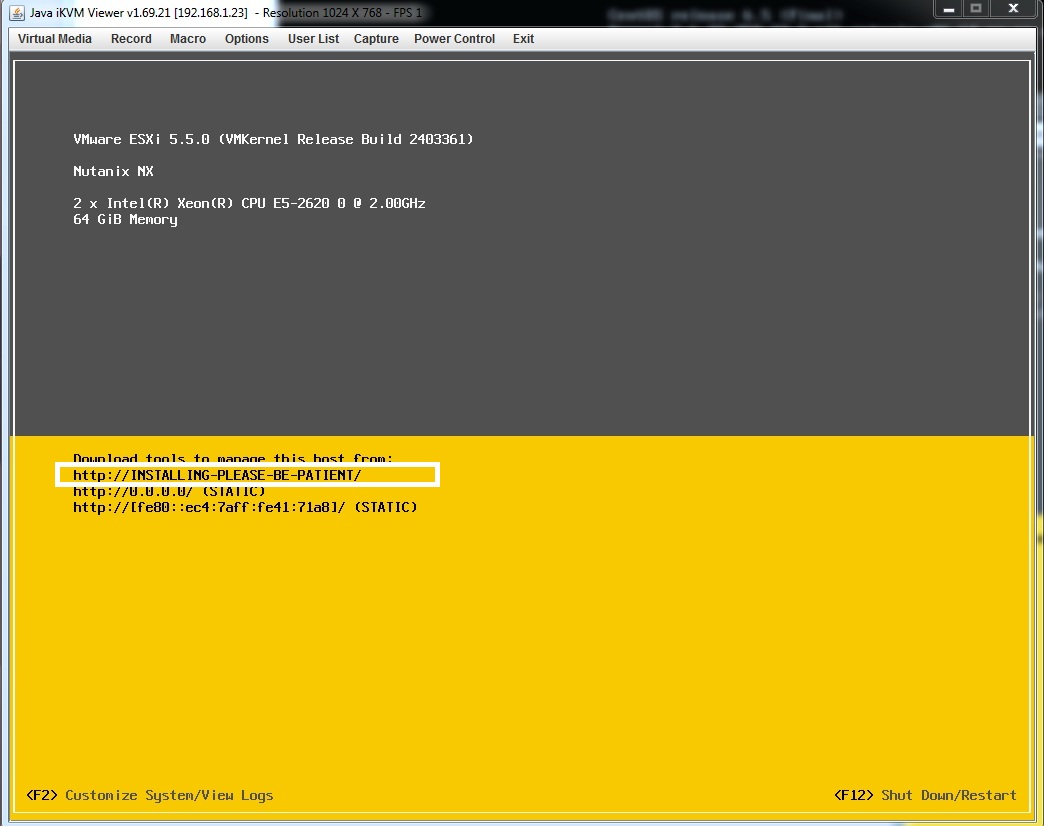
- After ESXi boots, you will see the message “INSTALLING-PLEASE-BE-PATIENT” on the Console screen (ESXi DCUI). This is a Nutanix VIB executing the first boot installation script, configuring ESXi and registering the CVM vmx file.
- Repeat steps 2 to 11 for Nodes B and C.
- You should now have three Nutanix Nodes with ESXi customised and CVM successfully installed. Proceed to the next section.
Phoenix Install Screenshots:
Configure IP addresses
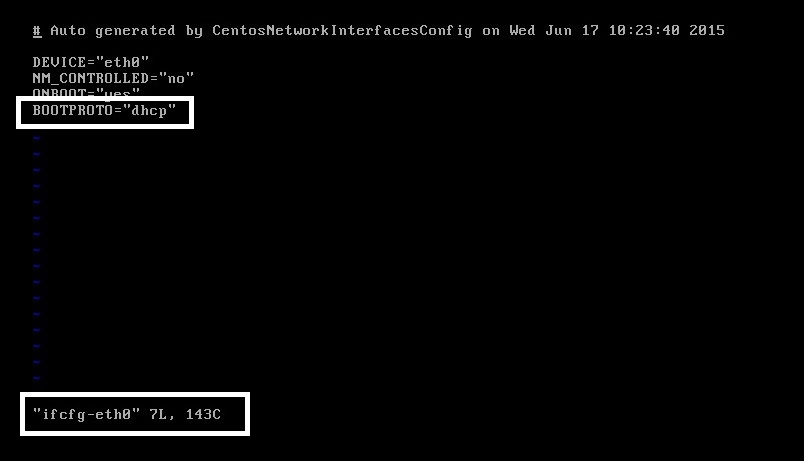
During this manual install process, everything is configured with DHCP. Even if you configure a static IP for vmk0 initially after the ESXi installation, the Phoenix installation process will configure vmk0 with DHCP. So you need to touch each node to configure the static IP addresses you require.
- From the previous section, you should have the consoles open to three Nutanix Nodes with ESXi customised and CVM successfully installed.
- Press “F2” on the IPMI Console and configure the “Management” IP to be a static IP address. Then logout.
- Use the vSphere Client to connect to the static IP address of the ESXi host.
- From vSphere Client, open the console to the CVM and login with the credentials “nutanix/nutanix/4u”.
- Edit the file: “/etc/sysconfig/network-scripts/netconf/ifcfg-eth0” and modify/add “BOOTPROTO=”none”“, “NETMASK=”N.N.N.N”“, “IPADDR=”N.N.N.N”“, “GATEWAY=”N.N.N.N”” to the correct IP Address settings of the CVM.
- You now have an unconfigured Nutanix node with static IP addresses that is ready to be joined to a Nutanix cluster.
- Repeat steps 2 to 6 for Nodes B and C.
- Note: within a functioning cluster you can make these changes by using the URL http:// <IPv6 LinkLocal>:2100/cluster_init.html from your Web browser.
Nutanix CVM Screenshots:


Configuring a Nutanix Cluster via NCLI
- From the vSphere Client, open the console to the CVM and login with the credentials “nutanix/nutanix/4u”.
- Run the command “cluster status” and verify that the cluster is unconfigured.
- Run the command “cluster -s <Node_A_CVM_eth0_IP>,<Node_B_CVM_eth0_IP>,<Node_C_CVM_eth0_IP> create” to create the cluster
- Run the command “ncli cluster add-to-name-servers servers=<DNS_IP>” to configure DNS.
- Run the command “ncli cluster add-to-ntp-servers servers=<NTP_IP>” to configure NTP.
- Run the command “ncli cluster set-external-ip-address external-ip-address=<CLUSTER_IP>” to configure the Cluster IP address.
- Run the command “cluster status” and verify that the cluster has been created.
- You now can access the Prism UI and continue configuring the Storage Pool and Container(s) for the cluster.
What Happened?
You have performed the following:
- Accessed the BIOS to statically set the IPMI network address.
- Accessed the IPMI URL to launch the Java Console and mounted the ISO images to install ESXi/Phoenix.
- Installed ESXi on the InnoLite SATADOM (64GB USB Flash Drive plugged into the Node motherboard).
- Installed Phoenix – which installed a VIB file (with first boot script) for ESXi on SATADOM and associated CVM files.
- The Phoenix installation launches via the script embedded in the VIB when ESXi is first booted and customises ESXi and installs the Controller VM.
- Coincidentally, William Lam has recently written a nice post about how VIBs can be used to run scripts within ESXi, which is what Nutanix are doing here.
- Configured static IP addresses for each ESXi vmk0 and each CVM eth0 interface – this is because the manual install process uses DHCP by default.
- Used NCLI to create a Nutanix cluster.
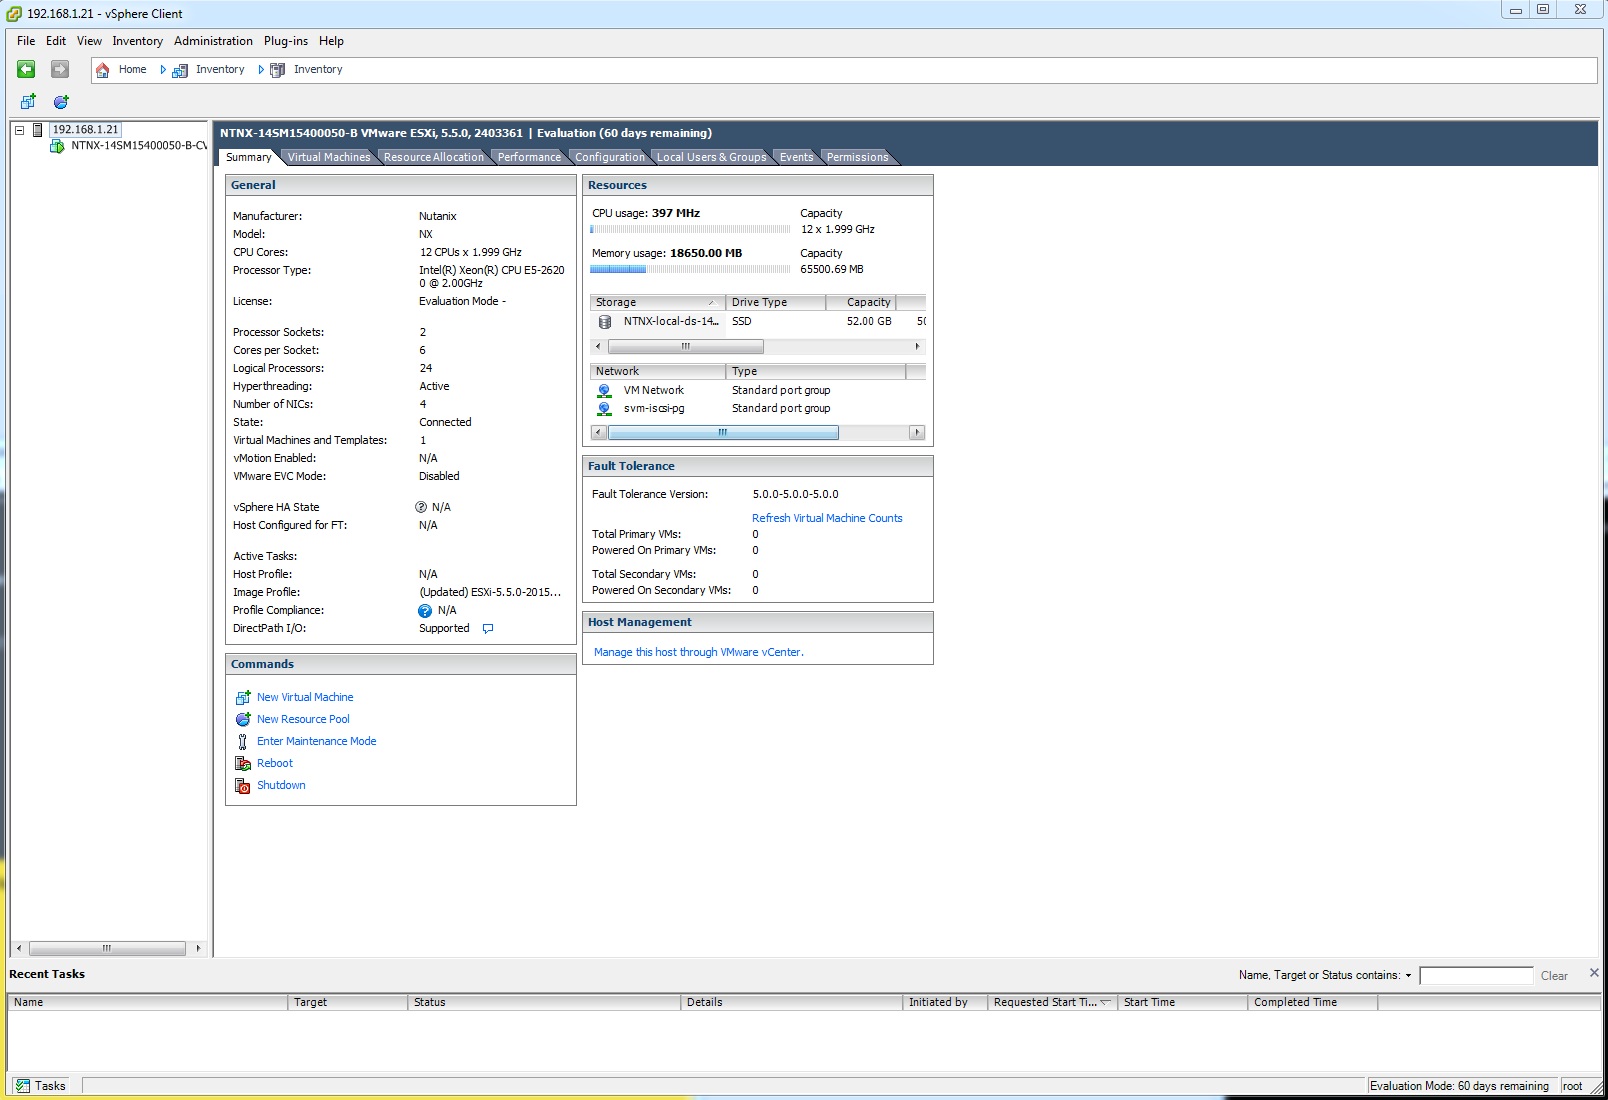
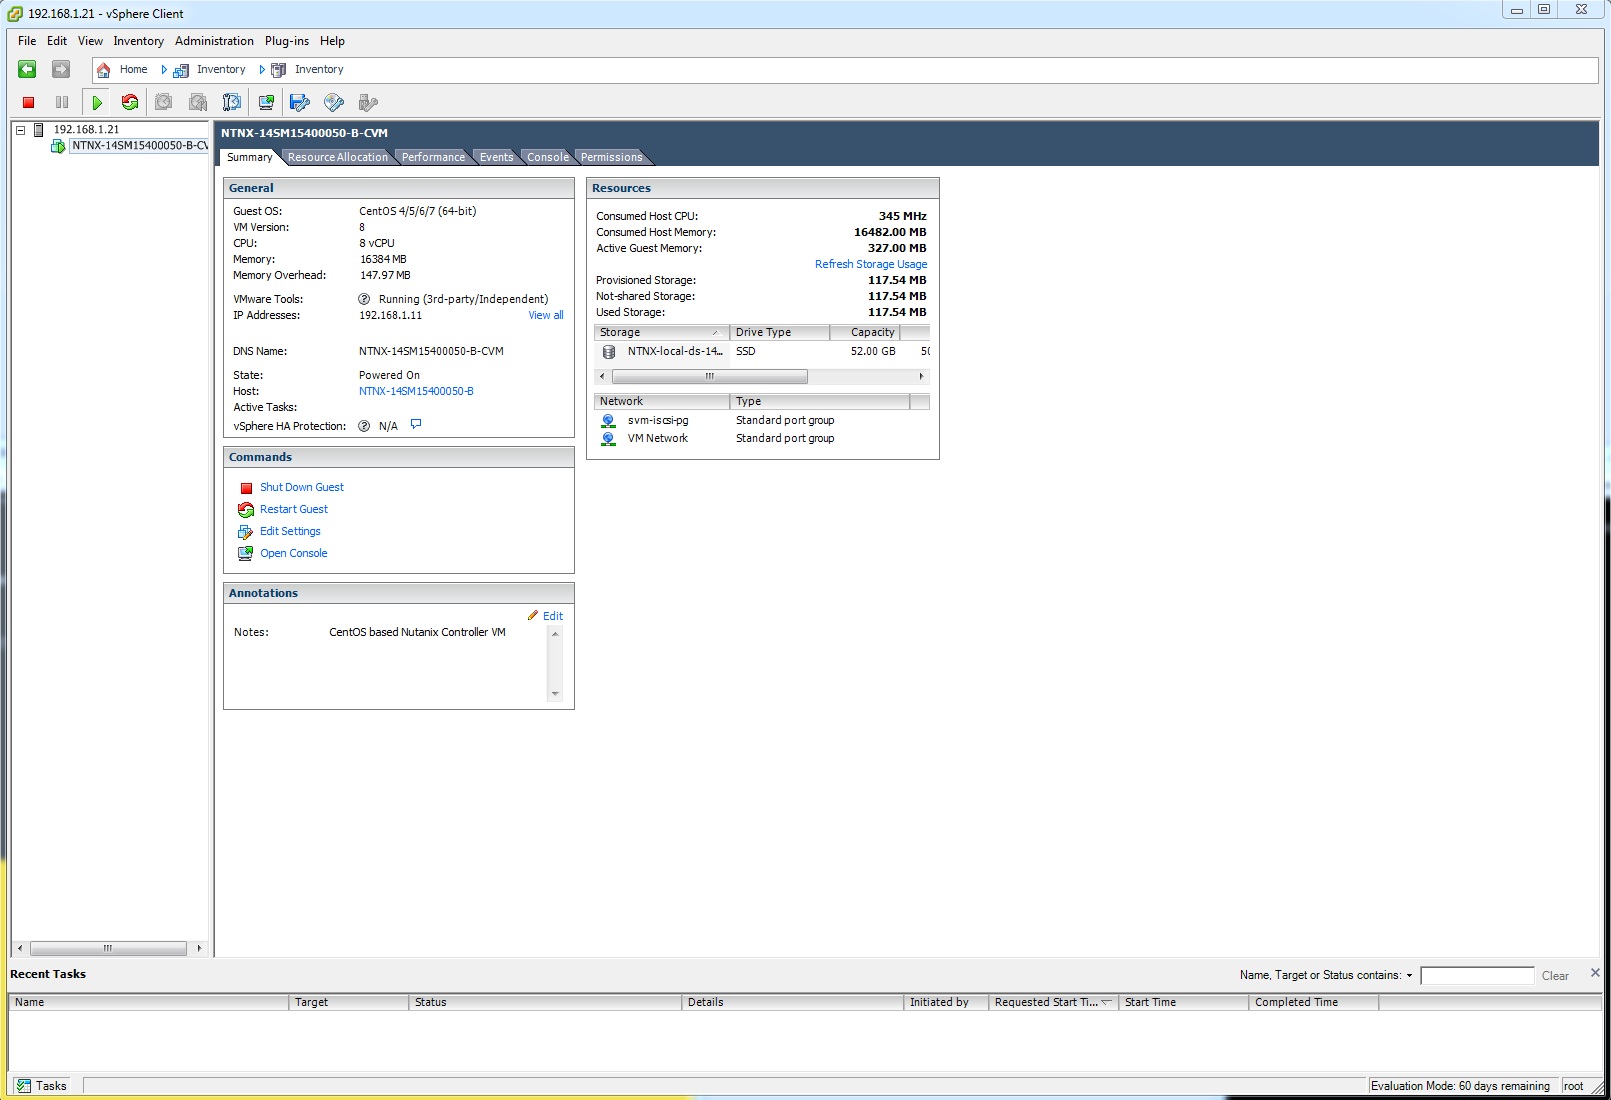
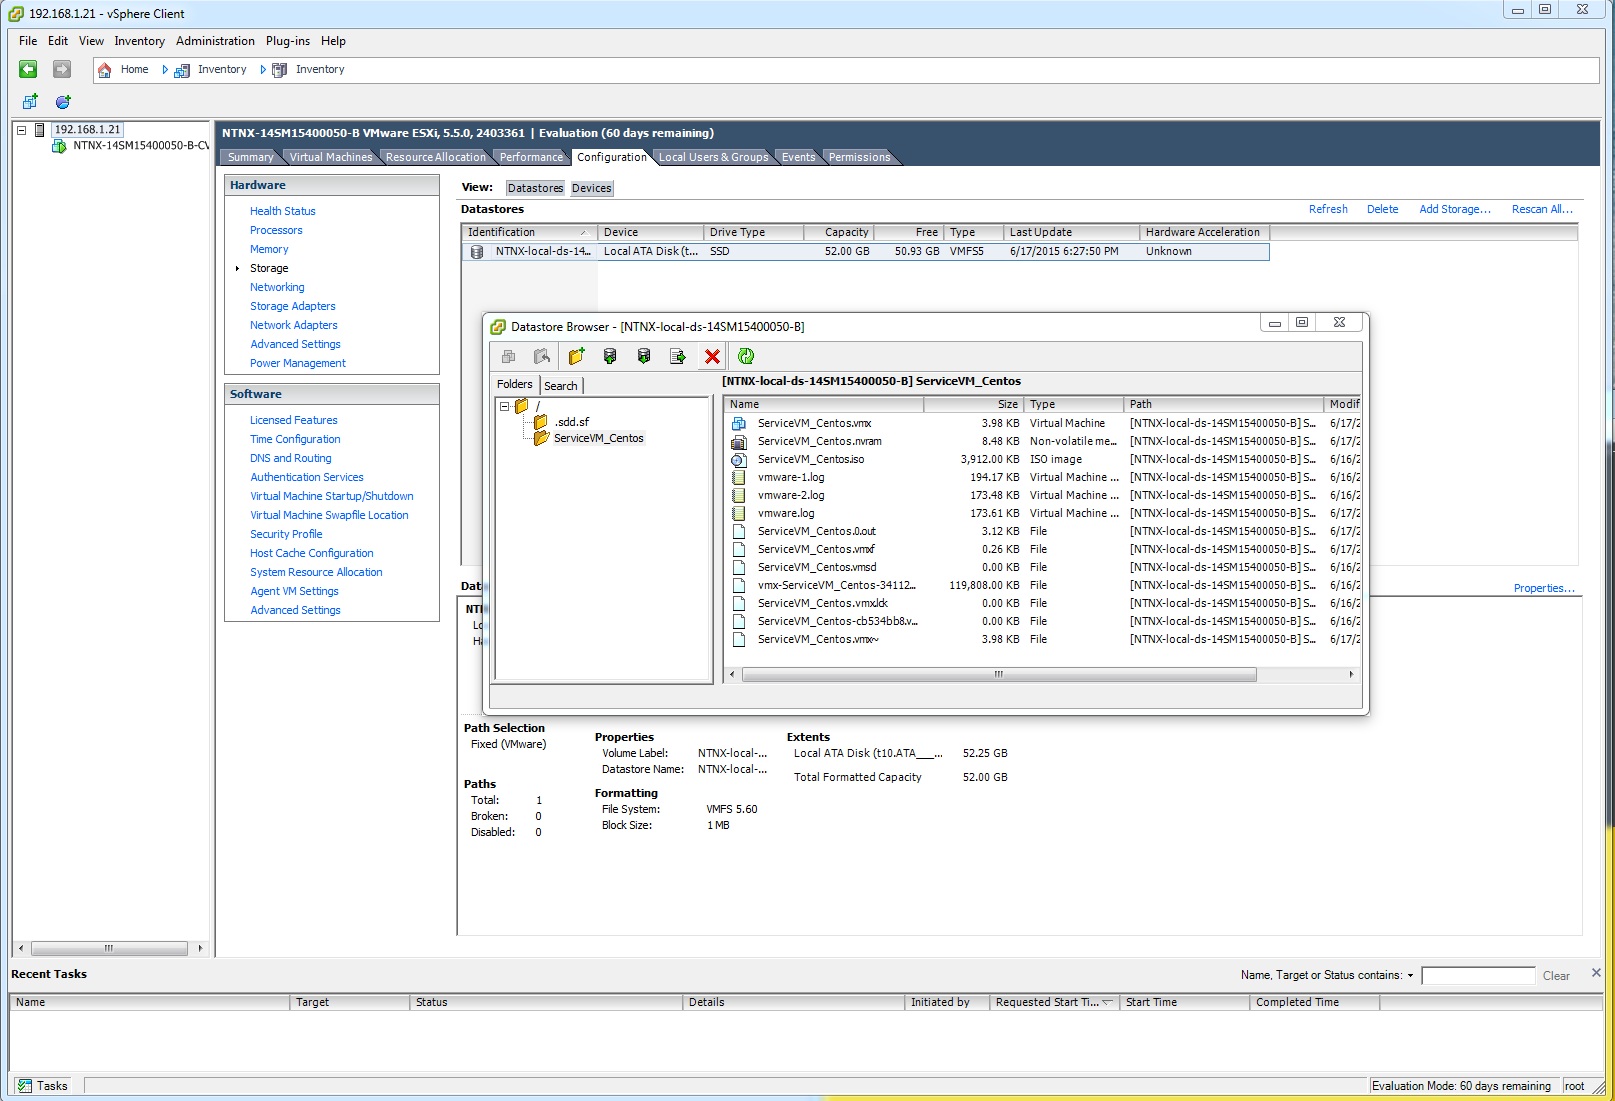
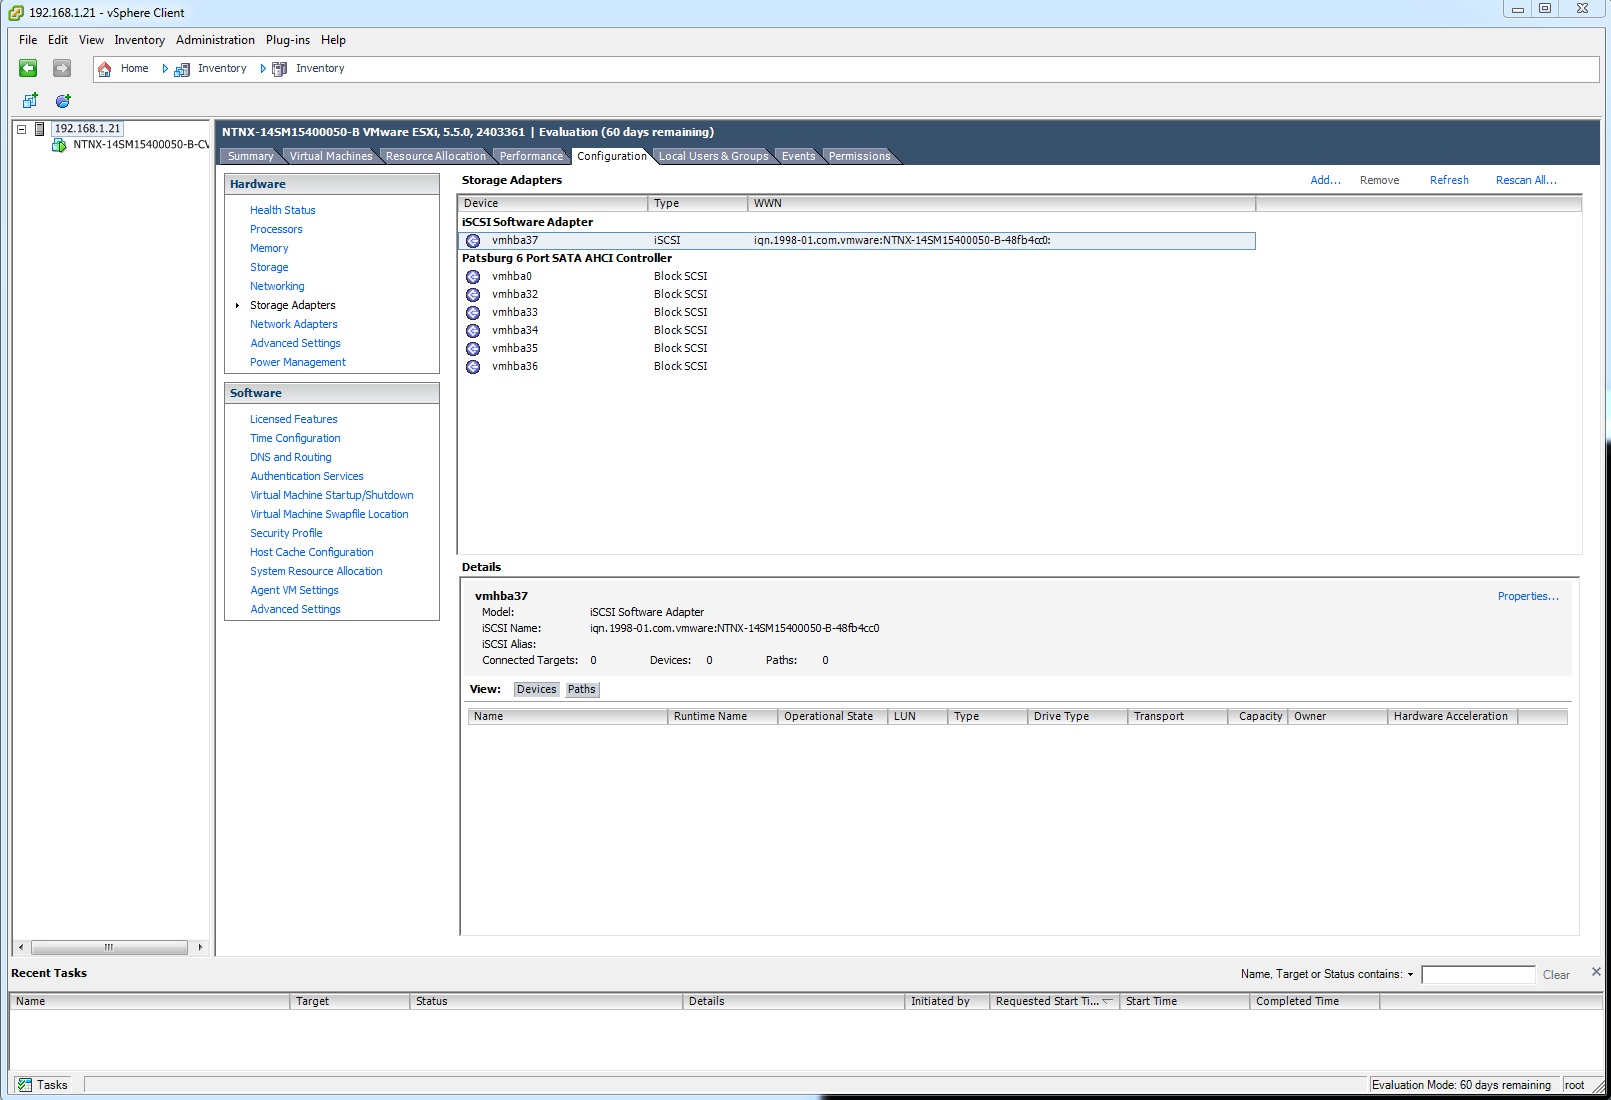
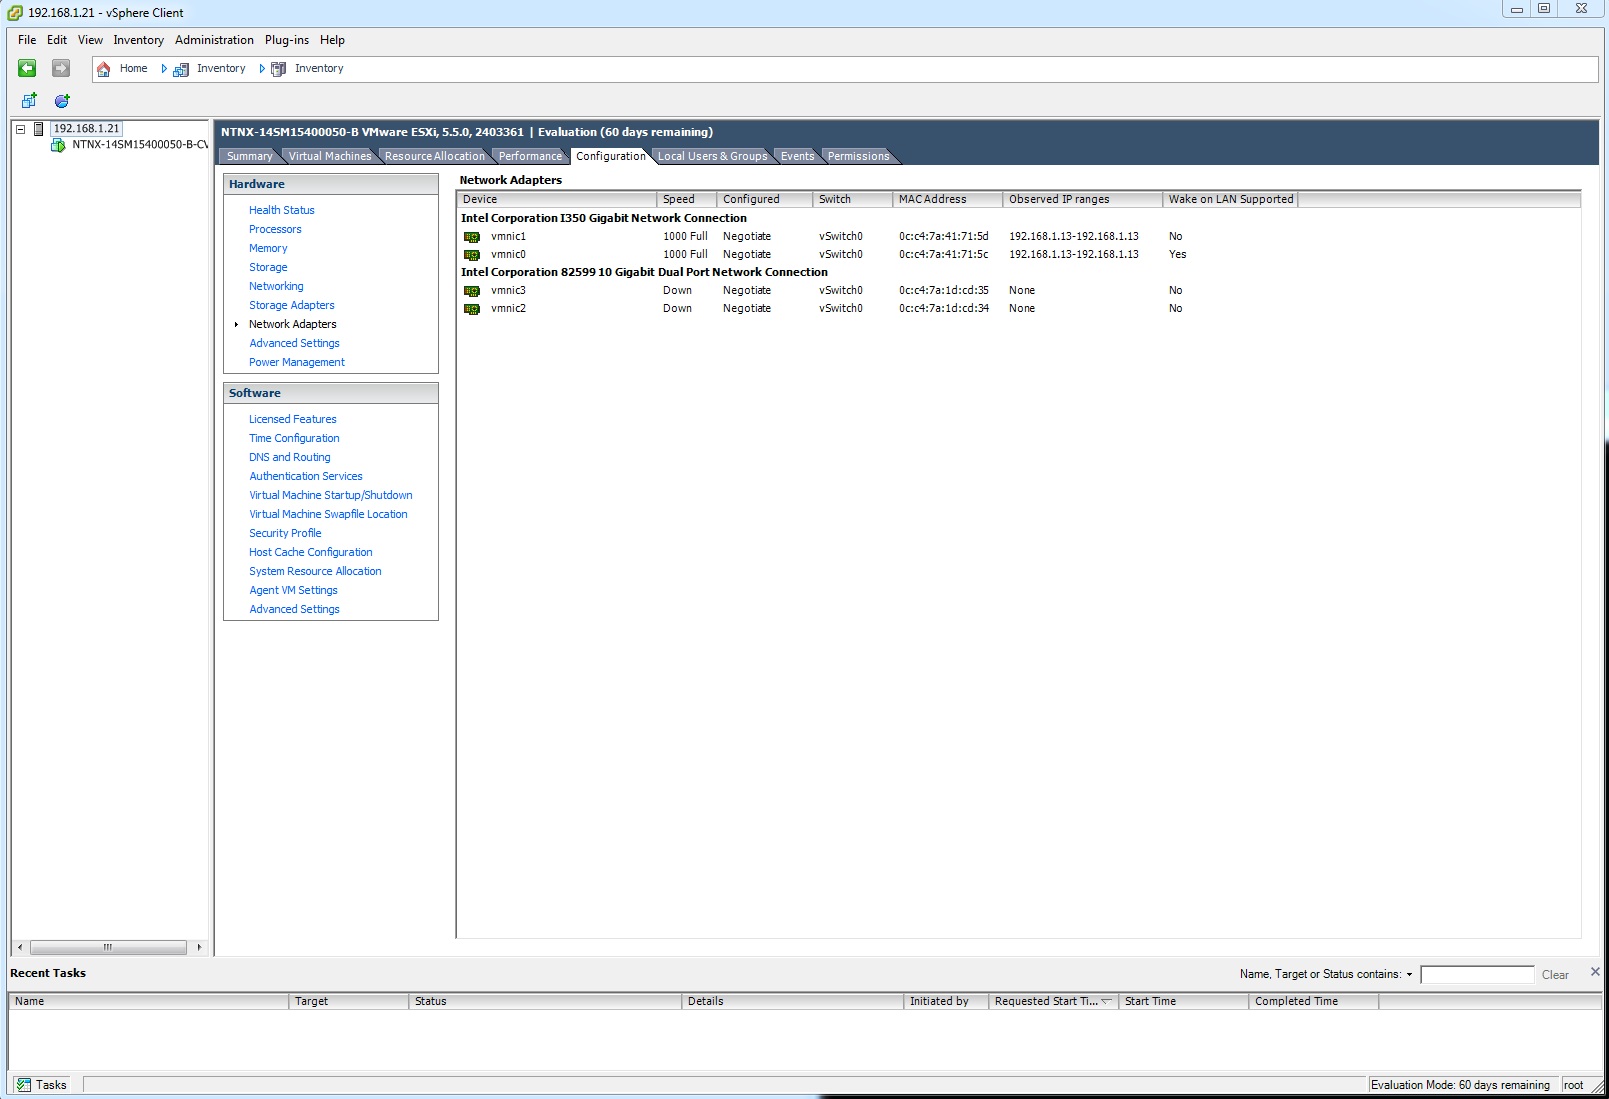
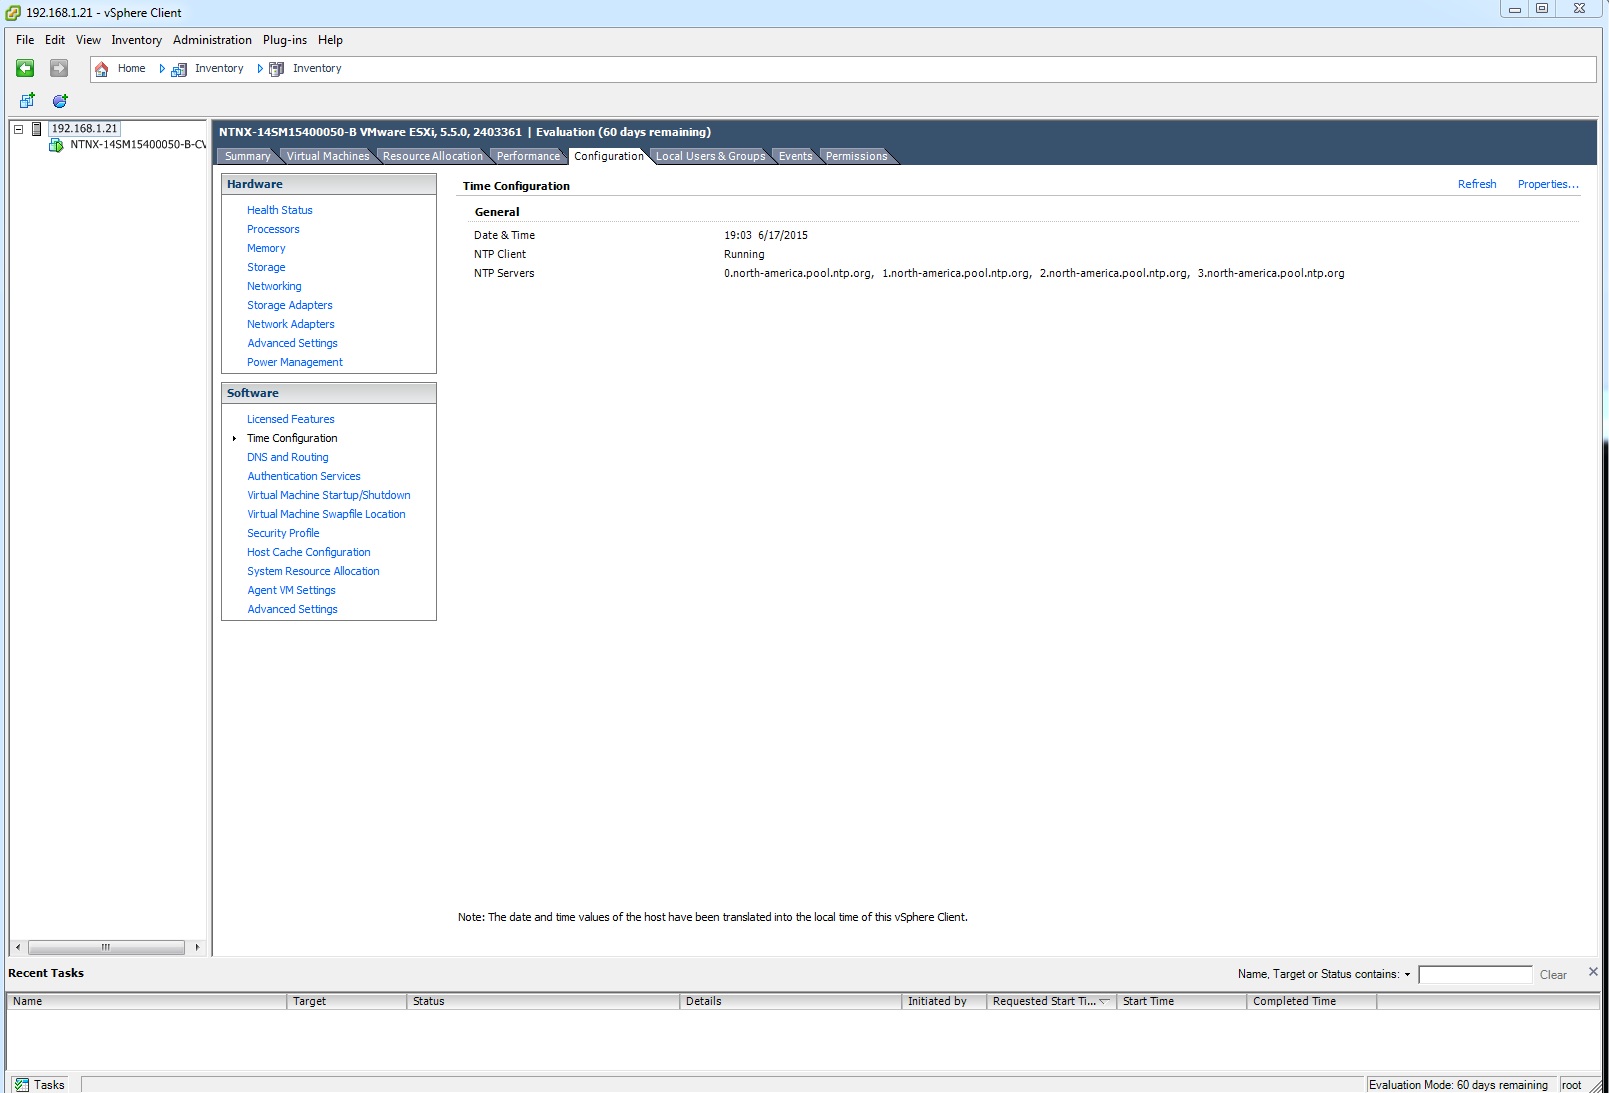
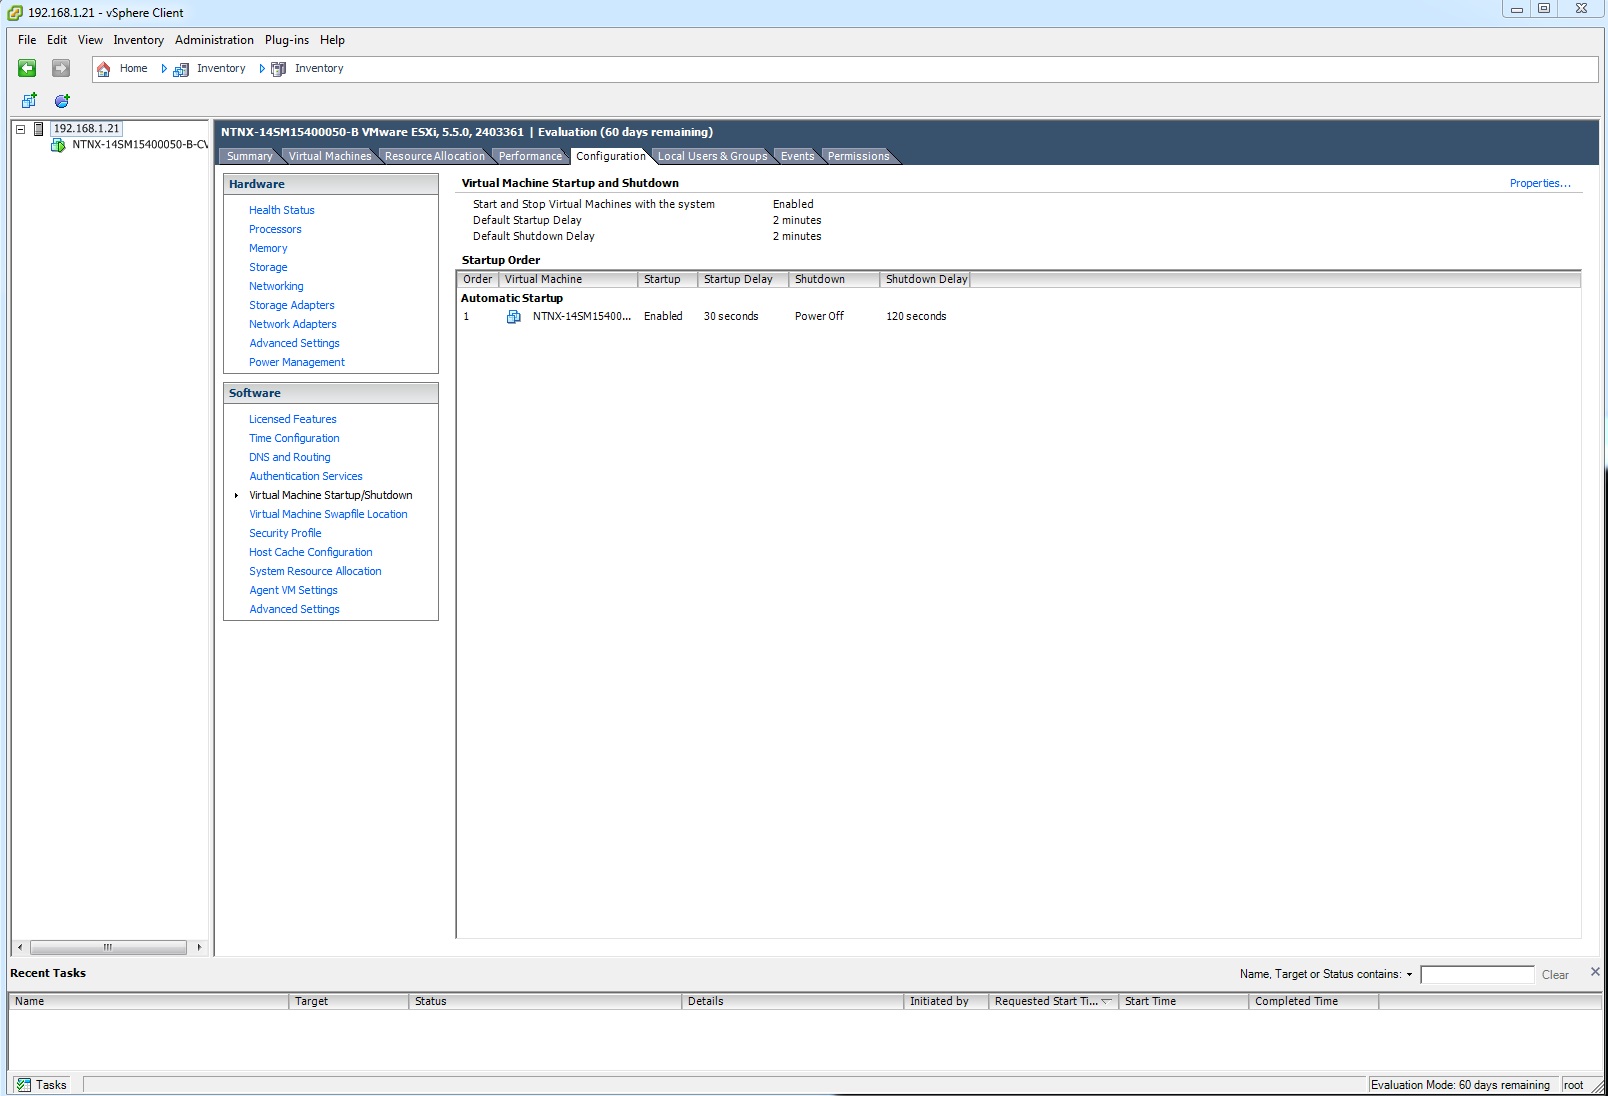
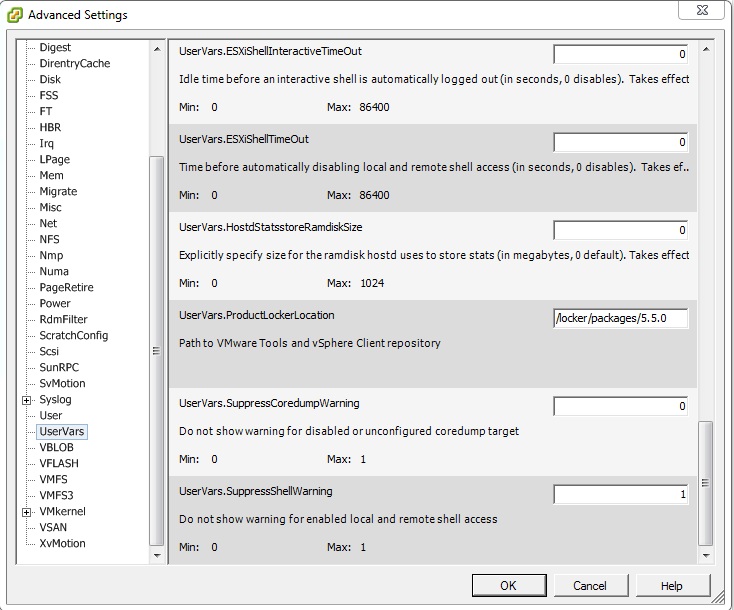
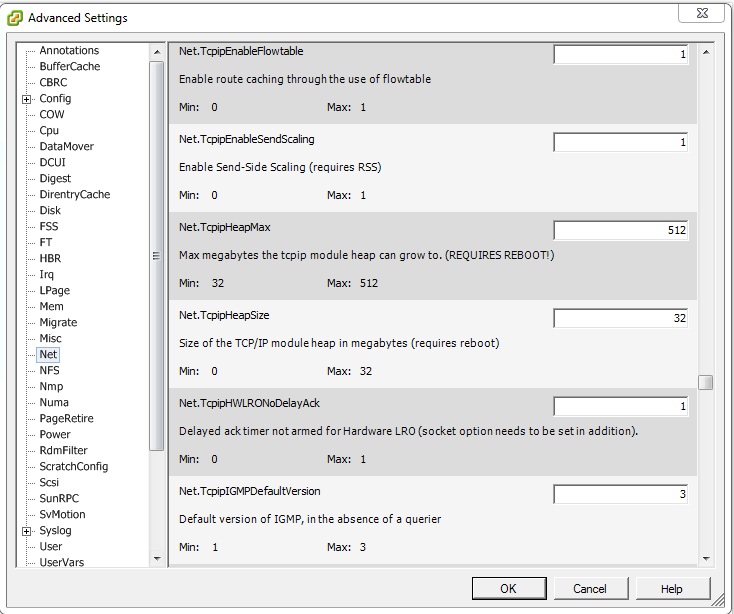
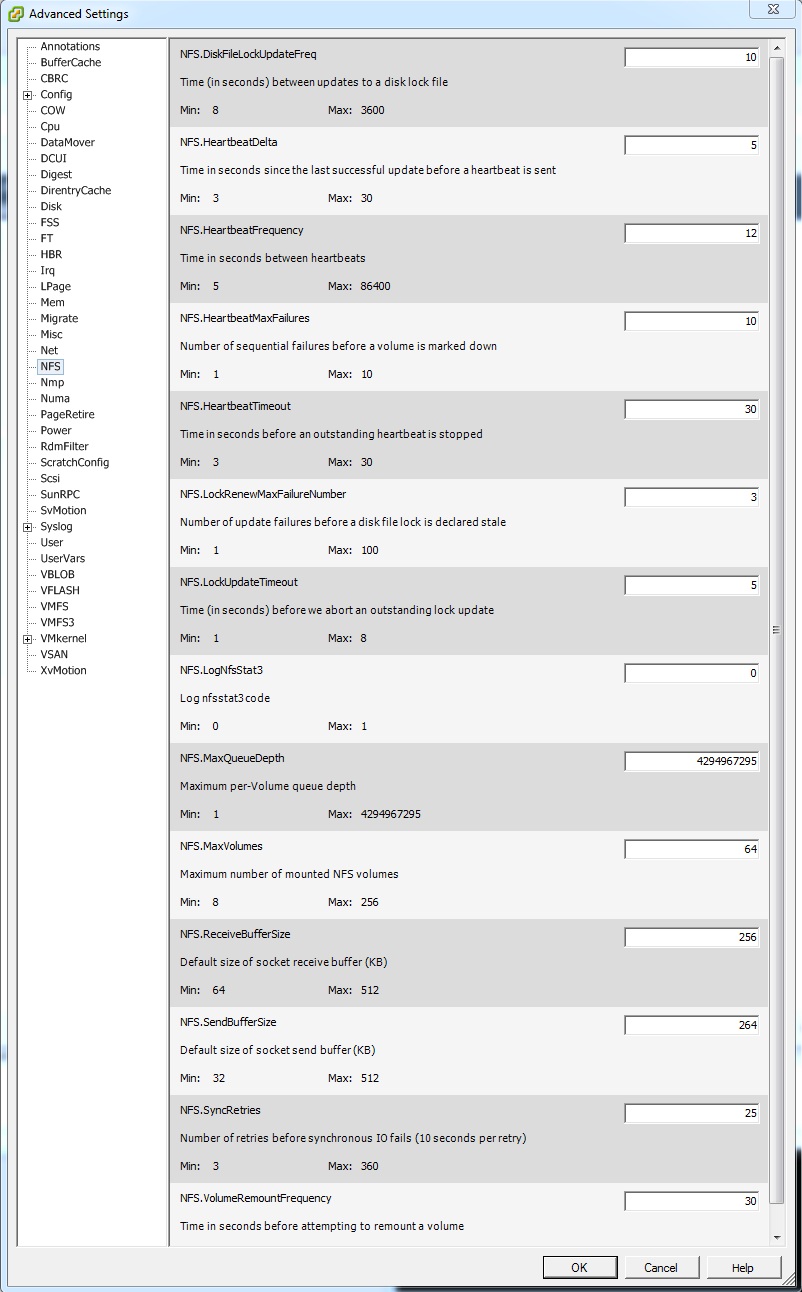
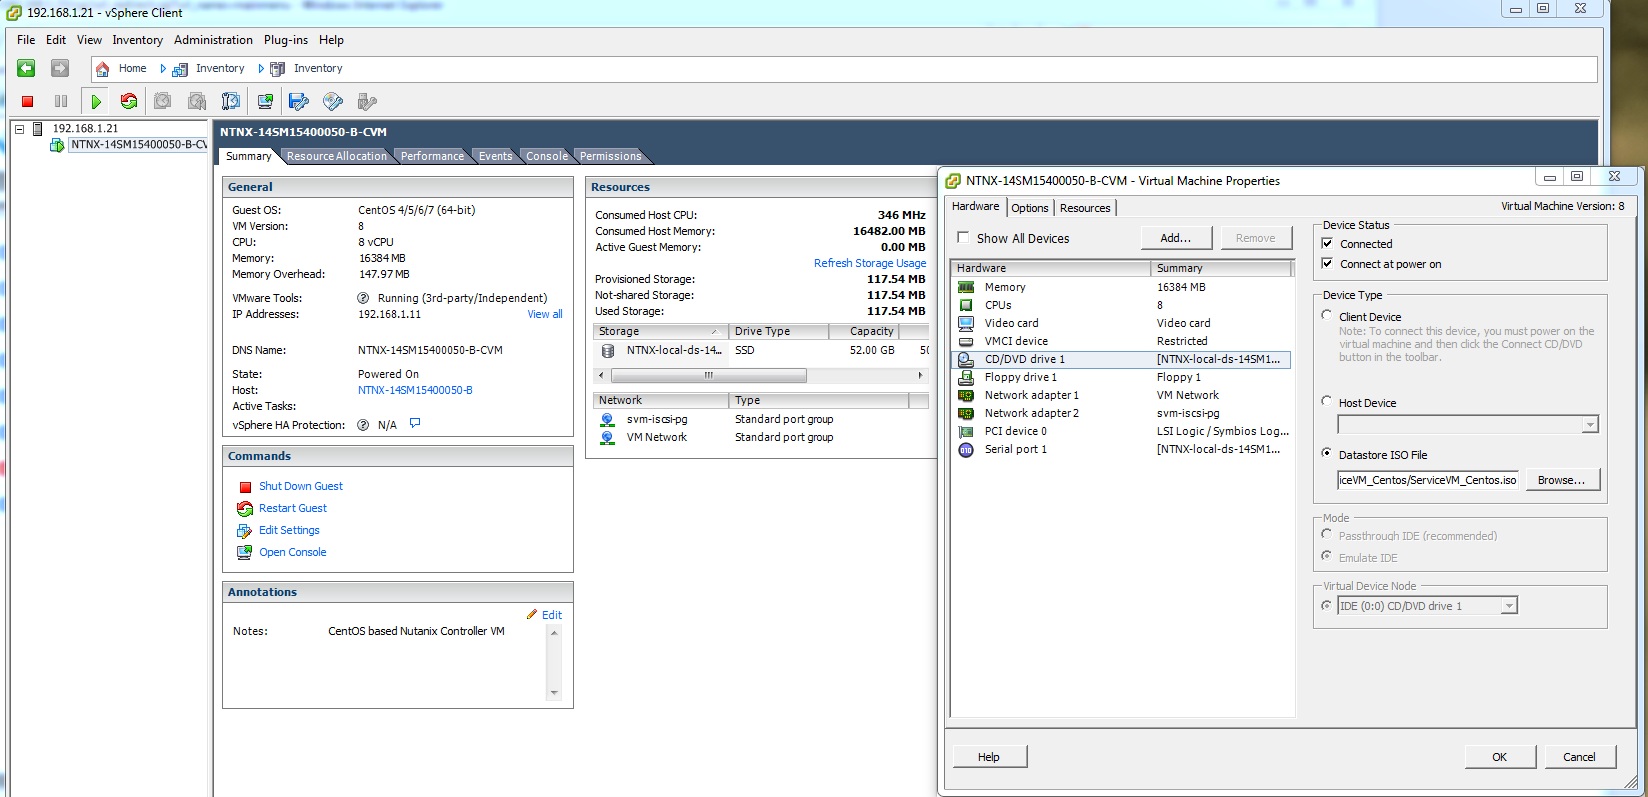
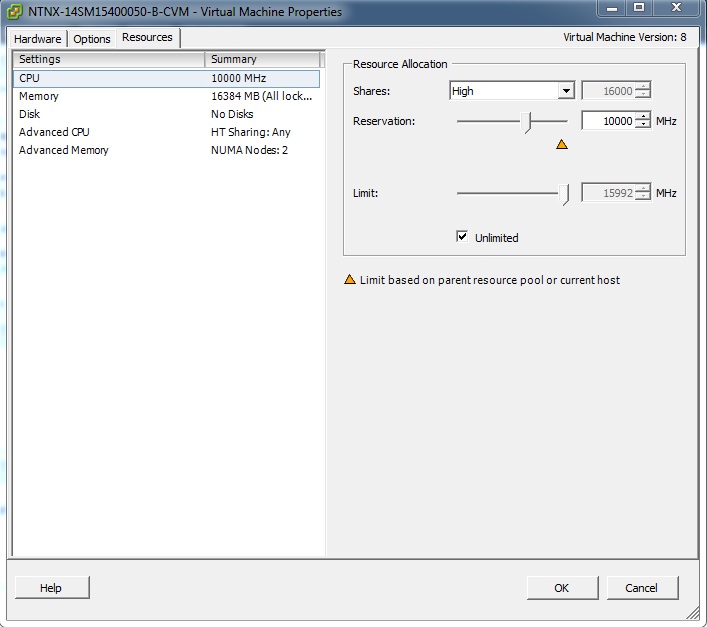
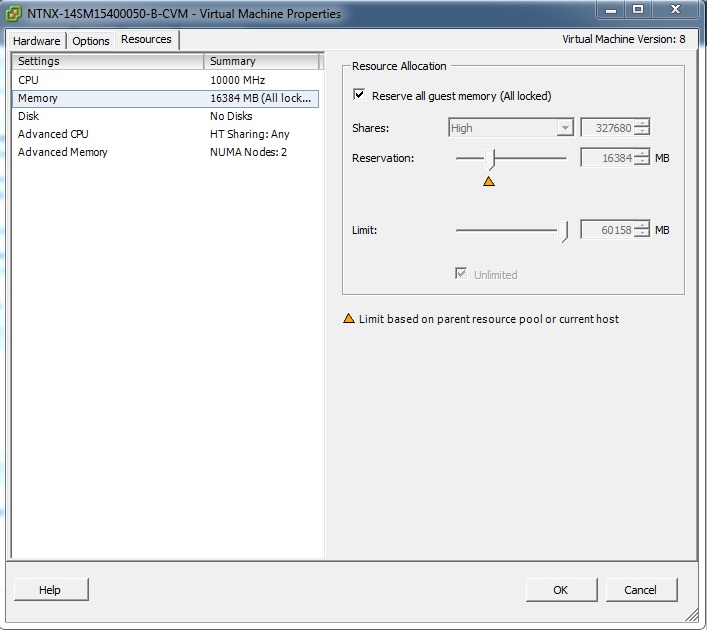
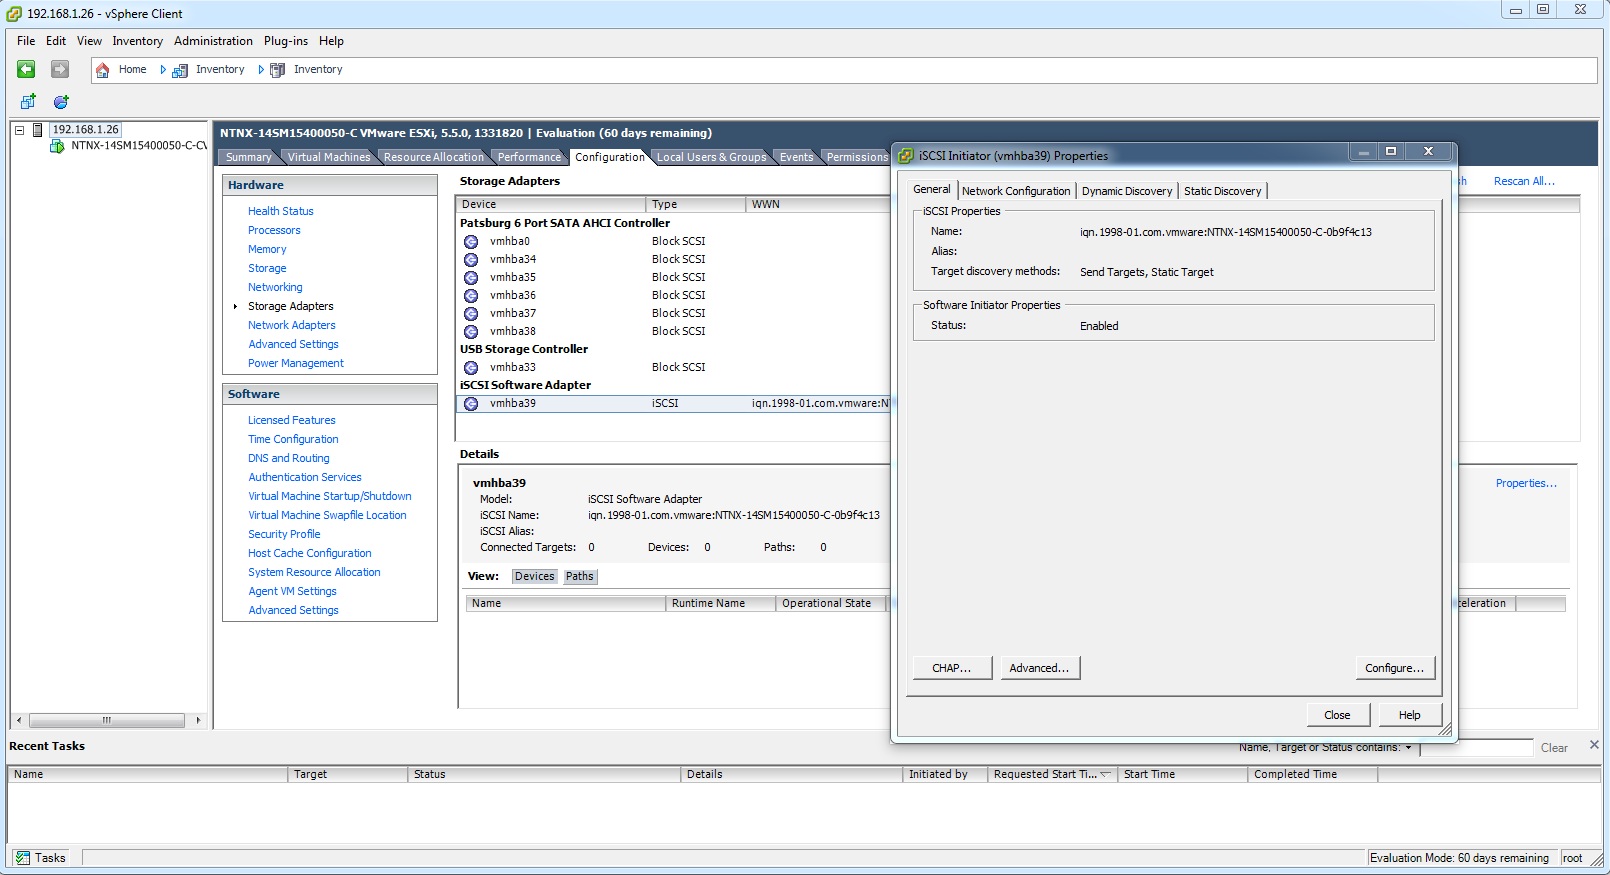
If you connect to ESXi using the vSphere Client, you can see the results of the VIB first time boot script:
- vSS “vSwitchNutanix” with vSS Portgroup “svm-iscsi-pg” and VMkernel port “vmk-svm-iscsi-pg”
- SSH enabled with SSH alert masked (UserVars.SuppressShellWarning)
- Defunct iSCSI Software adapter
- Advanced Software Settings for NFS (Net.TcpipHeapMax, Net.TcpipHeapSize, NFS.MaxVolumes, etc.)
- Controller VM boot from ISO with LSI2008 SCSI Adapter in Passthrough mode and CPU/Memory reservations
- NTP configured
- Virtual Machine Startup/Shutdown enable for CVM
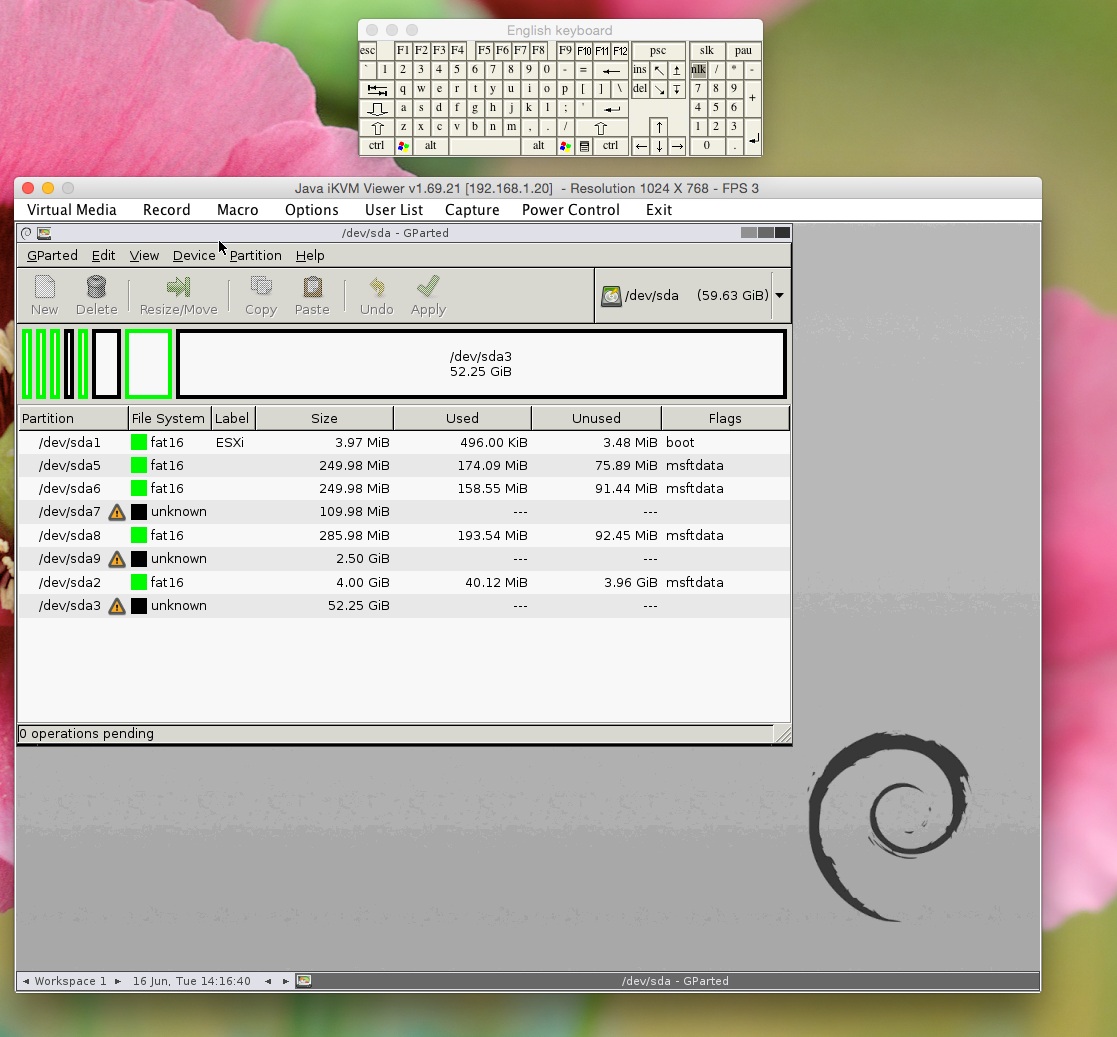
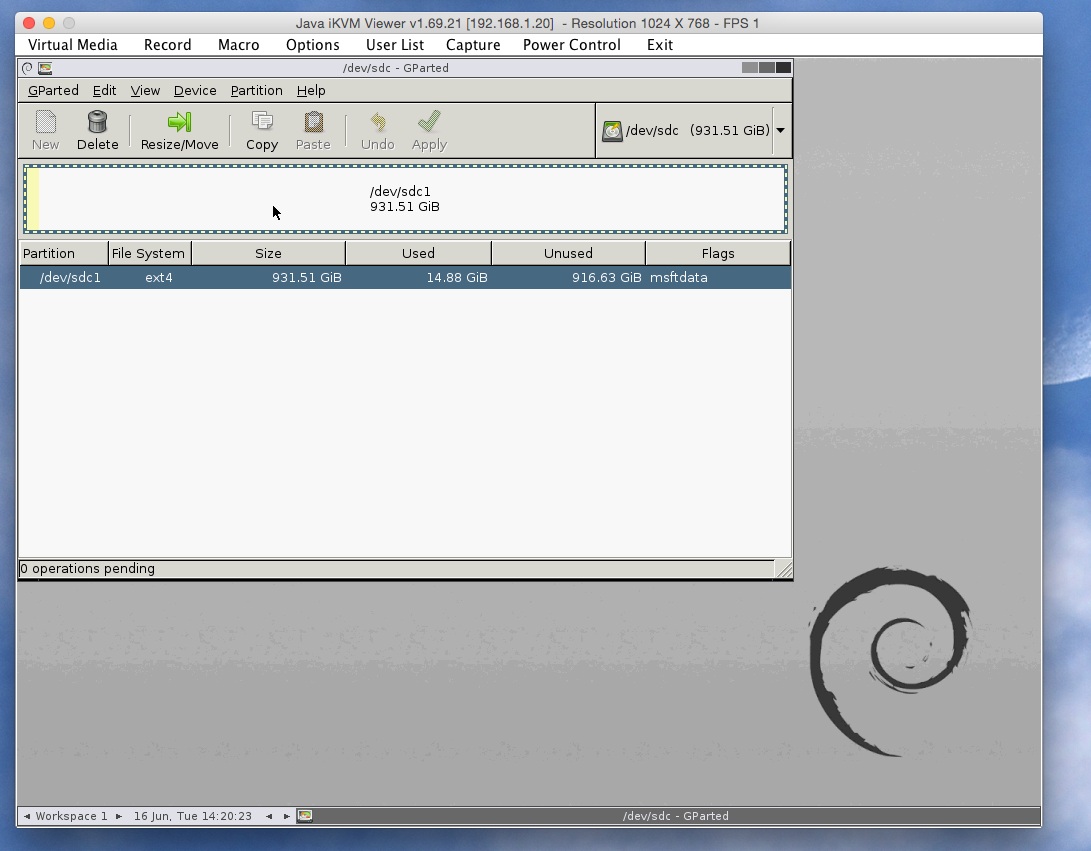
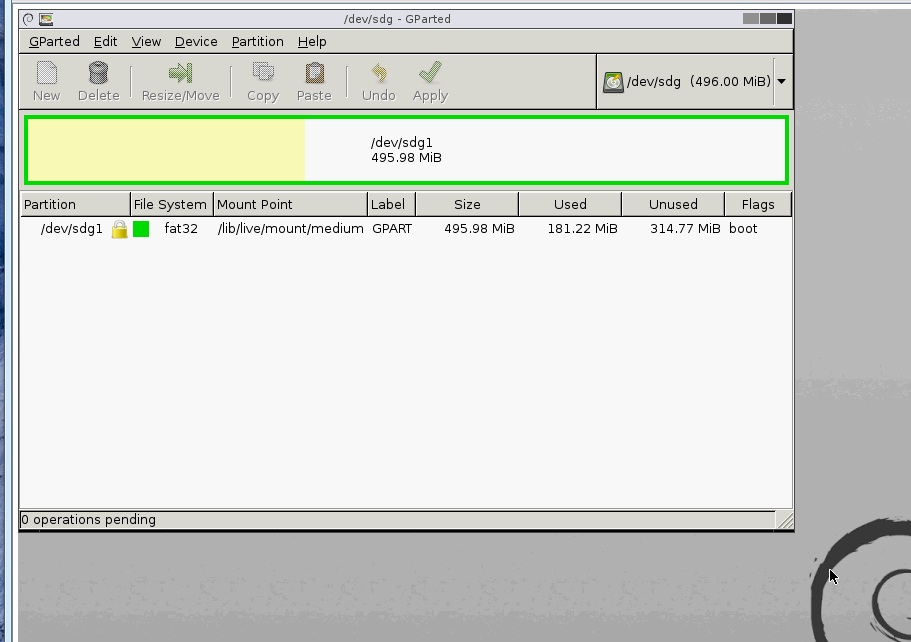
If you run a partition management program like GParted, you will see the following partitions on each Node:
- InnoLite SATADOM fat16 Partitions – where the ESXi boot and CVM (Service VM) files reside
- SSD ext4 Partitions – where the Nutanix Home, Cassandra, OpLog, Content Cache and Extent Store reside
- HDD ext4 Partitions – where the Curator and Extent Store reside
vSphere Client to ESXi host images:


GParted images:


Thank you for the post about Nutanix XCP, you helped me a lot.
Thank You for the post for Nutanix esxi installation
If all I need to do is change the ESXi Host names and Subnet Mask will it break the cluster?
ESXi hostname, no, Subnet Mask, yes. Contact Nutanix Support to take you through the process.