This is part 6 of the vSphere 6.5 Basics, detailing the setup of vCenter HA using the Basic method. If you have used vCenter Server Heartbeat (based upon Neverfail), then you will certainly appreciate the simplicity of this feature.
This is a 6 part series, describing the installation basics of vSphere 6.5:
- vSphere 6.5 Basics – Part 1 – ESXi Install
- vSphere 6.5 Basics – Part 2 – vCenter Server Appliance Install
- vSphere 6.5 Basics – Part 3 – vCenter Server Install with Windows Server 2016 (with vSphere Update Manager option)
- vSphere 6.5 Basics – Part 4 – Migrate vCenter Server 6.0 on Windows to vCSA 6.5
- vSphere 6.5 Basics – Part 5 – Upgrade vCSA 6.0 to vCSA 6.5
- vSphere 6.5 Basics – Part 6 – Build a vCenter HA cluster
This post has been constructed using the vCenter Server 6.5.0a (Build 4944578) release.
The simplest setup (Basic method) of vCenter HA is with an embedded PSC and a self-managed vCSA (ie. appears as an inventory object within the vSphere Web Client).
An external PSC architecture requires a load-balancer in front of the multi-PSC instances. If the vCSA instance is not self-managed, then the Advanced method must be used to setup vCenter HA (outside the scope of this post).

Prerequisites
- You have vCSA with an embedded PSC deployed to an ESXi host and the vCSA instance appears in the vSphere Web Client (self-managed). This allows the Basic method to be used.
- You have an ESXi host that has enough resources to host the vCenter Server Appliance passive node and witness node.
- Dedicated vCenter HA Portgroup has been created (“vCenter HA” portgroup used here) and a dedicated IP Subnet for vCenter HA has been allocated (172.16.0.0/24 used here).
Create vCenter HA Network
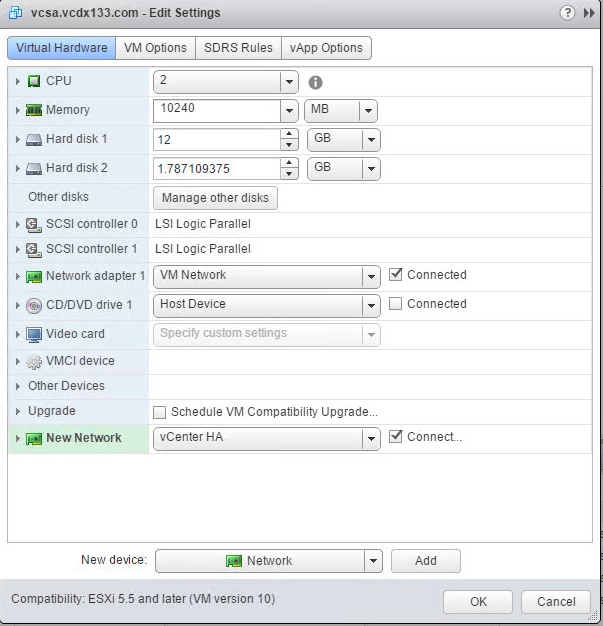
- Access the vSphere Web Client and add a second vNIC to the vCenter Server Appliance by editing the VM Hardware Settings. Select the vCenter HA Portgroup and select Connect. Then press “OK”.
- Reboot the vCSA instance.
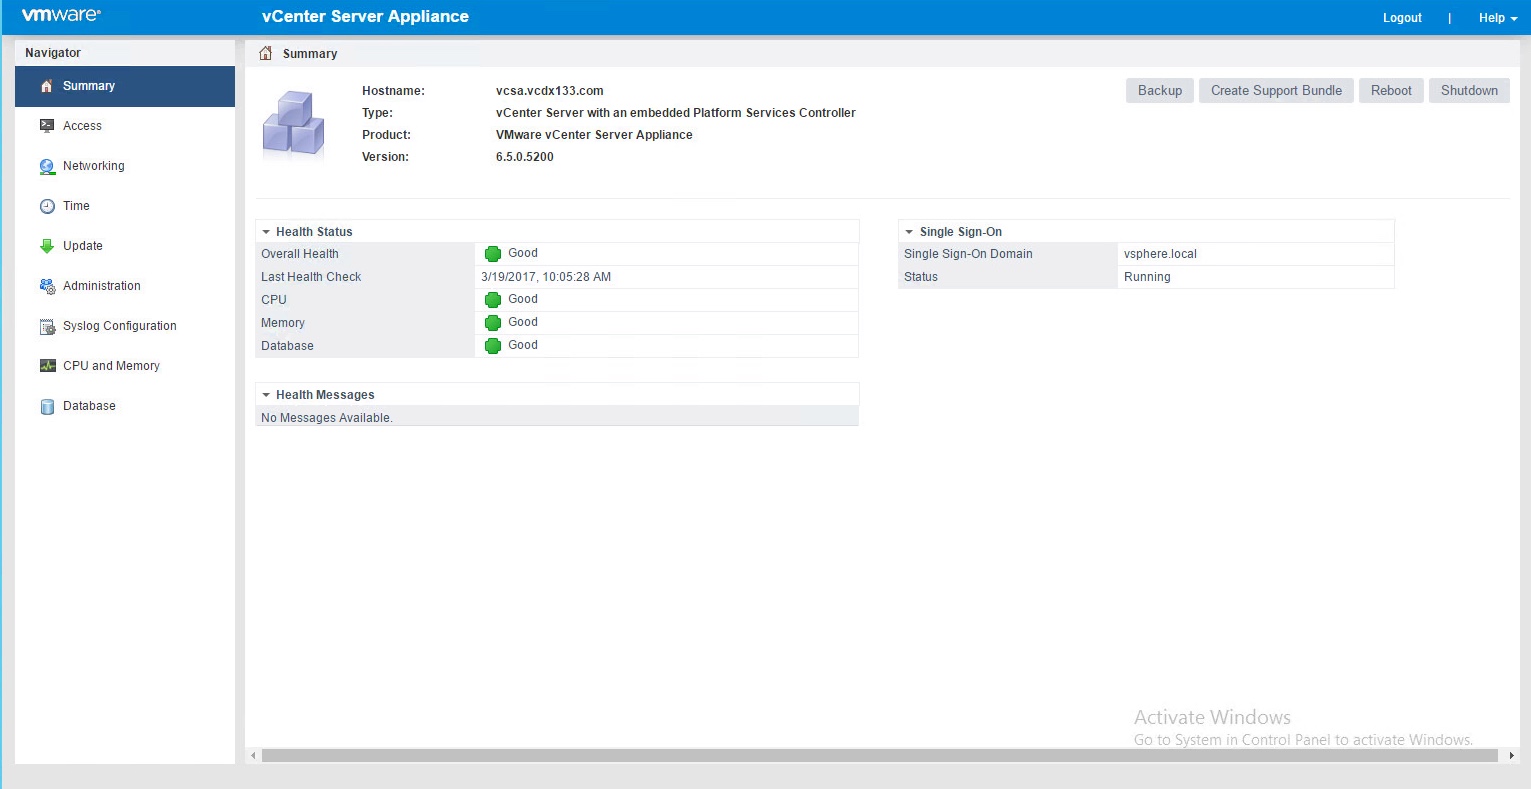
- Access the vCSA Appliance Management console (https://<IP Address>:5480/) and login with the “root” credentials.
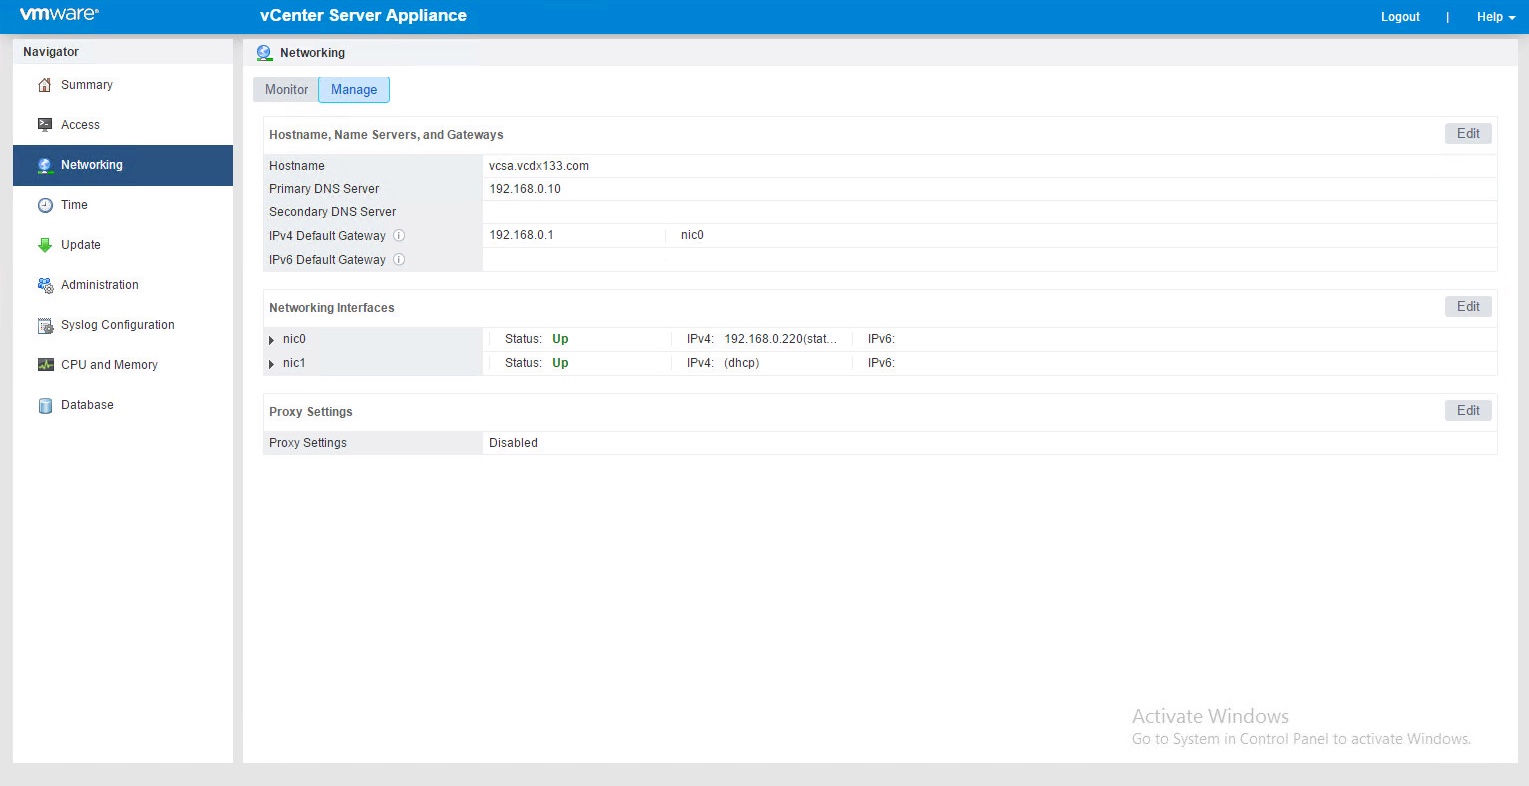
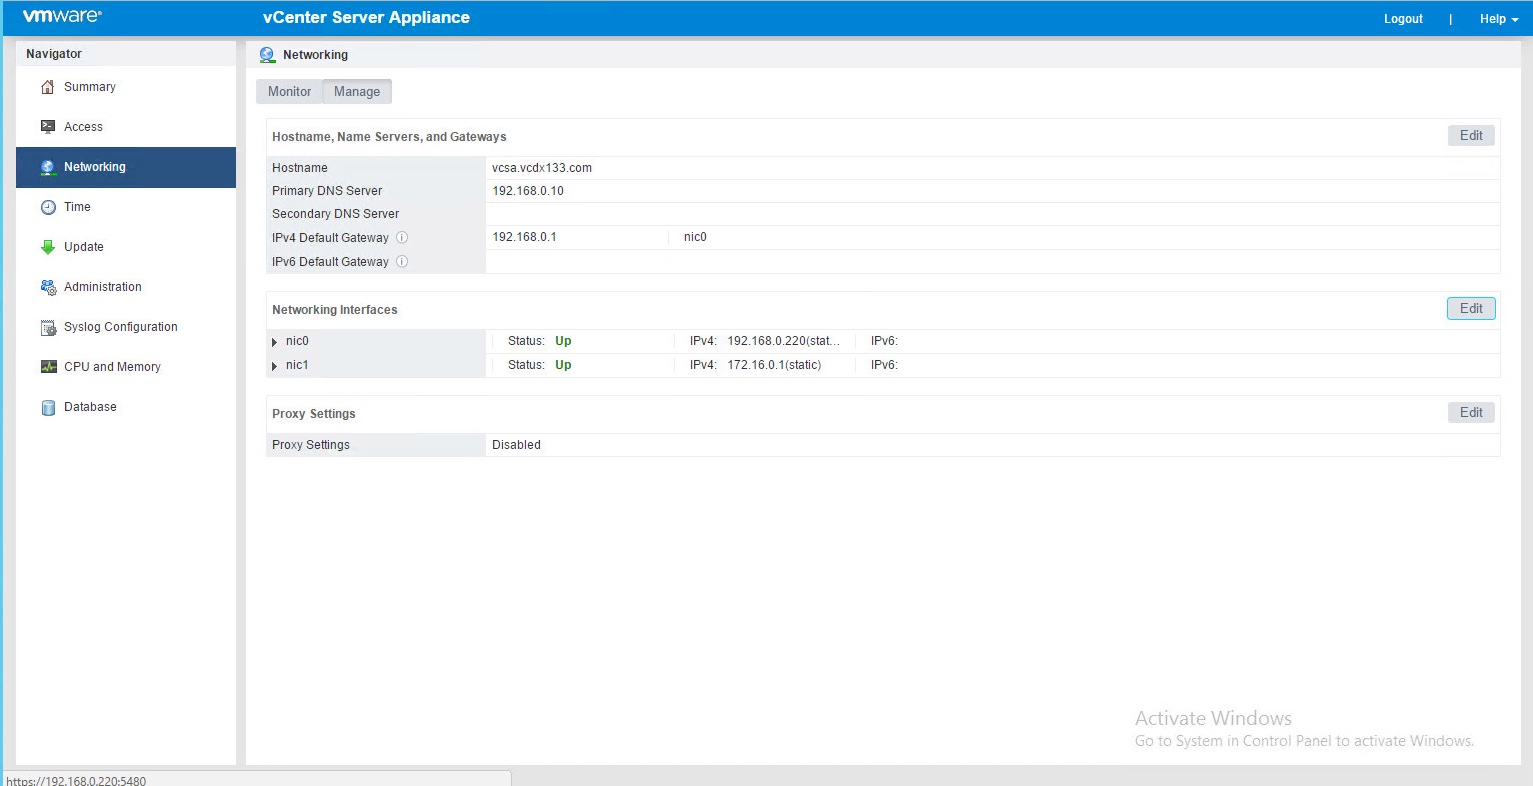
- From the Navigator, select “Networking” and then the “Manage” object. Press “Edit” and expand the “nic1” object.
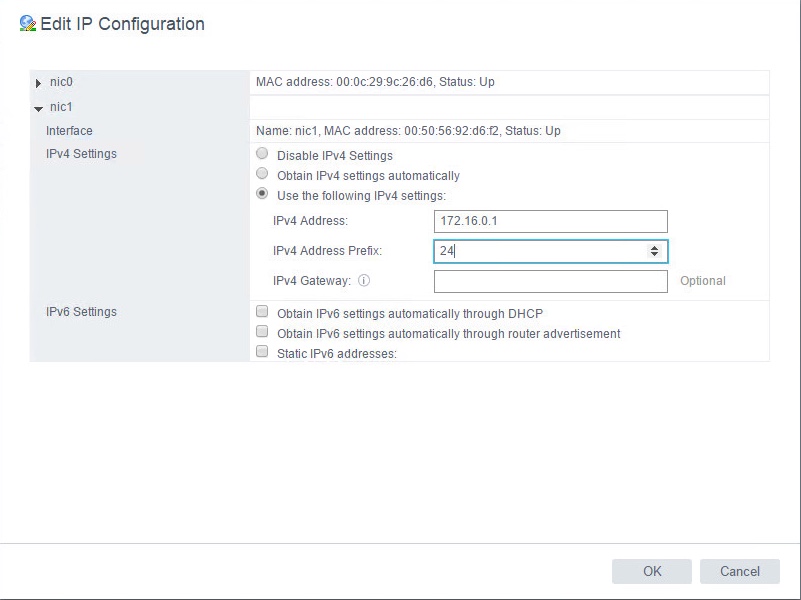
- Select “Use the following IPv4 settings:”, enter an IPv4 address from the vCenter HA address space and the IPv4 address Prefix (Class C subnet of 255.255.255.0 has a prefix of 24 bits). The IPv4 Gateway is optional. Then press “OK”.
- The “nic0” and “nic1” interfaces should be listed as “Up” and “static”.
Enable vCenter SSH
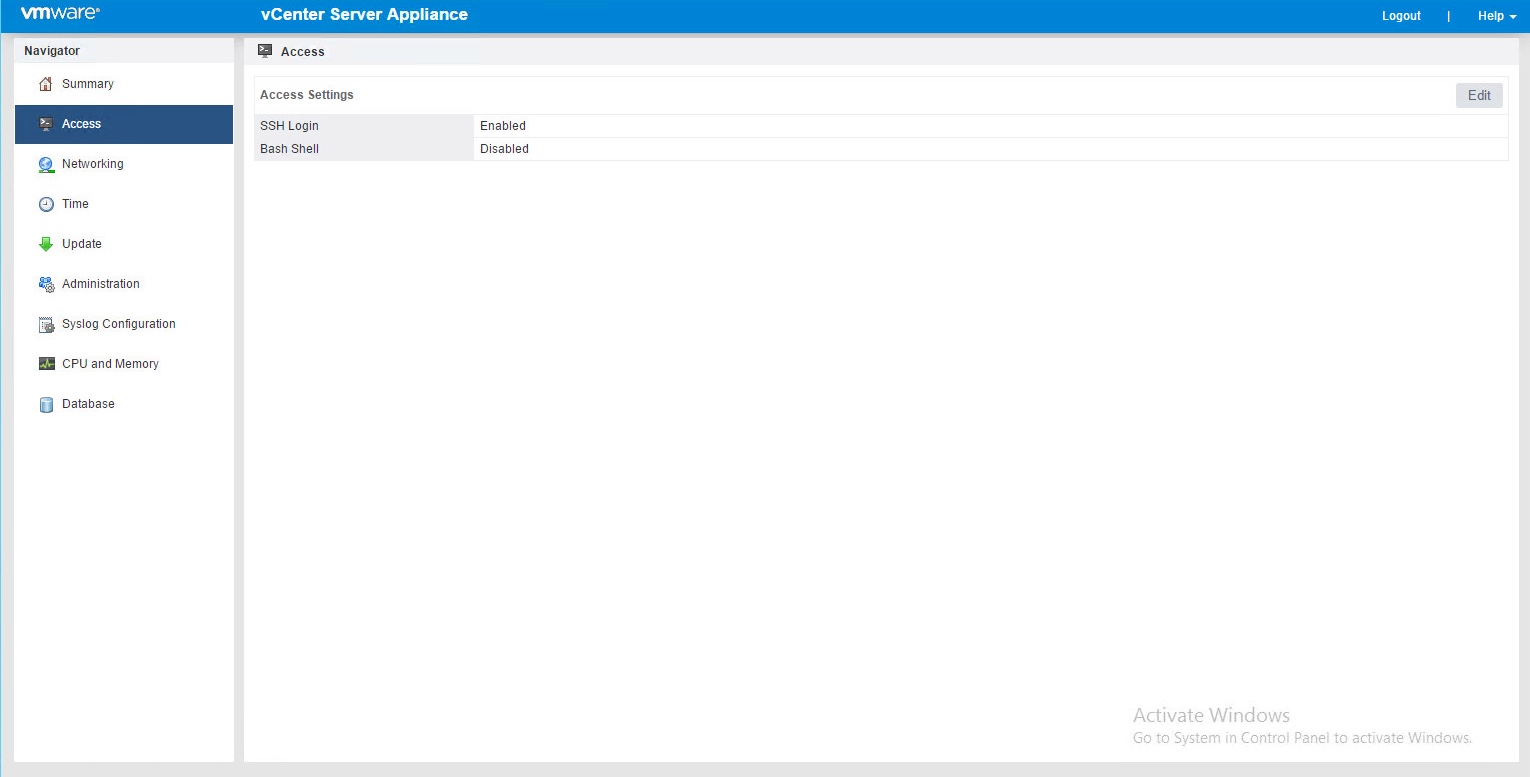
- Access the vCSA Appliance Management console (https://<IP Address>:5480/) and login with the “root” credentials.
- From the Navigator, select “Access” and check that “SSH Login” is “Enabled”.
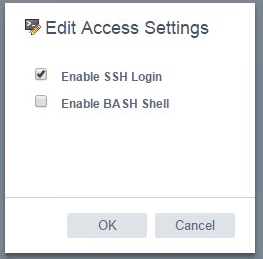
- If not, select “Edit”, tick the “Enable SSH Login” option and then press “OK”.
Configure vCenter HA via the Basic Method
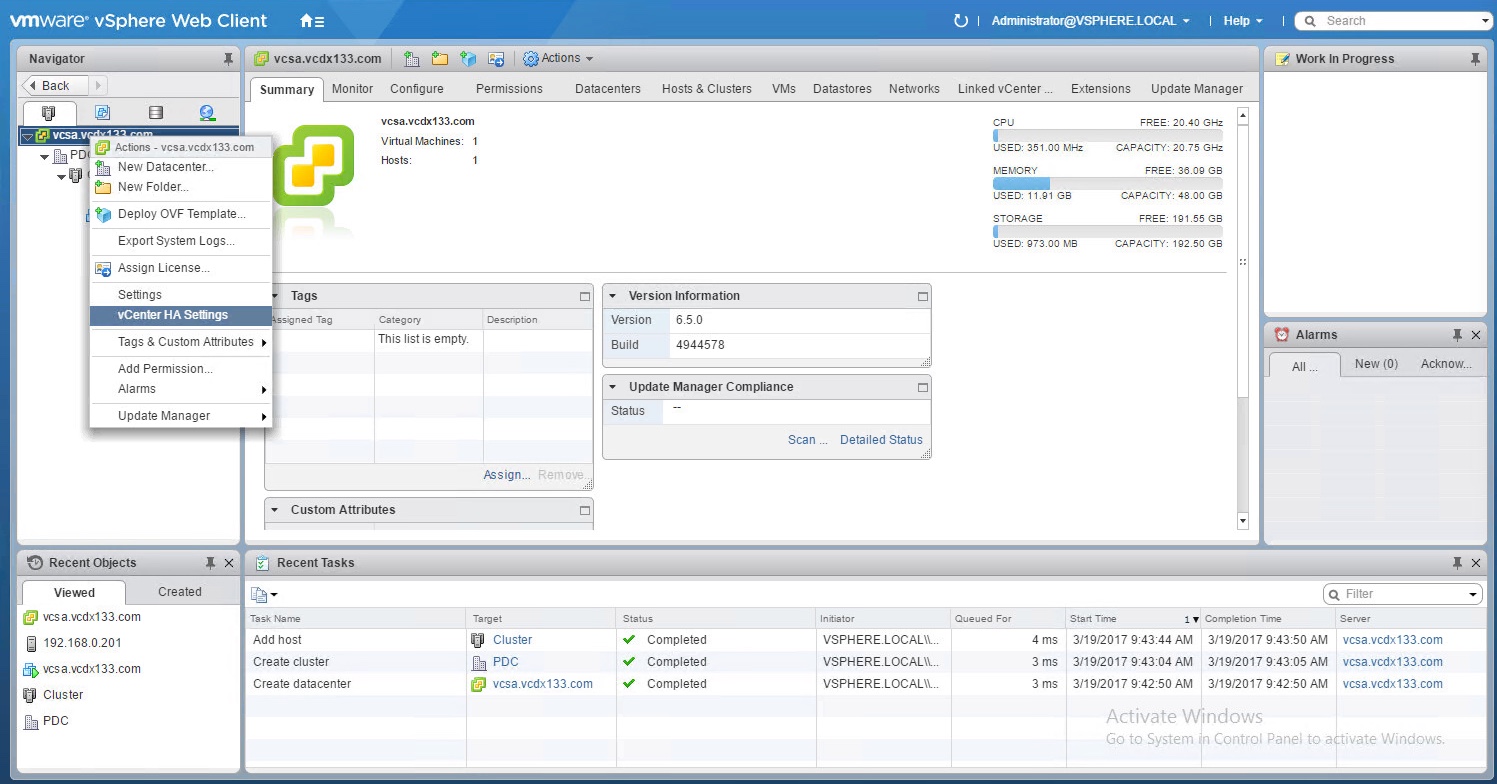
- Access the vSphere Web Client, select the vCenter Server object at the root of the Navigator, right mouse click and select “vCenter HA Settings”.
- From the “vCenter HA” screen, press the “Configure” button.
- The “Configure vCenter HA” wizard window will appear.
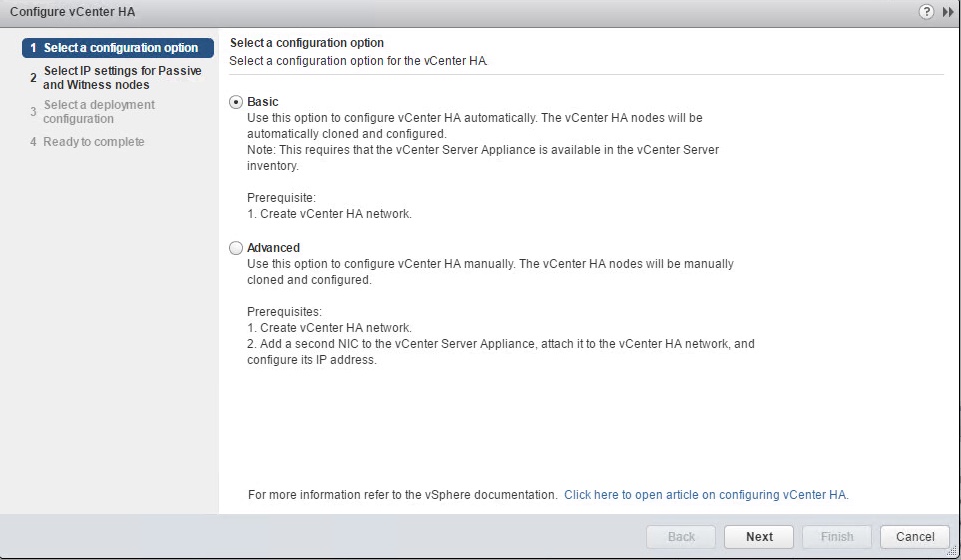
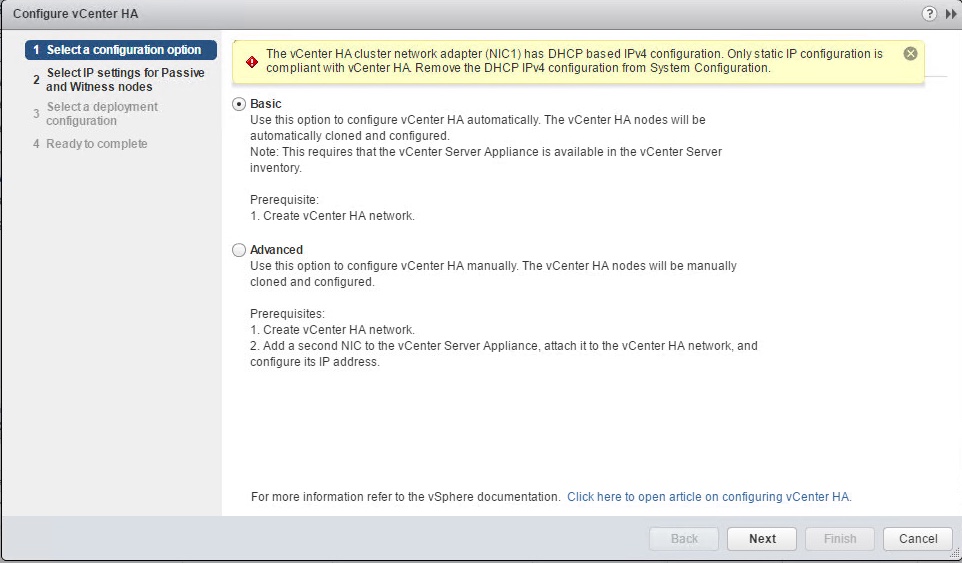
- In the “Select a configuration option” window, select “Basic” and press “Next”.
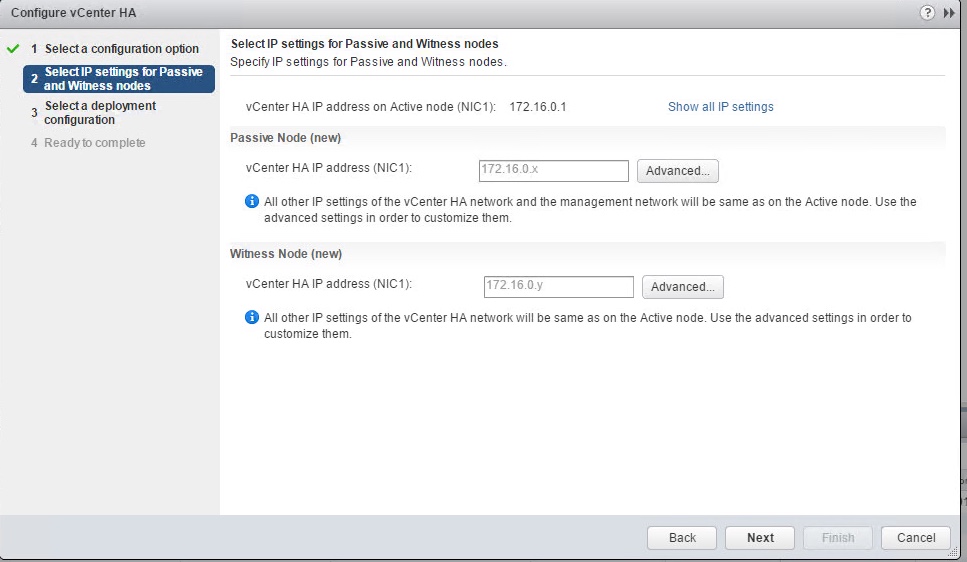
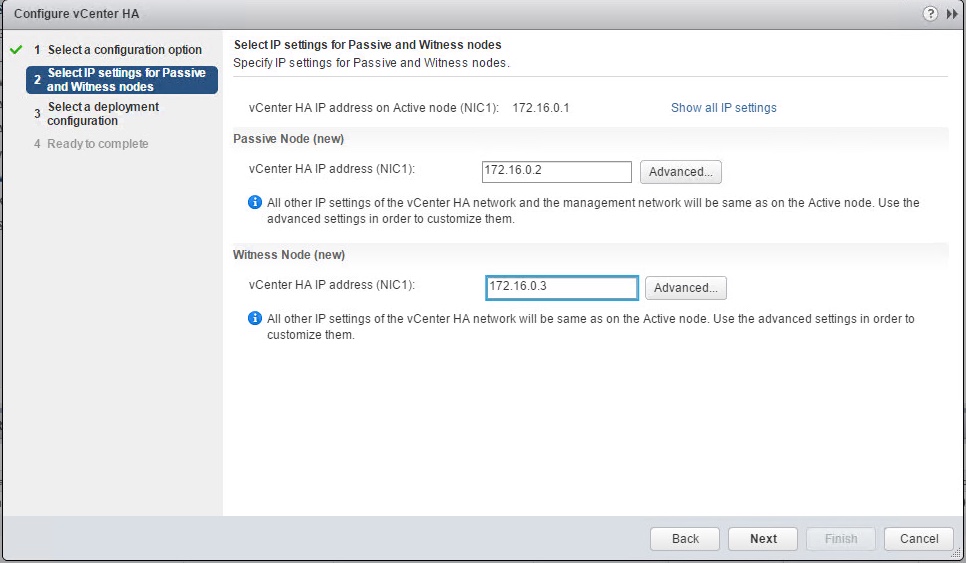
- In the “Select IP settings for Passive and Witness nodes” window, enter the IP Addresses for the “Passive Node (new)”and “Witness Node (new)” and press “Next”. These IP Addresses should be from the same subnet as configured for “nic1” earlier.
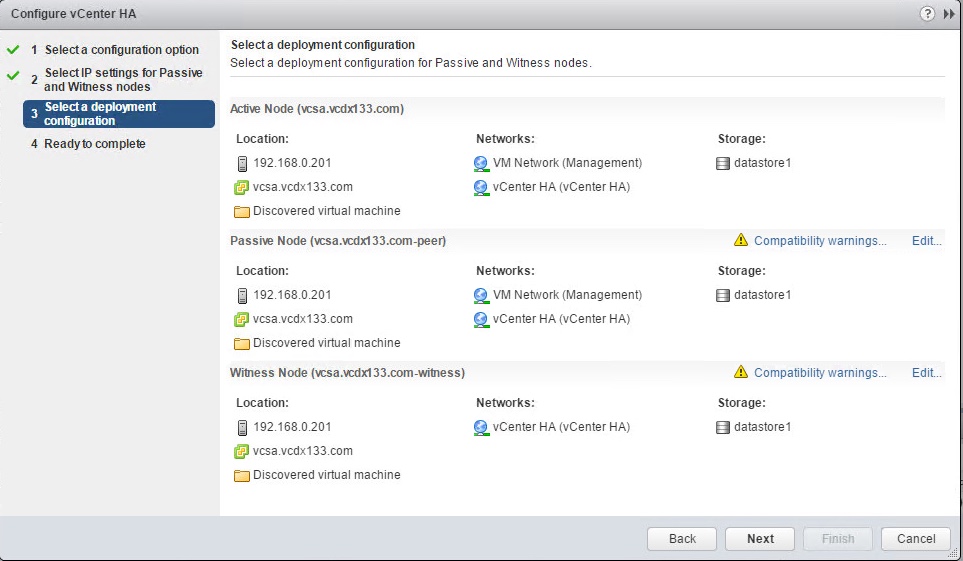
- In the “Select a deployment configuration” window, check that the “Passive Node”and “Witness Node” are on different hosts and datastores from the “Active Node” and press “Next”. If they are not on separate ESXi hosts and Datastores, press the “Edit” button to change.
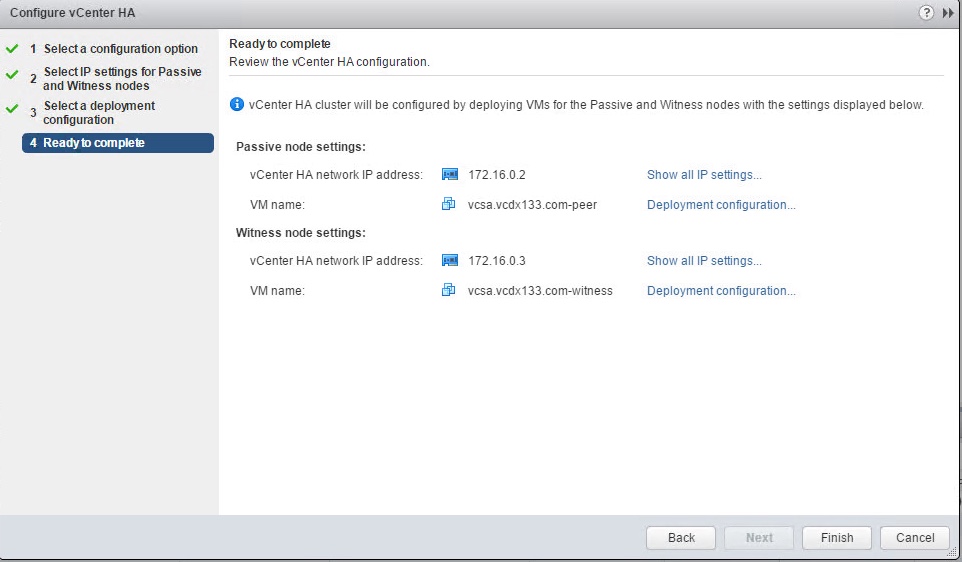
- In the “Ready to complete” window, verify the “Passive Node”and “Witness Node” settings and press “Finish”.
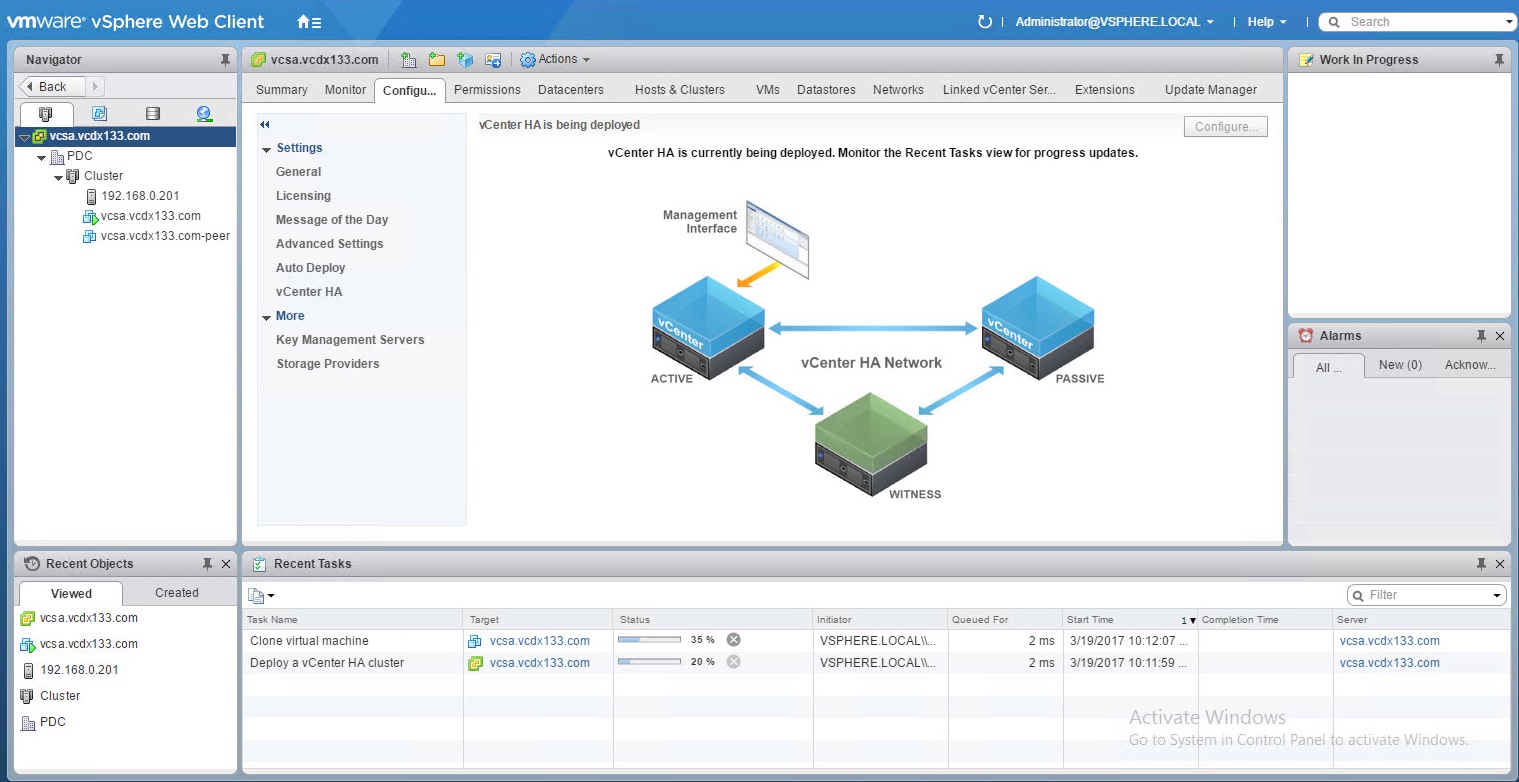
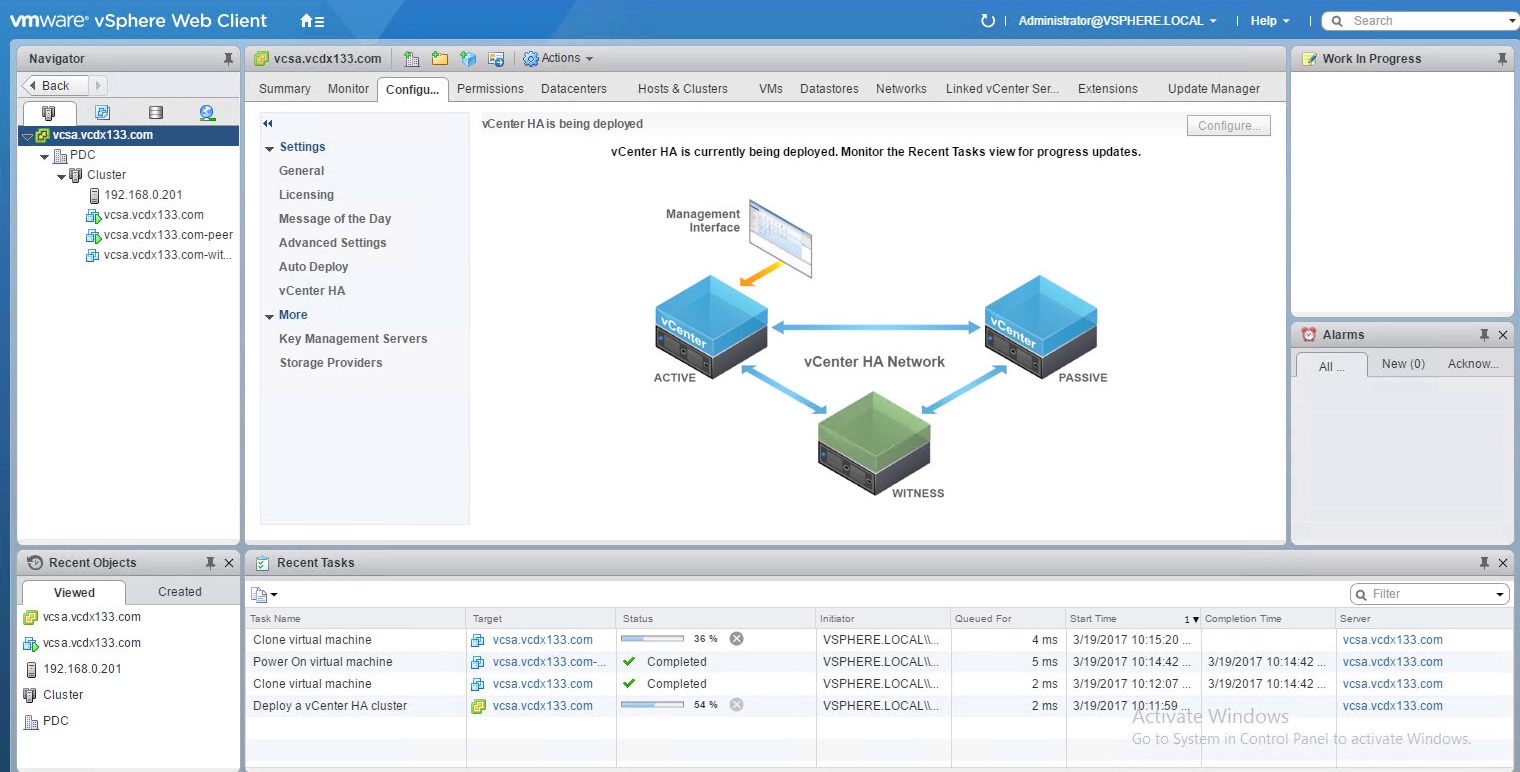
- vCenter Server will now start the “Deploy a vCenter HA Cluster” task. When this task reaches 100%, the Passive and Witness nodes will be fully deployed and the vCenter HA cluster will be active.
- It is also worth creating DRS VM Anti-affinity rules or VM-Host rules to ensure the vCenter HA cluster is spread across multiple hosts.


vCenter HA Operations
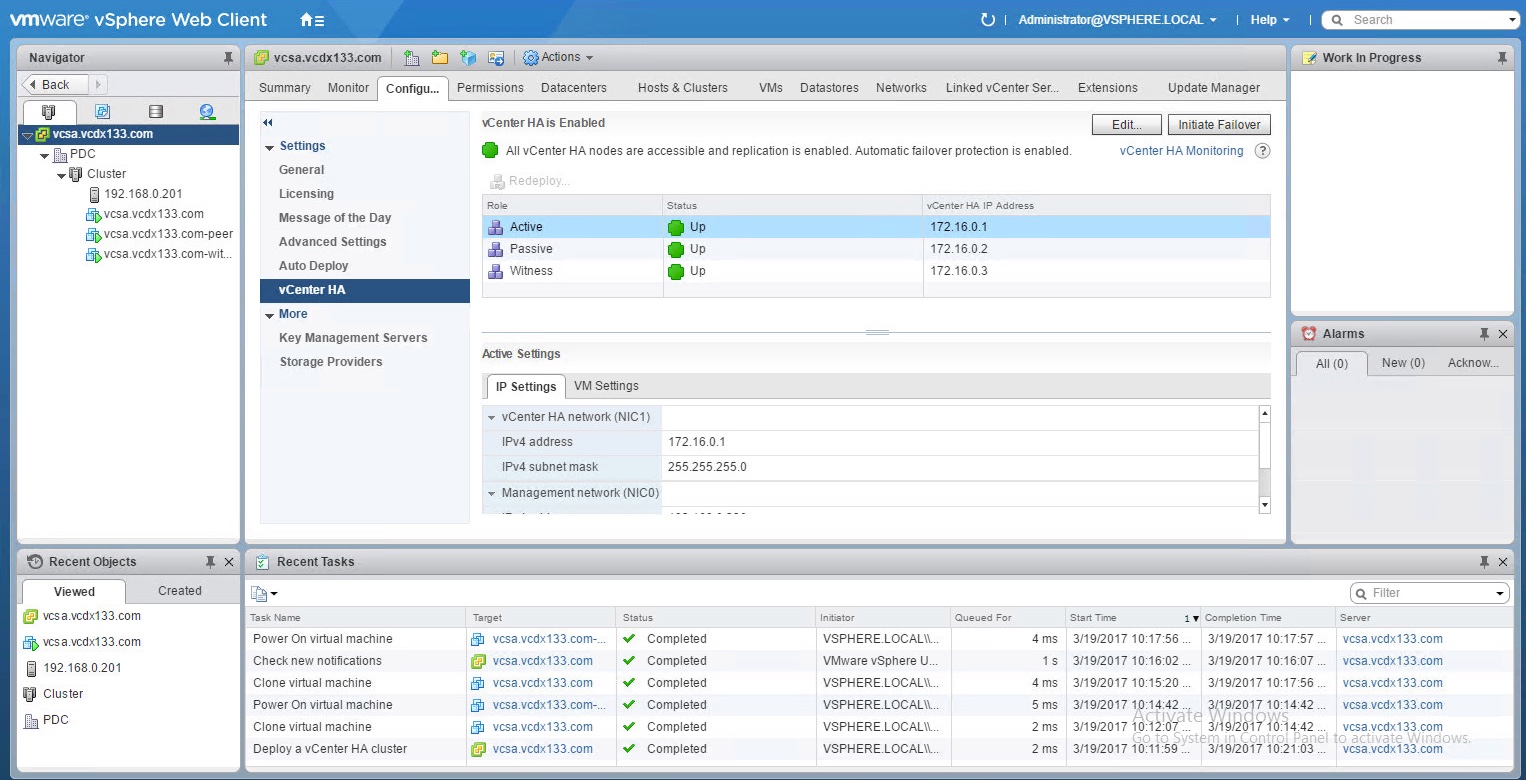
- Access the vSphere Web Client and browse to the vCenter HA page.
- The status of the Active, Passive and Witness nodes is listed as “Up” with a green icon.
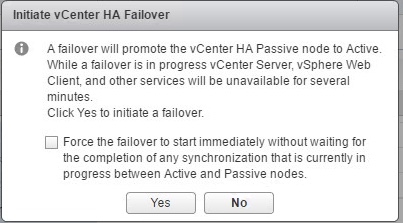
- The “Initiate vCenter HA Failover” button allows you to promote the vCenter HA Passive node to Active.
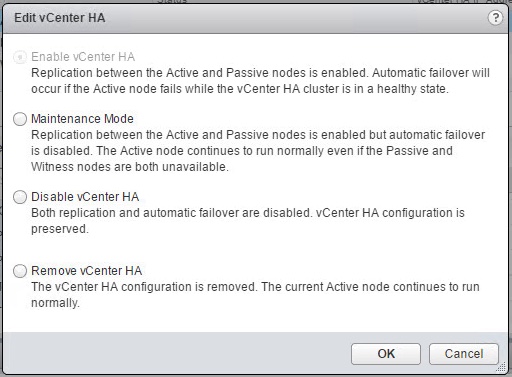
- The “Edit vCenter HA” button allows you to Enable vCenter HA, enter Maintenance Mode, Disable vCenter HA and Remove vCenter HA.