Recently I upgraded the XtremIO X-Brick in the RoundTower DemoLab to a later version. Dell-EMC requires you to open a ticket and schedule time for their support staff to do the upgrade for you. These are the steps required.
Objective
- You want to upgrade your XtremIO system to a later version, which includes the XMS and X-Brick Storage Controllers.
Prerequisites
- Valid support contract with Dell-EMC, you will need to access documentation that requires a valid login to Dell-EMC support.
- X-Brick is fully functional and connected to an XMS.
- Have a copy of the default passwords for XtremIO, I cannot list them here due to the Dell-EMC partner agreement. The accounts you will be using are: xmsupload, tech and xmsadmin. You have to access Dell-EMC support and search for Article number “332100”.
- Have access to the XtremIO Management System (XMS).
- Open a ticket with Dell-EMC for the upgrade. They will contact you with a Health Script that needs to be executed and validated before the upgrade can be scheduled. They will also provide the XtremIO Upgrade Customer Preparation Guide with a list of checks and pre-requisites that need to be met before the upgrade can begin.
- The health check script is also available from XtremIO SolVe Desktop via the XtremIO Generator, Services Scripts and Utilities, XtremIO System Health Check menu.
Step 1 – Upload the XMS software and XtremIO System Health Check script to the XMS appliance
- You need to visit Dell-EMC support and download the latest XtremIO software (4.0.25-22 XIOS 4.2.2-18 XMS in this example).
- Use WinSCP to connect to the XMS IP Address using the “xmsupload” login and browse to the “/var/lib/xms/images” directory and drag the XMS software file to that directory (“upgrade-to-4.0.25-22_XIOS_4.2.2-18_XMS.tar” in this example).
- Use WinSCP to copy the XtremIO System Health Check script (“system_health-v200.0.18-s4.0.0.py.gpg”in this example) to the “/var/lib/xms/scripts” directory.
Step 2 – Upgrading the XMS and X-Brick
- Open Putty and SSH to the XMS IP address and login with “xmsadmin” and then with username “tech” (get default password from Dell-EMC support).
- Your Dell-EMC XtremIO specialist will now take control and execute the following commands to perform the upgrade.
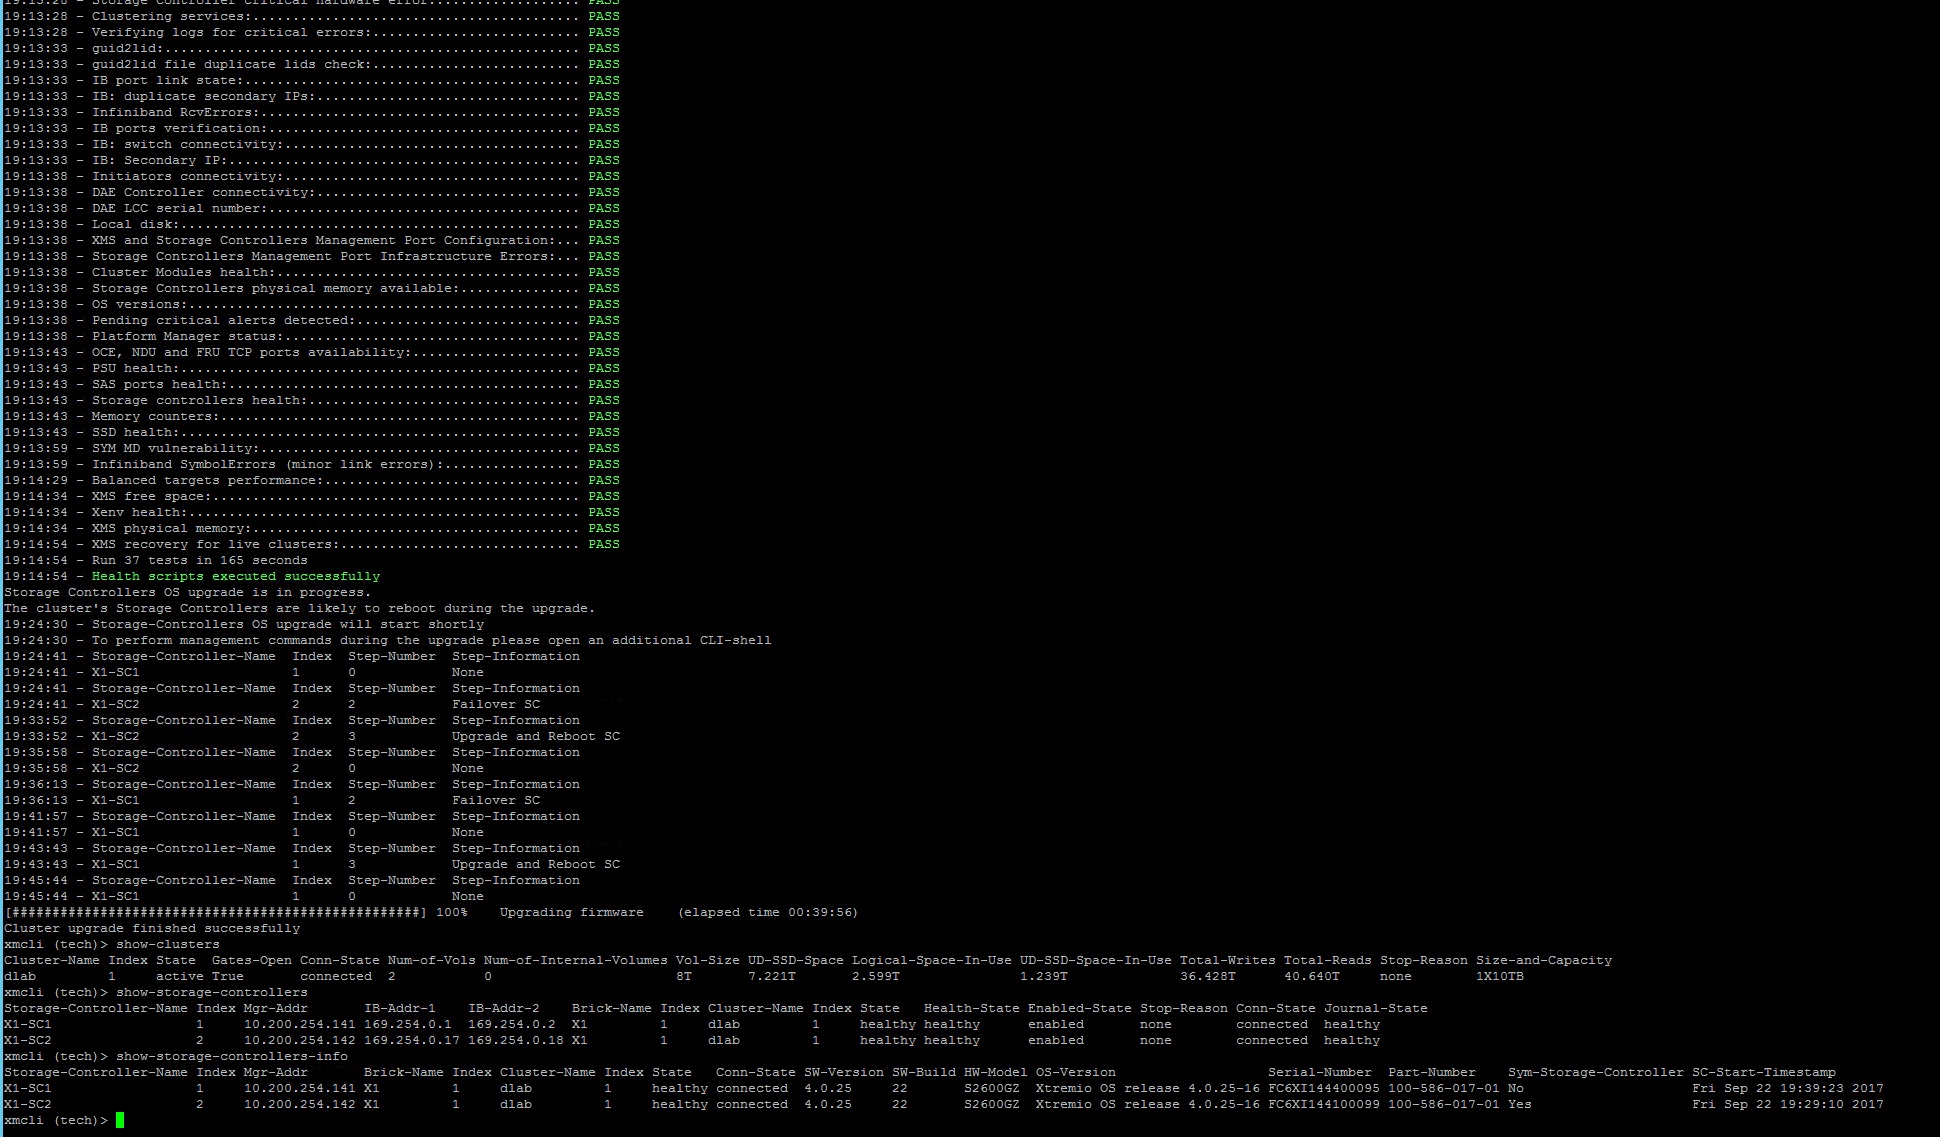
- Use the command “show-sw-images” to list the upgrade packages available.
- Use the command “show-clusters” to get the current status of the clusters. They should be connected.
- Use the command “show-storage-controllers” to get the current status of the storage controllers. They should be healthy and connected.
- Use the command “show-storage-controllers-info” to get the detailed status of the storage controllers.
- Use the command ‘run-script script=”<script name>”‘ to execute the XtremIO System Health Check script. All tests should pass.
- Use the command ‘upgrade-xms package=”<package name>”‘ to upgrade the XMS (approximately 20min).
- Use the command ‘upgrade-cluster cluster-id=<id> package=”<package name>”‘ to upgrade the X-Brick (approximately 40min per X-Brick).
- Execute the previous show commands again and verify the upgrade was successful and all components are healthy and connected.
- The upgrade has completed.