 This post covers how to provision a LUN (less than 239GB) for vSphere on an EMC Symmetrix VMAX using the Unisphere for VMAX GUI. The basic architecture of the VMAX is covered here. If you want to build LUNs greater than 238GB, you follow the same procedure, but with the additional step of creating a “Meta Volume” (multiple TDEVs bound to a single logical volume).
Summary
- Create the “LUN” – TDEV (Thin Device)
- Create the Storage Group and bind the TDEV to it
- Create the Initiator Group with the ESXi HBA WWPNs
- Create the Masking View and bind the Storage Group, Port Group and Initiator Group to it
- Appendix – “Set Port Attributes” for vSphere
Prerequisites
- You have administrator access to the EMC Symmetrix VMAX and Unisphere for VMAX GUI.
- EMC Symmetrix VMAX Enginuity code 5876.268.174 with EMC Unisphere for VMAX version 1.6.0.8.
- Symmetrix VMAX is being configured for Virtual Volumes with FAST-VP, not Regular Volumes and FAST-DP.
- You know your storage environment, in particular, how to zone the SAN Fabric and which VMAX Front End Ports are being used for your ESXi hosts.
- This procedure breaks the tasks into their most basic steps, you can also use the “Provision Storage” wizard in the “Common Tasks” section on the right of the GUI. Symmetrix VMAX gurus also use “symcli” to script via CLI – not covered here.
Create the “LUN” – TDEV (Thin Device)
- Open a Web Browser and connect to the Unisphere for VMAX GUI: http://<IP Address>:8443/univmax/
- Login as administrator (default login “smc”).
- Select the Symmetrix VMAX to be configured.
- Press the “Storage” icon and then the “Volumes” object.
- Expand the “Virtual Volume” folder, select “TDEV” and then press the “View” button.
- Press the “Create” button.
- In the “Create Volume” window, press “Virtual” Volume Type, Configuration “TDEV”, Emulation “FBA”, Number of Volumes “1”, Volume Capacity 1 GB (for ESXi Boot LUN) and Bind to Pool “FC R10 or R6”. Then select “Run Now”.
- Record the serial number (“0C08” in this example) of the volume when the “Successfully created” window appears. Press the “Close” button.


Create the Storage Group
- Press the “Storage” icon and then the “Storage Groups” object.
- In the “Storage Groups” window, press the “Create” button.
- In the “Create Storage Group” window, enter the Storage Group Name (end with “_SG” for clarity) and the Storage Group Type “Empty Storage Group”. Then press the “Finish” button. Then press the “Close” button.
- Press the “Filter” button to search for the new “Storage Group”, select it and then press the “View Details” button.
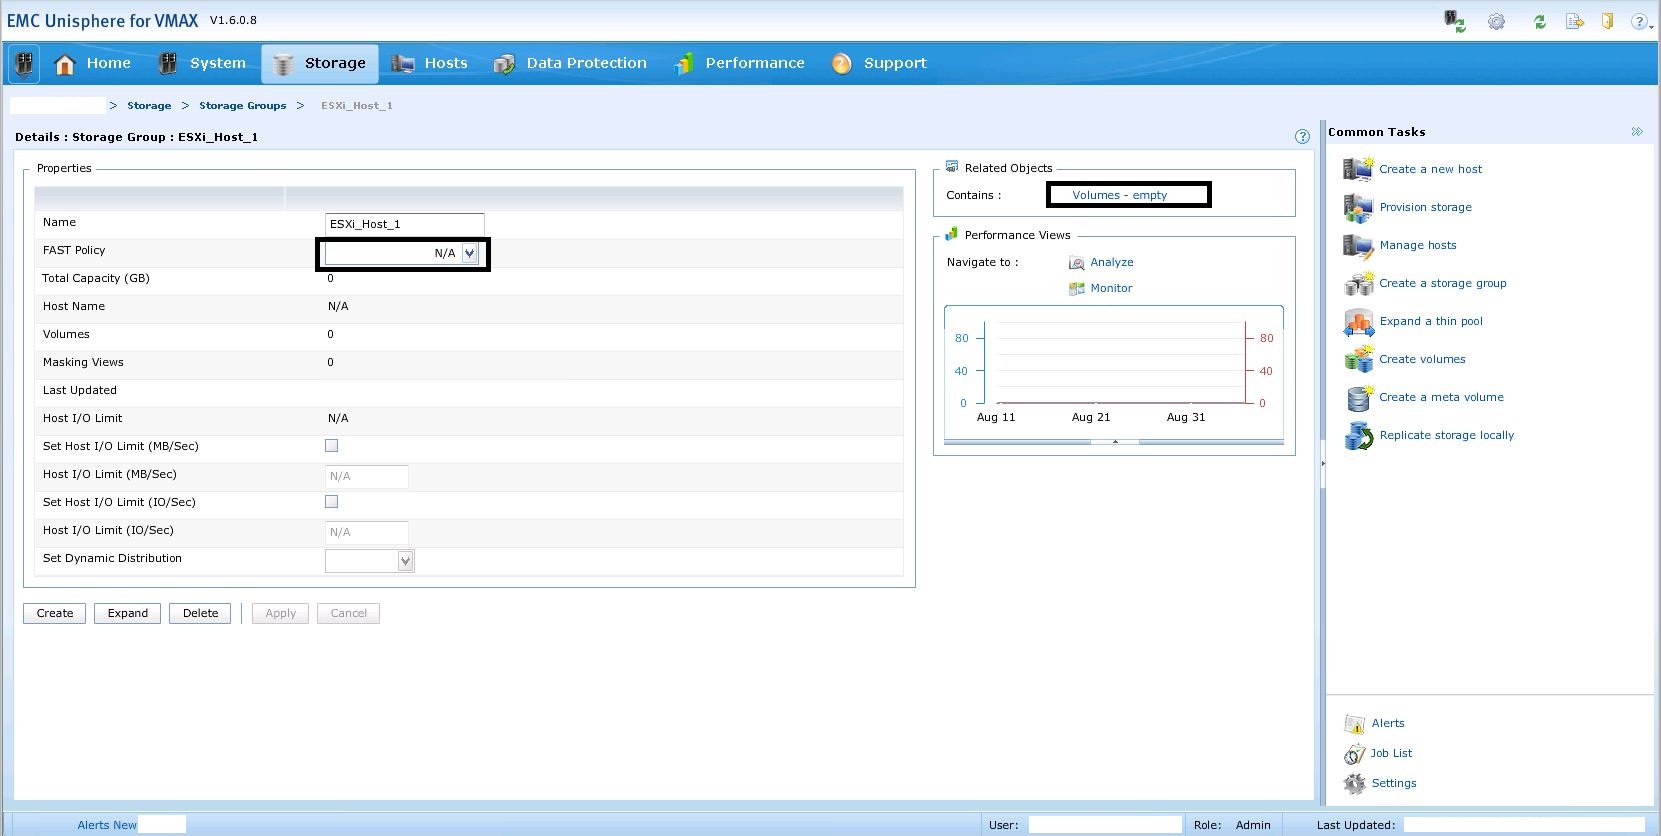
- In the “Storage Group Details” window, select the appropriate FAST Policy and press the “Volumes Empty” link to assign the TDEV.
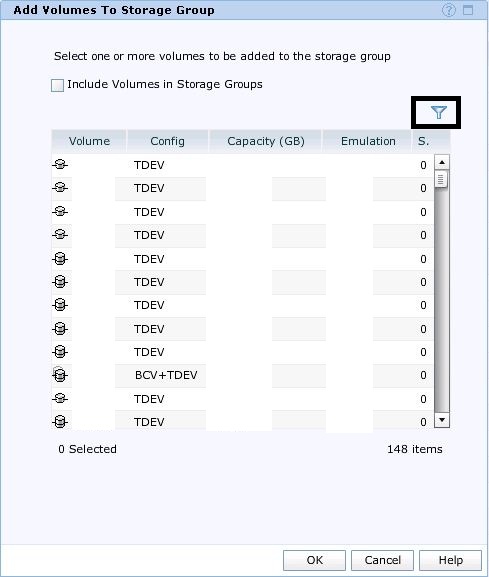
- In the “Volumes” window, press the “Add” button.
- In the “Add Volumes to Storage Group” window, press the “Filter” button and then expand the “Volume Identifier” object and enter the TDEV serial number (“0C08” in this example) in the “Volume ID” field. Then press “OK”.
- Select the filtered TDEV and press “OK”.
- In the “Storage Group Details” window, verify that the “Related Objects” contains “Volumes – 1”.


Create the Initiator Group
- Press the “Hosts” icon and then the “Initiator Groups” object.
- In the “Initiator Groups” window, press the “Create” button.
- In the “Host Management – Create Host” window, select the relevant Symmetrix “Serial Number”, Host “Name” (end with “_IG” for clarity), select the Initiator WWPNs of the ESXi Host HBAs and “Add” them to the “Initiatior Group”. Then press “Finish” and then “Close”.


Create the Masking View and link to the SG, PG and IG
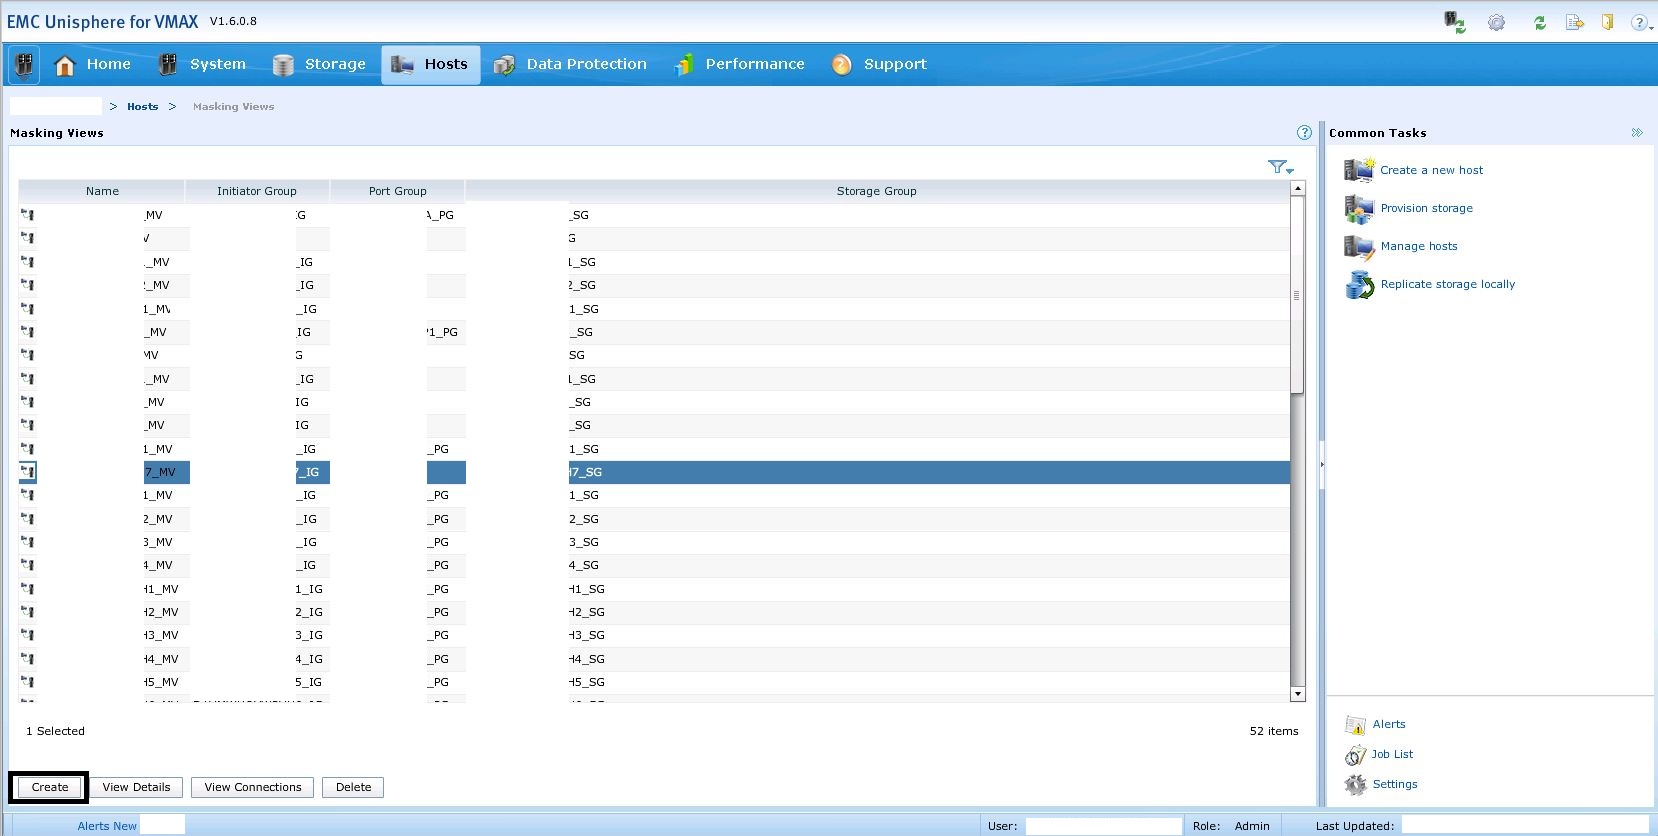
- Press the “Hosts” icon and then the “Masking Views” object.
- In the “Masking Views” window, press the “Create” button.
- In the “Create Masking View” window, enter the Masking View Name (add “_MV” for clarity), Initiator Group name from the previous step, the selected Port Group that is zoned to the ESXi Host and the Storage Group name from the previous step. Then press “OK” and then press “Close”.
- You LUN (TDEV) is now ready for use. Make sure your SAN fabric has zoned the ESXi Host HBAs to the Front End ports of the VMAX as per the Masking View just configured.


Appendix – EMC Symmetrix VMAX – “Set Port Attributes” for vSphere
The Front End Ports of the VMAX require a specific set of “Port Attributes” to be configured to function with vSphere. This should already be configured as part of the Symmetrix implementation, but here it is anyway.
- Press the “System” icon and then the “Front End Directors” link in the “Hardware” section.
- Select each of the Front End Director objects that is being used with vSphere “FA-xxy” and press the “Set Port Attributes” button.
- Make sure the following Port Attributes are “Ticked”: “ACLX”, “Common Serial Number”, “SCSI 3” and “SPC2 Protocol Version”.


3 thoughts on “EMC Symmetrix VMAX – Provisioning a LUN”
Comments are closed.