 This is part 2 of the vCenter 5.1 to 5.5 Update 1c upgrade, detailing the Windows Server 2012 R2 OS installation and configuration.
This is an eleven part series, describing how to upgrade from vCenter 5.1 to vCenter 5.5:
- vCenter 5.5 Upgrade with Windows Server 2012 R2 – Part 1 – Preparation
- vCenter 5.5 Upgrade with Windows Server 2012 R2 – Part 2 – OS Build
- vCenter 5.5 Upgrade with Windows Server 2012 R2 – Part 3 – vCenter Install
- vCenter 5.5 Upgrade with Windows Server 2012 R2 – Part 4 – Cleanup
- vCenter 5.5 Upgrade with Windows Server 2012 R2 – Part 5 – Integrating vUM and Syslog
- vCenter 5.5 Upgrade with Windows Server 2012 R2 – Part 6 – Integrating vC Ops
- vCenter 5.5 Upgrade with Windows Server 2012 R2 – Part 7 – Integrating vIN
- vCenter 5.5 Upgrade with Windows Server 2012 R2 – Part 8 – Upgrading and Integrating vCM
- vCenter 5.5 Upgrade with Windows Server 2012 R2 – Part 9 – Upgrading and Integrating vCO Appliance
- vCenter 5.5 Upgrade with Windows Server 2012 R2 – Part 10 – Upgrading and Integrating CBM
- vCenter 5.5 Upgrade with Windows Server 2012 R2 – Part 11 – Upgrading ESXi
Prerequisites
- You have a validated design for your new vCenter management layer.
- You have checked all systems that integrate with vCenter support vSphere 5.5 Update 1c.
- You have an approved scheduled downtime from your Release Management team.
- You have downloaded the necessary binaries.
- You have a valid Windows Server 2012 R2 Data Center Edition licence (KMS server used in this case)
- You have valid IP addresses and hostnames for the vCenter 5.5 servers.
- You have administrator access (direct/indirect) to Active Directory, DNS, ESXi hosts, etc.
- You have tested this process in a test environment before moving to Production.
- You have an AD “vCenter” OU which has a “optimised” Group Policy configured specifically for vCenter.
- You have a “optimised” Anti-Virus policy specifically configured for vCenter.
Preparing the vSphere Management Cluster
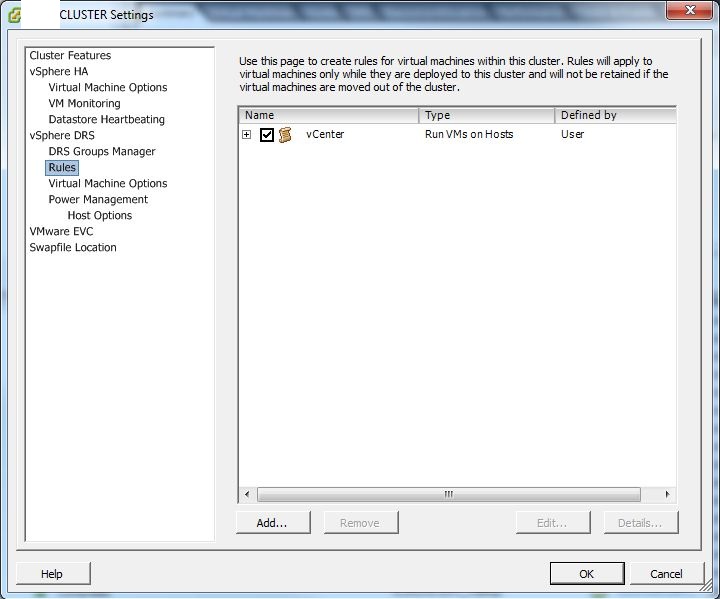
- Create the DRS VM-Host rule that binds the vCenter Management Layer to a single Host in your Management Cluster.
- Take vSphere Snapshots of your vSphere 5.1 Management Layer Virtual Machines as part of your roll-back strategy. Make sure you include all VMs in the management ecosystem that integrate with vCenter: VUM, vCOPs, vCAC, vCD, CBM, vCM, vShield Manager, etc.
- Take a Database consistent backup of the vCenter 5.1 SQL Server database.
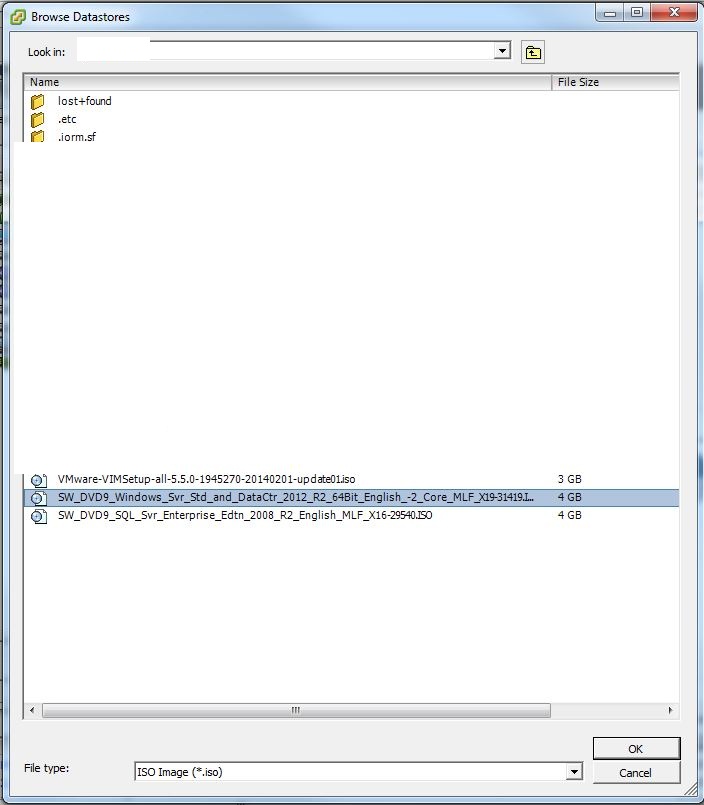
- Upload the ISO images (Windows Server 2012 R2, Microsoft SQL Server 2008 R2 & VMware vCenter 5.5 Update 1c) to a Datastore that your Host has access to.
- Connect your vSphere Client directly to the ESXi Host you selected in Step 1.
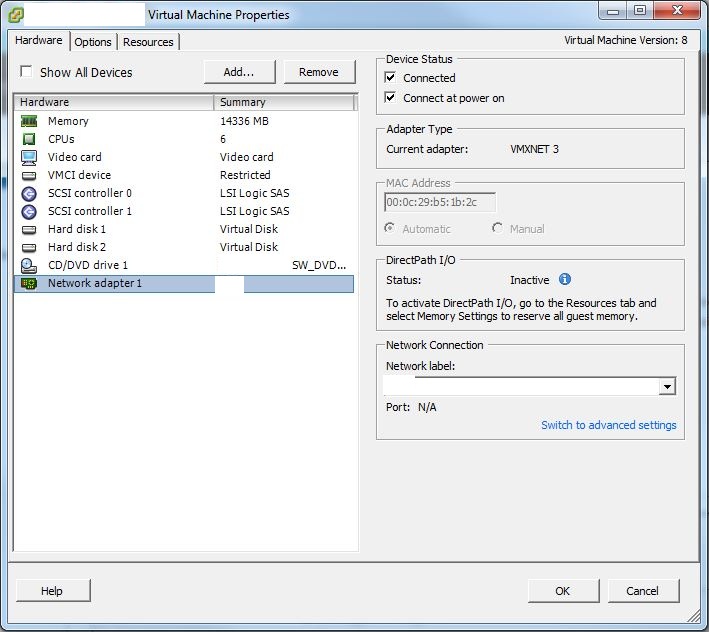
- Create the VM that will run Windows Server 2012 R2. For a “Small” vCenter deployment, configure 6 vCPUs, 14GB RAM, 2 vDisks (100GB & 40GB), vNIC vmxnet3 and connect the CD-ROM to the Windows Server 2012 R2 ISO image.

Shutdown the Original vCenter 5.1 Servers
- Open the Console to your Web Client, Inventory and Web Client servers and gracefully shutdown the VMs.
- Open the Console to your vCenter/Database server and uninstall the vCenter 5.1 software.
- WARNING: DO NOT DELETE “C:\ProgramData\VMware\VMware VirtualCenter\SSL\” DIRECTORY. These certificates will be copied to the new vCenter server later on.
- Change the IP Address of the VM to another IP in the same subnet. The original IP will be assigned to the Win2012 R2 server, which means you may not have to change a lot of firewall rules.
- Change the name of the VM to the organisational naming standard for databases. The original name will be assigned to the Win2012 R2 server, this means administrators will continue to use the same name for access. You will have to remove the VM from the Domain, change the name and add it to AD again.
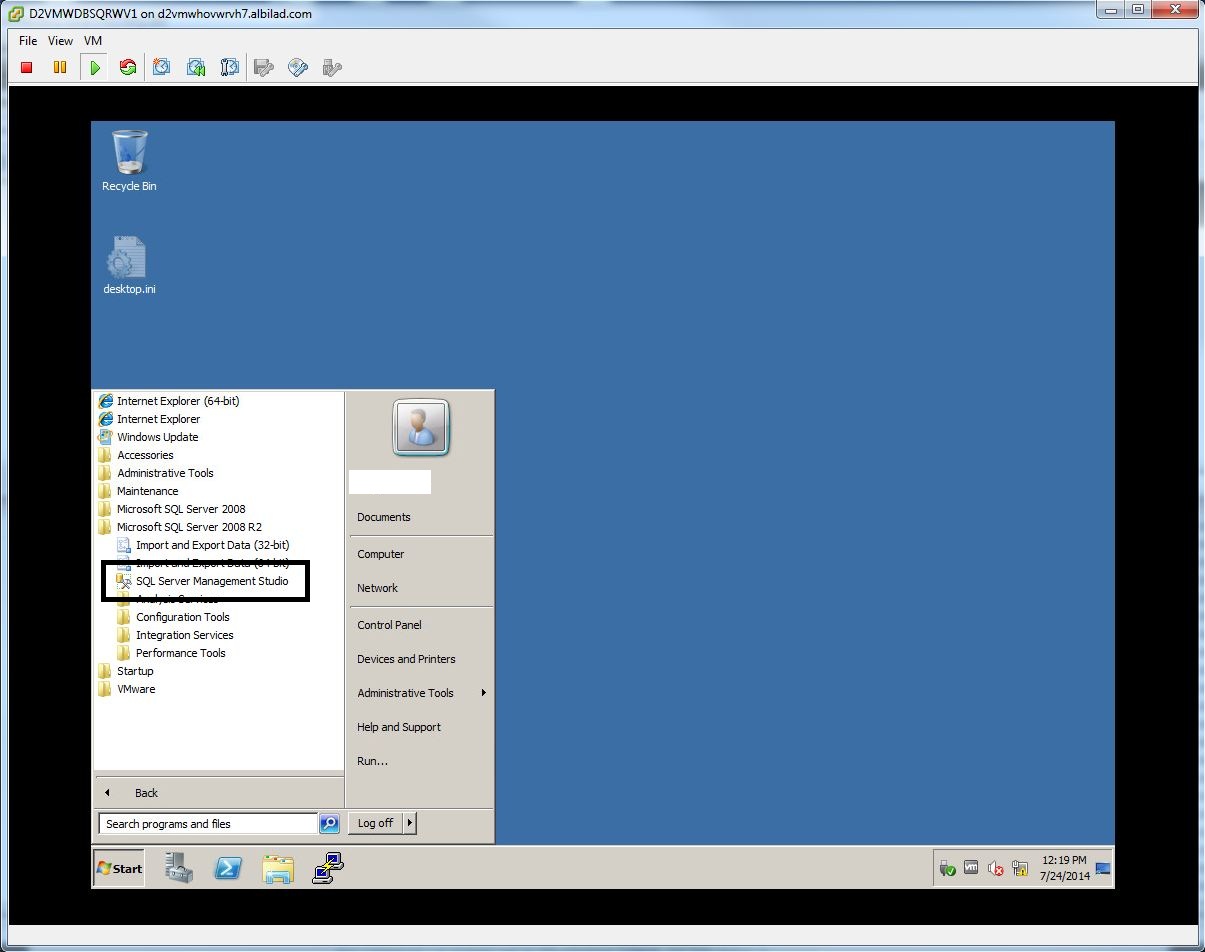
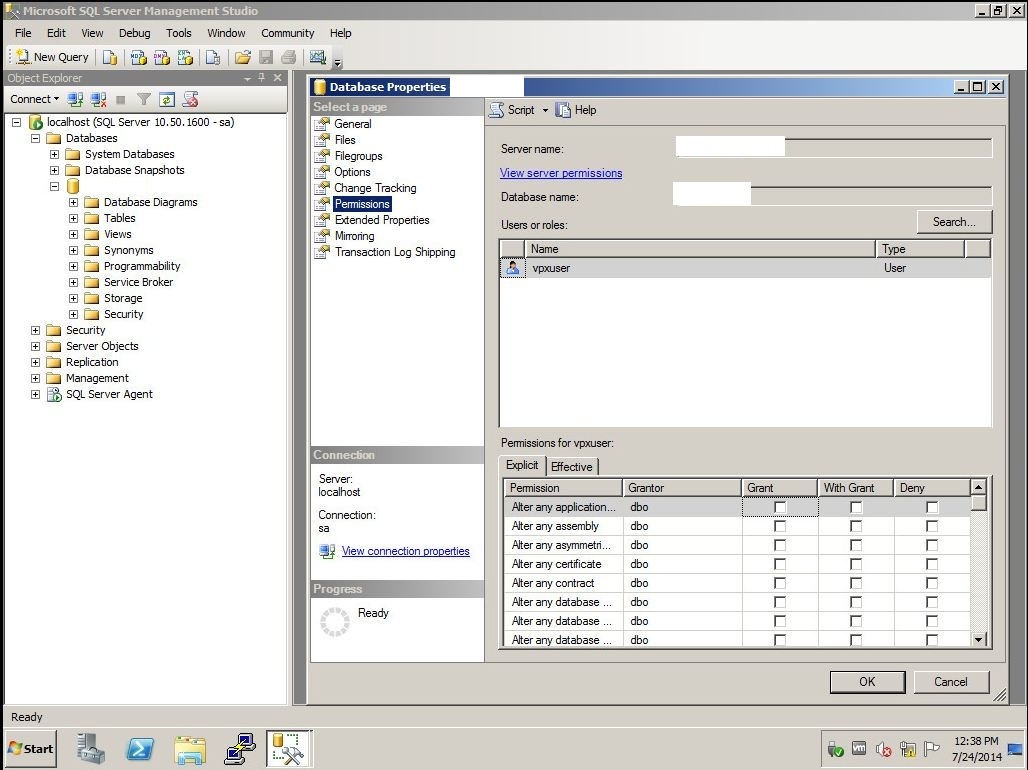
- After the necessary reboots, login to the Database server and run the “SQL Server Management Studio”. Login as “sa” with the relevant password.
- Browse to the “Database” folder and record the name of the vCenter Database configured, this will be required later. Verify that “vpxuser” exists in the “Permissions” option under Database “Properties”.

Installing Windows Server 2012 R2 Data Center Edition with GUI
- Check that the Windows Server 2012 R2 ISO image is connected to the CDROM of the vCenter Virtual Machine.
- Power-On the VM and wait for the Windows Server 2012 R2 installation screen to appear. Select “Next”.
- Select “Install Now”.
- Select “Windows Server 2012 R2 Data Center (Server with a GUI) x64” and select “Next”.
- Accept the licence and select “Next”.
- Select “Custom: Install Windows only (advanced)”.
- Select “Drive 0 Unallocated Space” (100GB) and select “Next”.
- Wait for the “Installing Windows” screen to complete and then the VM will reboot.
- In the “Settings Window”, set the “Administrator Password”.
- When the “Press Ctrl+Alt+Delete to sign-in” message appears you can login.


Customise the Windows Server 2012 R2 Operating System for vCenter
- Install VMware tools. This is especially required for the vNIC “vmxnet3” driver.
- Access the “Server Manager” interface (it should start automatically after login) and configure the following OS settings.
- Set the Time-Zone.
- Disable the Windows Firewall for the Domain, Private and Public profiles.
- Configure the vNIC: IP Address of original vCenter 5.1 server, Netmask, Gateway and DNS servers.
- Disable Internet Explorer Enhanced Security.
- Change the computer name to that of the original vCenter 5.1 server and add to Active Directory.
- Move the Computer object to the “vCenter” OU in AD (Domain Admin task).
- Install Anti-Virus and set the “vCenter” AV policy (Information Security task).
- Check that the server licence is activated from the KMS server.
- Check that the server has been updated with the latest patches from the WSUS server.
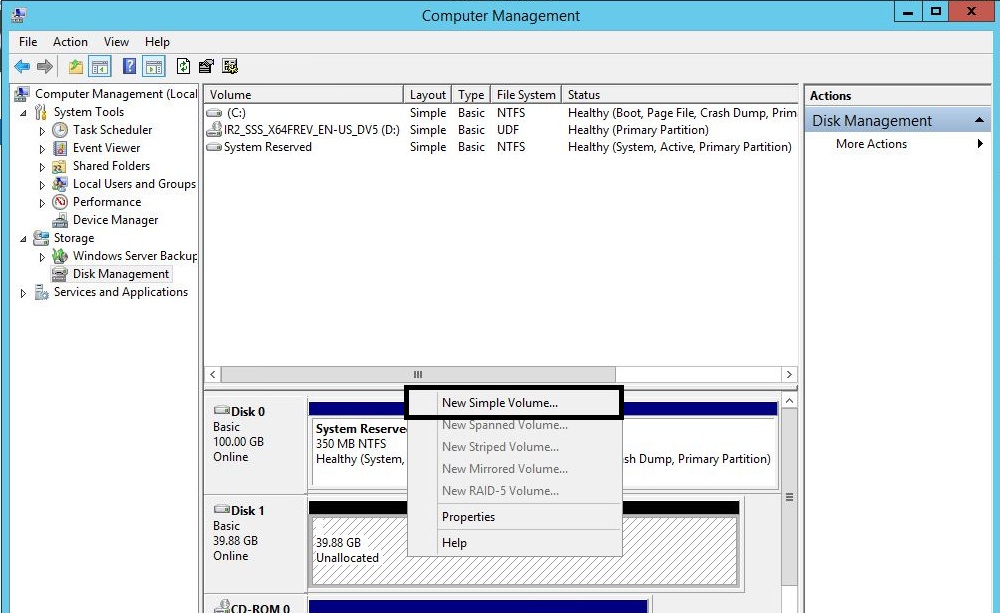
- From “Server Manager”, select “Tools” and then “Computer Management”.
- Within the “Computer Management” window, select the “Disk Management” object. Browse to the “Unknown” 40GB Disk and place it “Online”, then “Initialise” with “GPT” and finally create a “Simple Volume” that will map to E:.
- Within the “Computer Management” window, select the “Local Users & Groups” object. Browse to the “Administrator” Group and add the administrator groups and users that will manage this vCenter. In particular, your service account for vCenter must be added.


Install .Net Framework 3.5 Features
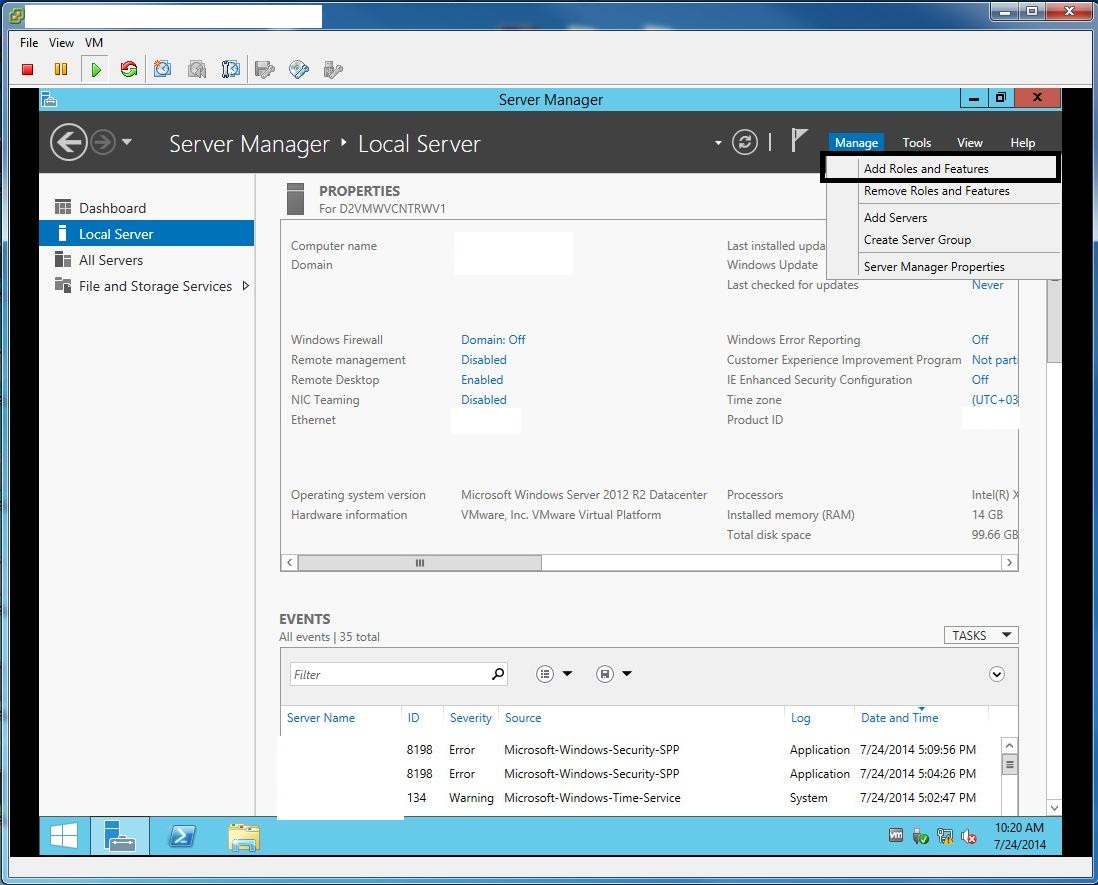
- From “Server Manager”, select “Manage” and then “Add Roles and Features”.
- Select “Next”.
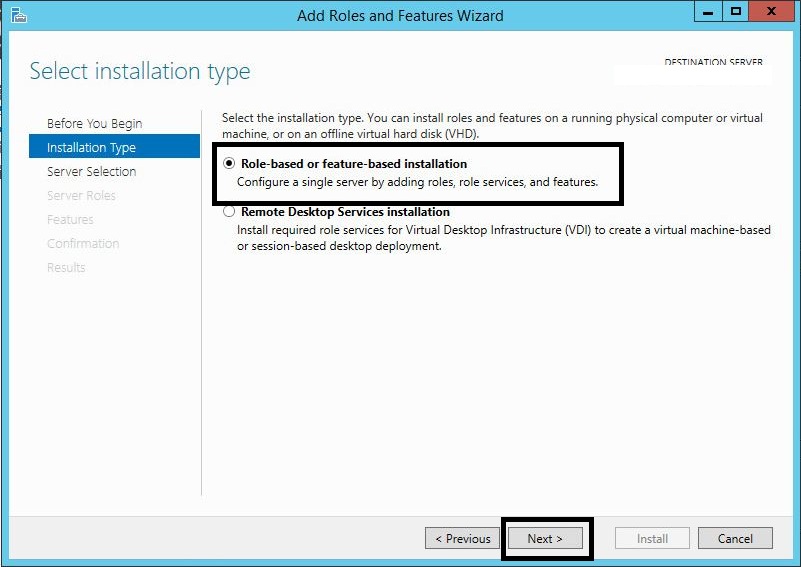
- Select “Role-based or feature-based installation” and select “Next”.
- Press “Select a server from the server pool”, make sure the “Windows Server 2012” OS is highlighted and select “Next”.
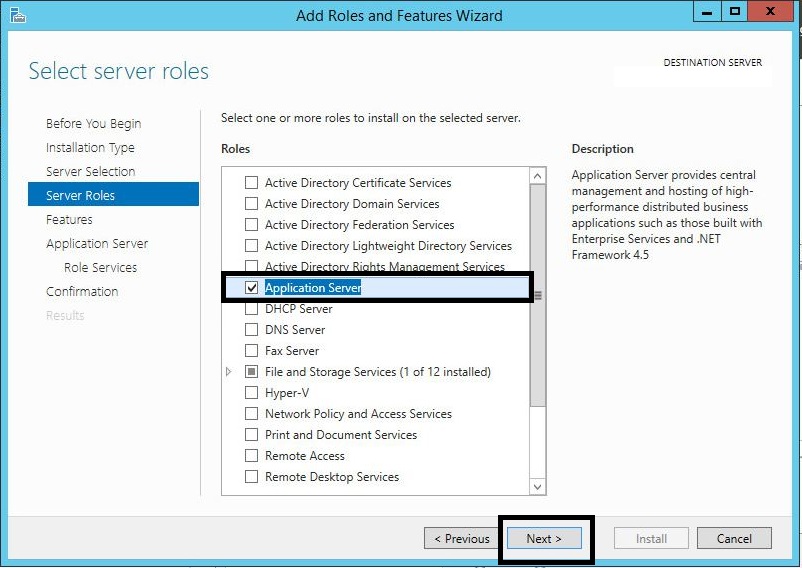
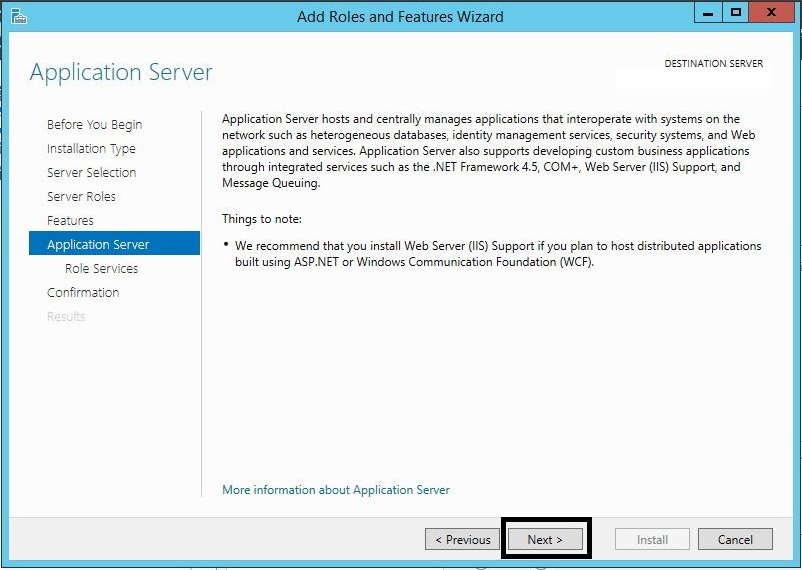
- Tick “Application Server” and select “Next”.
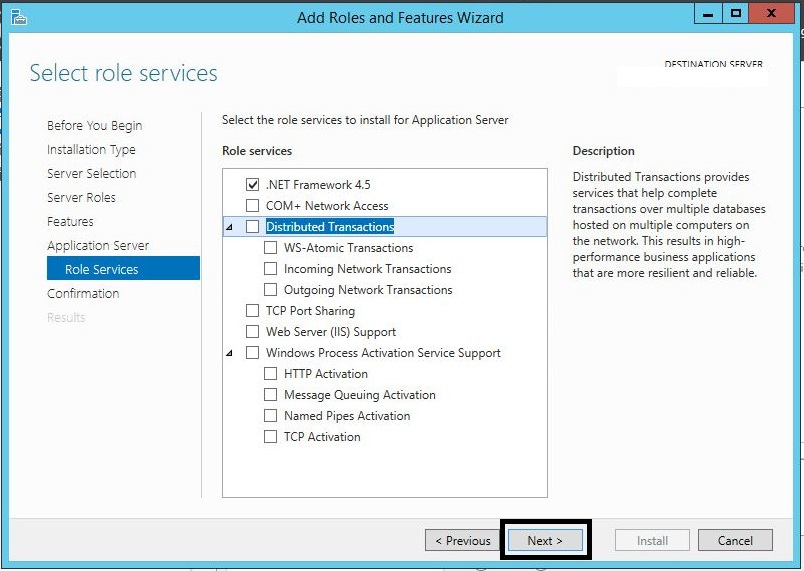
- Tick “.NET Framework 3.5 Features” and select “Next”.
- Select “Next”.
- Select “Next”.
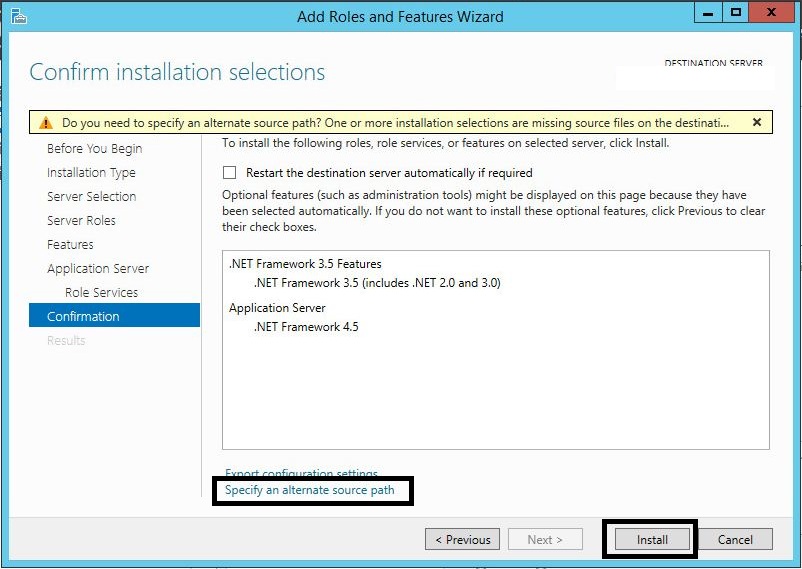
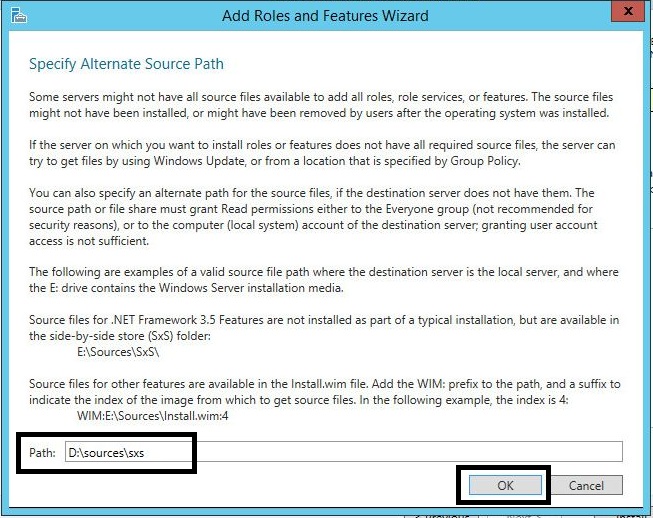
- Press “Specify an alternate source path” and define the “Path” as “D:\sources\sxs” and press “OK”.
- Select “Install”.
- Once the feature installation progress has “succeeded”, press the “Close” button.


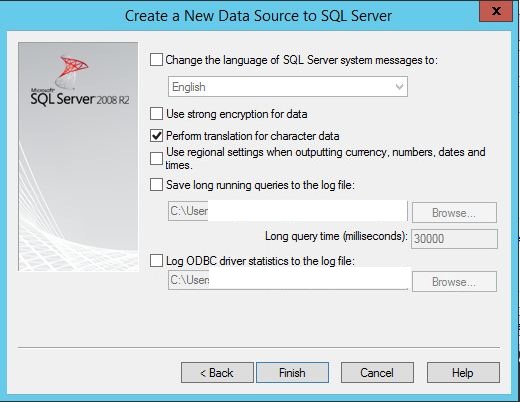
Install and Configure the 64bit DSN
- Mount the Microsoft SQL Server 2008 R2 ISO image to the CDROM of the virtual machine.
- Search for “sqlncli” or browse to D:\x64\setup\x64 and run “sqlncli.msi”. Install the Microsoft SQL Server 2008 R2 Native 64-bit Client.
- Unmount the ISO image.
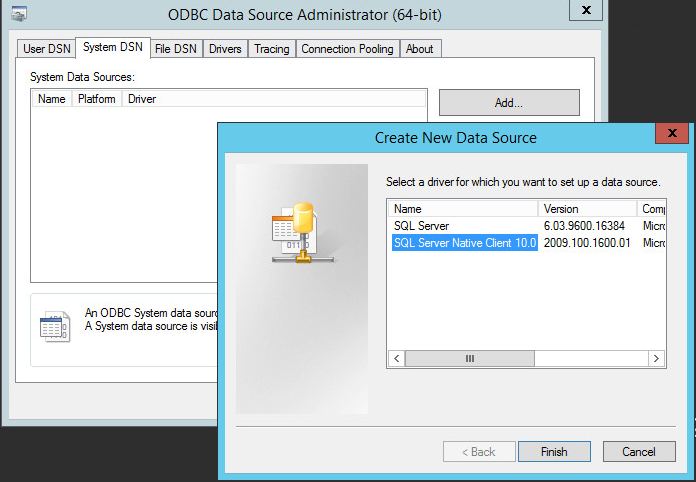
- Press the Windows “Start” button and run the “ODBC Data Sources (64-bit)” program.
- Select the “System DSN” tab and then press “Add”.
- Select the “SQL Server Native Client 10.0” driver and then press “Finish”.
- Enter the name “VCENTERDB”, the description “VCENTERDB” and then select the name of the vCenter Database server (SQL Server 2008 R2) configured earlier from the “Server” list. Press “Next”.
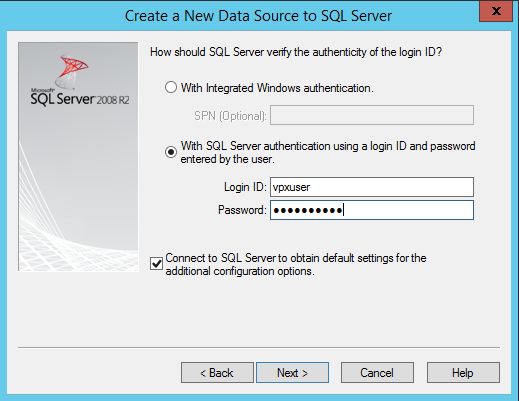
- Select “With SQL Server authentication using a login ID and password assigned by the user”, use the “vpxuser” and password and press “Next”.
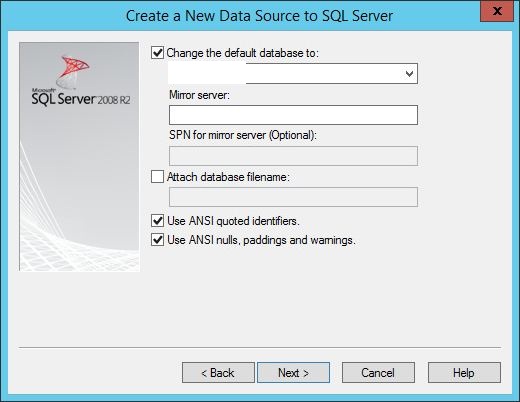
- Tick “Change the default database to” the vCenter Database name recorded earlier.
- Select “Finish”.
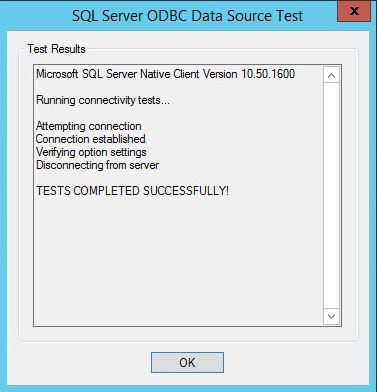
- Select “Test Data Source”. Verify “TESTS COMPLETED SUCCESSFULLY!” appears and select “OK”. Then select “OK” again.
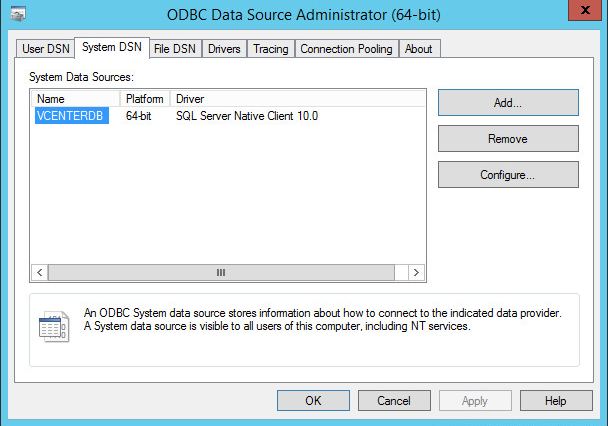
- Verify that the “System DSN” tab now has a “VCENTERDB” System Data Source with a “SQL Server Native Client 10.0” driver. Then select “OK”.


Copy the SSL Directory from the old vCenter server
- Copy the SSL directory from the “C:\ProgramData\VMware\VMware VirtualCenter\SSL\” from the old vCenter server
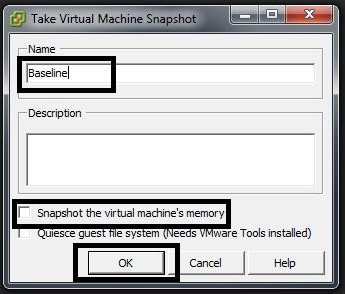
- Create a vSphere “Baseline” Snapshot. This will be used for roll-back if the vCenter installation is corrupted in any way during Part 3.
- Reboot server by opening a Power Shell window and typing “shutdown /r”.


![]()
You can now move to Part 3 of the Configuration Guide.

We will migrate everything from VC 5.5 U2 (running over win2k8r2) to VC 6.0 (would run over w2k12r2). The inventory snapshot fling is not supported for the same. What is the best way to migrate permissions, alarms, all datacenter objects including all rules set under cluster, inherited permissions etc. over to the new built vsphere VC 6.0 running on 2012r2 VM?
Any help will be highly appreciated.
Thanks a lot for your documentation , I am currently in a similar situation . I also have to relocate Vcenter 5.1 to a new Vcenter 5.5 server. I am bit confused based on your explanations about the database . You have mentionned a database backup but I don’t see the steps for a database restore in your tutorials. I only see the 64 bits DSN steps. You are also backing up and restoring the Vcenter MSSQL database, am I right ? .
Thank you for reading. This series assumes that the database server remains intact and separate during the vCenter Server upgrade/re-install.