 This is part 3 of the vCenter 5.1 to 5.5 Update 1c upgrade, detailing the vCenter 5.5 Installation.
This is an eleven part series, describing how to upgrade from vCenter 5.1 to vCenter 5.5:
- vCenter 5.5 Upgrade with Windows Server 2012 R2 – Part 1 – Preparation
- vCenter 5.5 Upgrade with Windows Server 2012 R2 – Part 2 – OS Build
- vCenter 5.5 Upgrade with Windows Server 2012 R2 – Part 3 – vCenter Install
- vCenter 5.5 Upgrade with Windows Server 2012 R2 – Part 4 – Cleanup
- vCenter 5.5 Upgrade with Windows Server 2012 R2 – Part 5 – Integrating vUM and Syslog
- vCenter 5.5 Upgrade with Windows Server 2012 R2 – Part 6 – Integrating vC Ops
- vCenter 5.5 Upgrade with Windows Server 2012 R2 – Part 7 – Integrating vIN
- vCenter 5.5 Upgrade with Windows Server 2012 R2 – Part 8 – Upgrading and Integrating vCM
- vCenter 5.5 Upgrade with Windows Server 2012 R2 – Part 9 – Upgrading and Integrating vCO Appliance
- vCenter 5.5 Upgrade with Windows Server 2012 R2 – Part 10 – Upgrading and Integrating CBM
- vCenter 5.5 Upgrade with Windows Server 2012 R2 – Part 11 – Upgrading ESXi
Prerequisites
- Prepare the vSphere Management Cluster
- Shutdown the existing vCenter services and re-purpose the existing hybrid vCenter/Database server to be a dedicated Database server.
- Windows Server 2012 R2 server Operating System installation
- Customise the Windows Server 2012 R2 OS
- Install the .Net Framework 3.5 Features
- Install and Configure the 64-bit DSN
- Import the SSL directory from the original vCenter server
- If you used custom ports in vCenter 5.1, then make sure you know what they are, so that you can configure them here. You will have to modify your firewall rules since the vCenter services are now centralised.
Install the vCenter Single Sign-On Service
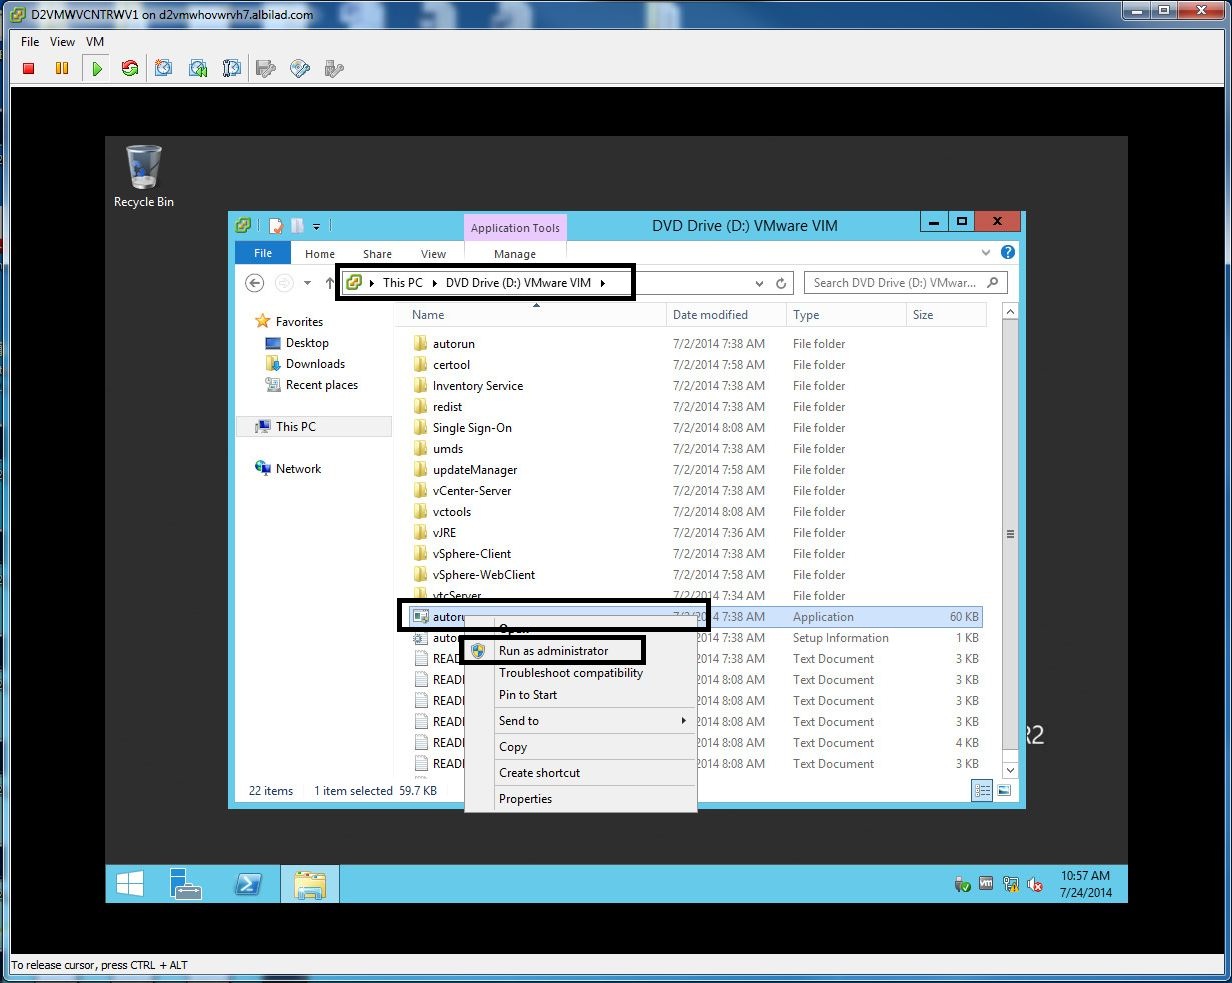
- Make sure the vCenter 5.5 Update 1 ISO image has been mounted to the CDROM of the Windows Server 2012 R2 Virtual Machine.
- Open the console of the new vCenter VM running Windows Server 2012 R2 and login with the AD “vCenter” service account.
- Browse to the CDROM and select the “autorun.exe” file and “Run as Administrator”.
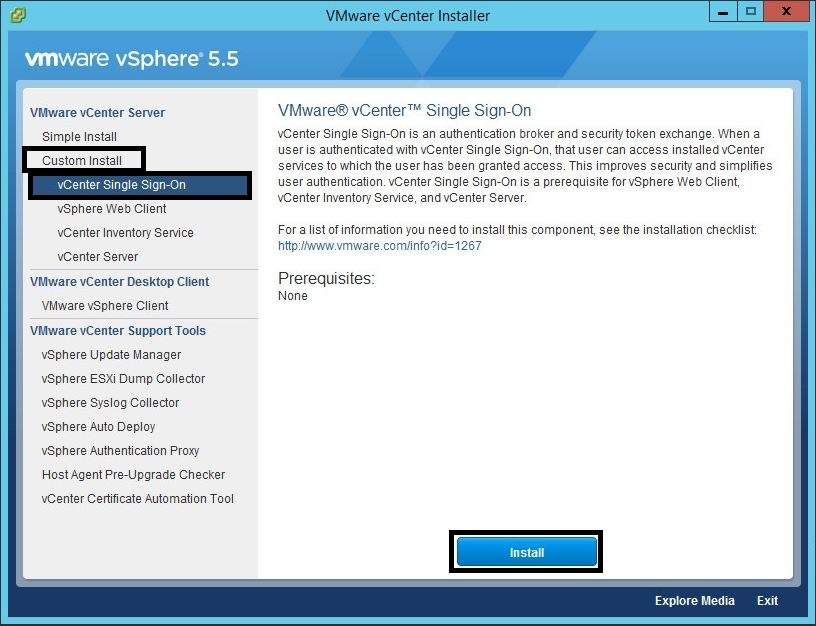
- In the VMware vSphere 5.5 vCenter Installer window, select “vCenter Single Sign-On” from the “Custom Install” and press “Install”.
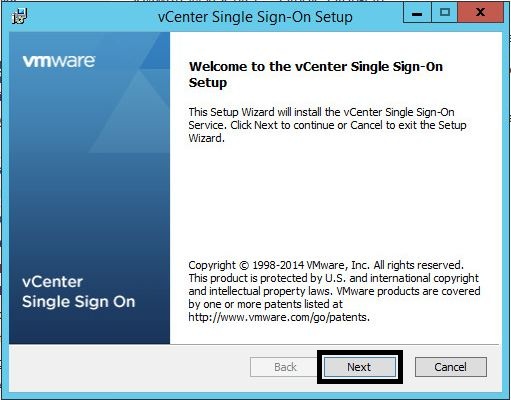
- Select “Next”.
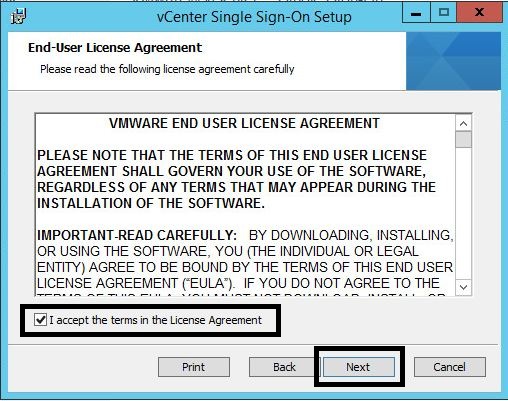
- Accept the licence agreement and select “Next”.
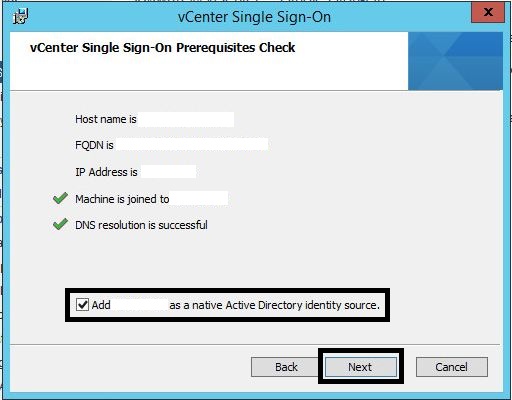
- Make sure the “Host name” is displayed, “FQDN” is displayed, “IP Address” is displayed, “Machine is joined to <domain>” has a green tick and “DNS resolution is successful” has a green tick.
- Make sure “Add <domain> as a native Active Directory identity source” is ticked and then press “Next”.
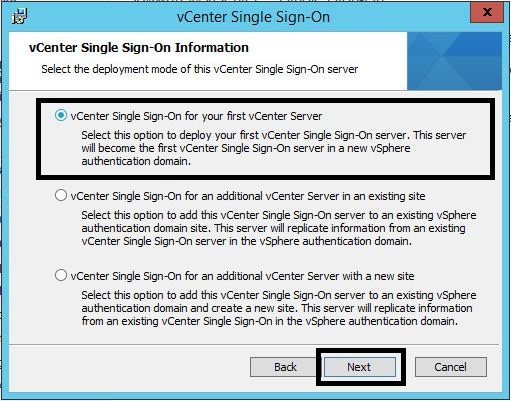
- Select “vCenter Single Sign-On for your first vCenter Server” is selected and press “Next”.
- Create the password for “administrator@vsphere.local”. It should be complex, with upper case, lower case, numerals and one special character (recommend “!”, this is because in SSO 5.1 other special characters caused the SSO scripts to fail – not sure if this is true for 5.5). WARNING: record this password in a safe place, it is the master key to your entire vCenter infrastructure.
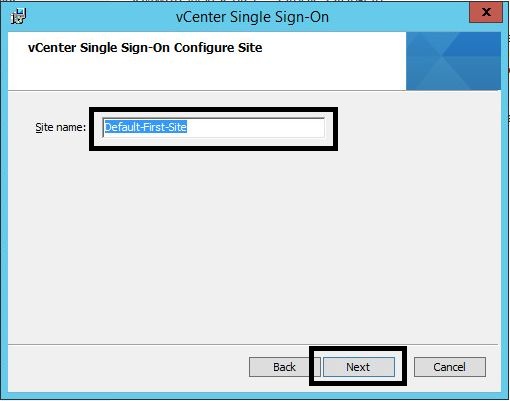
- Enter the “Site name” and press “Next”.
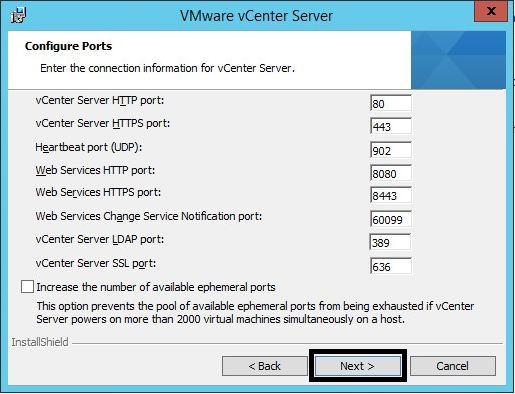
- If you use custom ports, configure it here. Select “Next”.
- Change the “Destination folder” to E:\ and select “Next”.
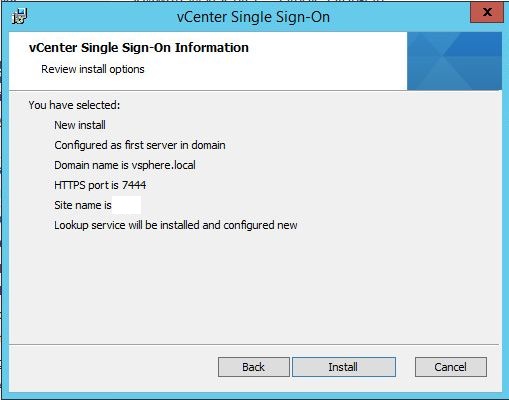
- Select “Install”.
- Select “Finish”.
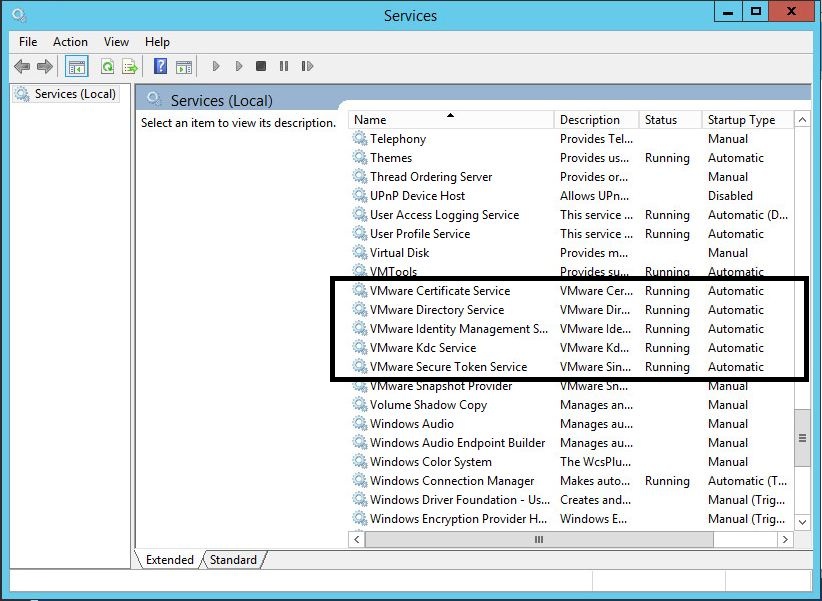
- Open the Services application and verify that the VMware “Certificate”, “Directory”, “Identity Management”, “Kdc” and “Security Token” services are installed and running.


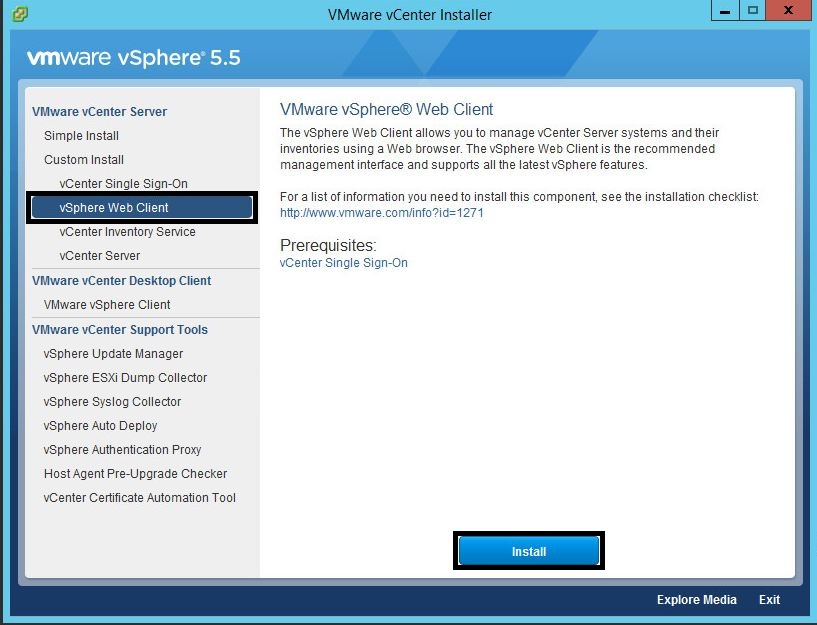
Install the vSphere Web Client Service
- In the VMware vSphere 5.5 vCenter Installer window, select “vSphere Web Client” from the “Custom Install” and press “Install”.
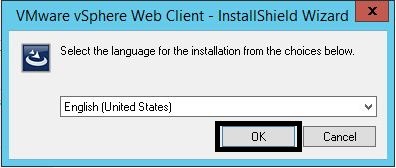
- Select “OK”.
- Select “Next”.
- Accept the licence agreement and select “Next”.
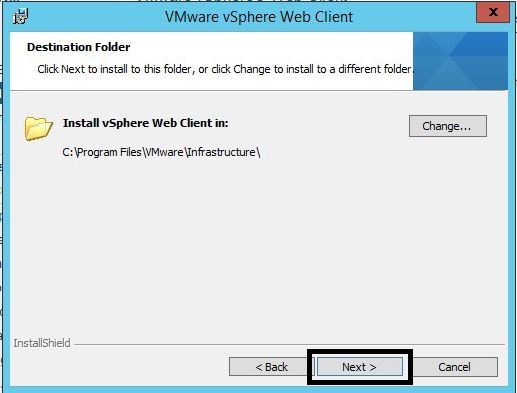
- Leave the “Destination folder” as C:\ and select “Next”. If you change this, then the Web Client will not function, you will have to uninstall the vSphere Web Client and reinstall it with the default destination folder.
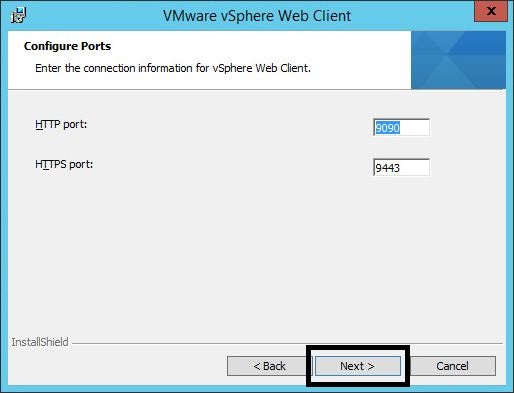
- If you use custom ports, configure it here. Select “Next”.
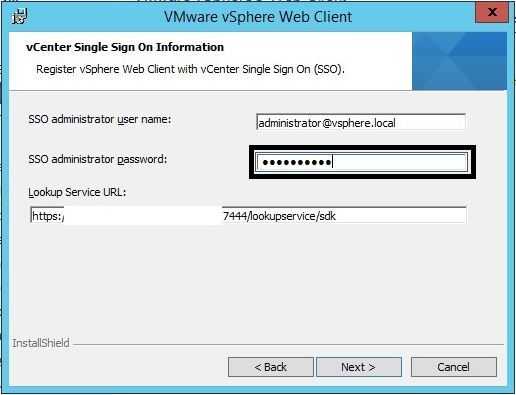
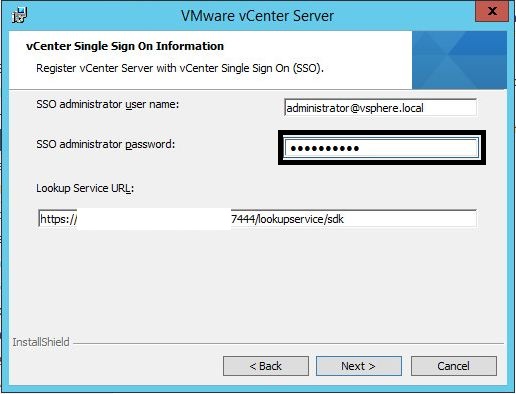
- Enter the “administrator@vsphere.local” password and select “Next”.
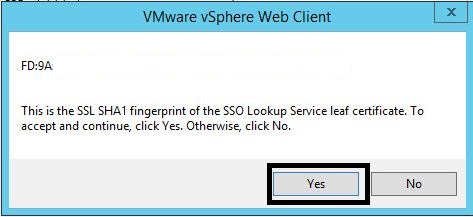
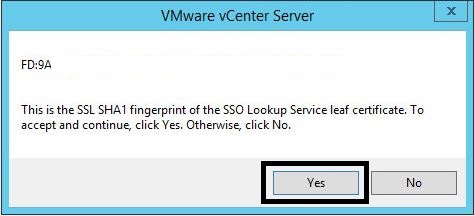
- Accept the SSO leaf certification by pressing “Yes”.
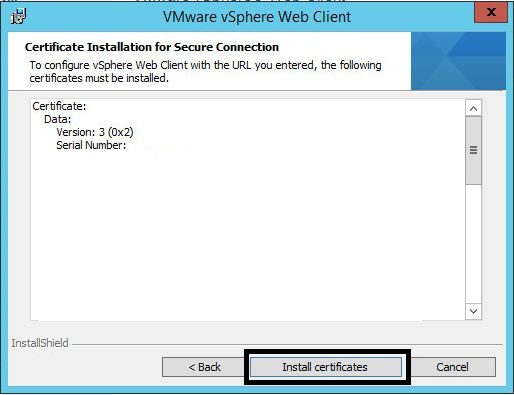
- Select the “Install certificates” button.
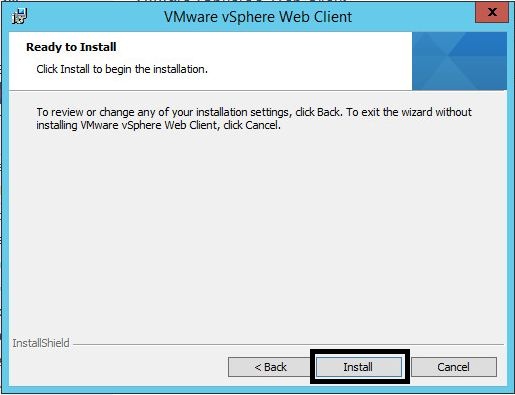
- Select “Install”.
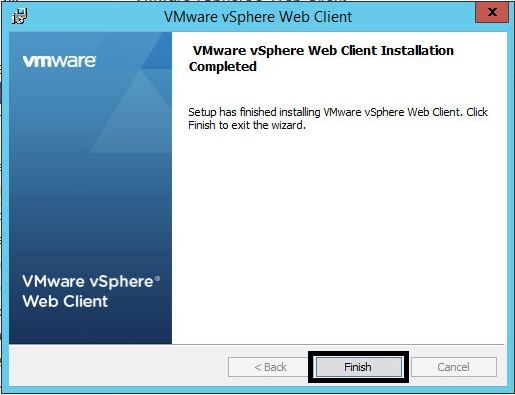
- Select “Finish”.
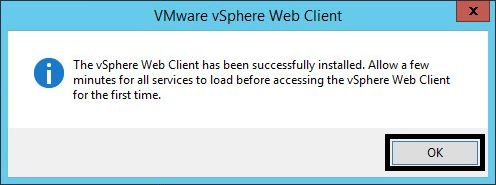
- Press “OK”.
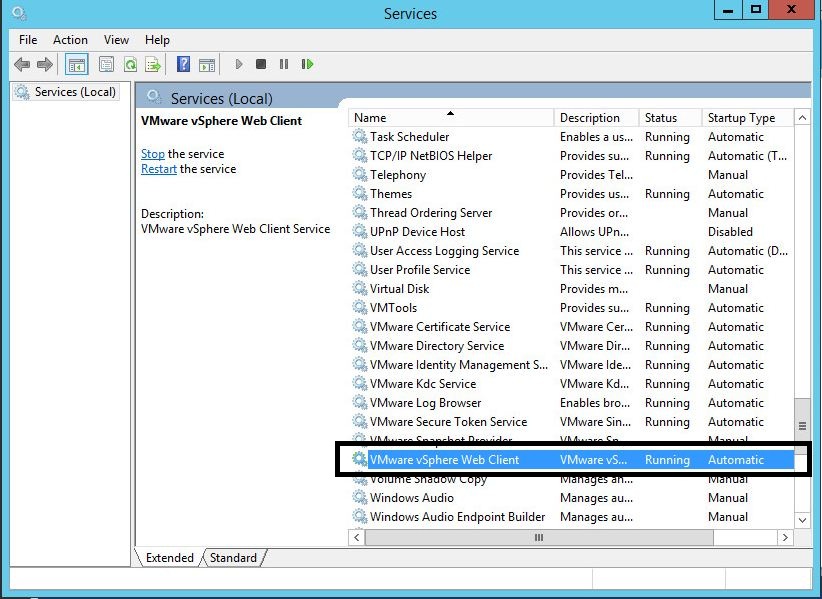
- Open the Services application and verify that the VMware “vSphere Web Client” service is installed and running.


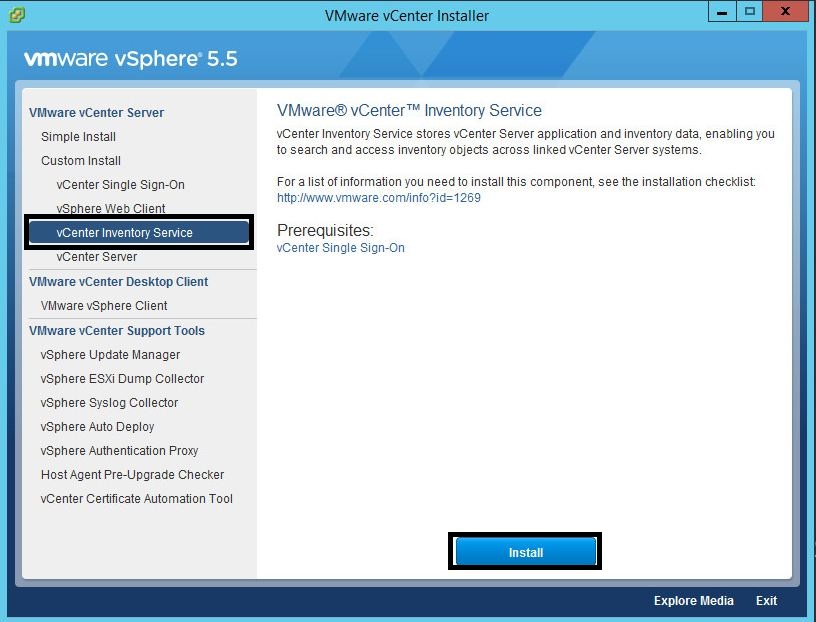
Install the vCenter Inventory Service
- In the VMware vSphere 5.5 vCenter Installer window, select “vCenter Inventory Service” from the “Custom Install” and press “Install”.
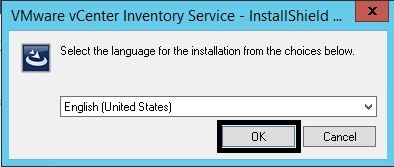
- Select “OK”.
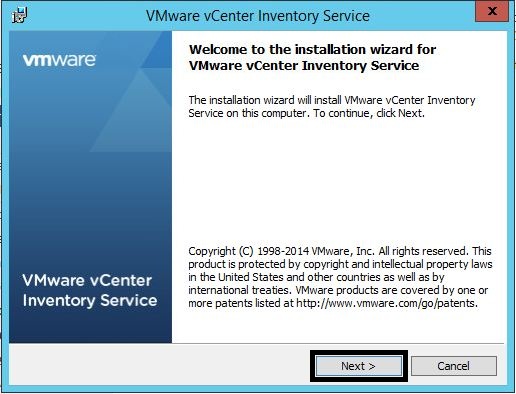
- Select “Next”.
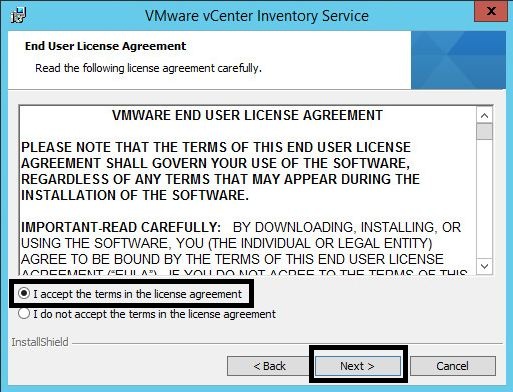
- Accept the licence agreement and select “Next”.
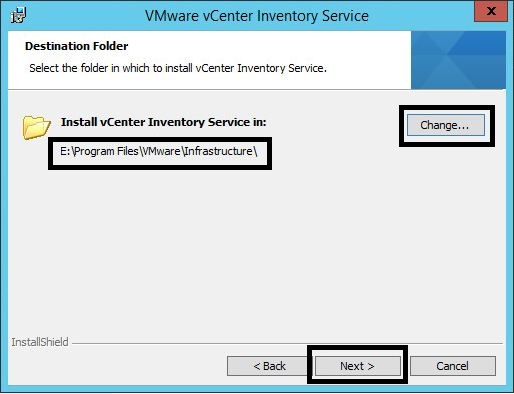
- Change the “Destination folder” to E:\ and select “Next”.
- Select “Next”.
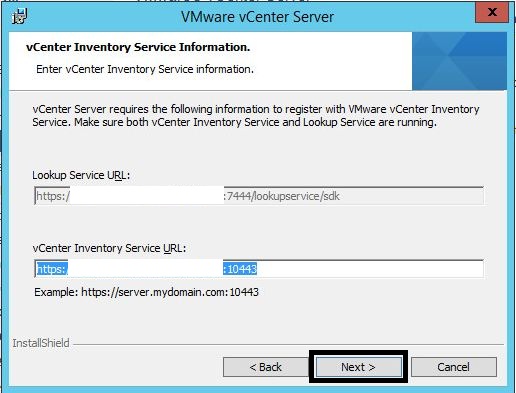
- If you use custom ports, configure it here. Select “Next”.
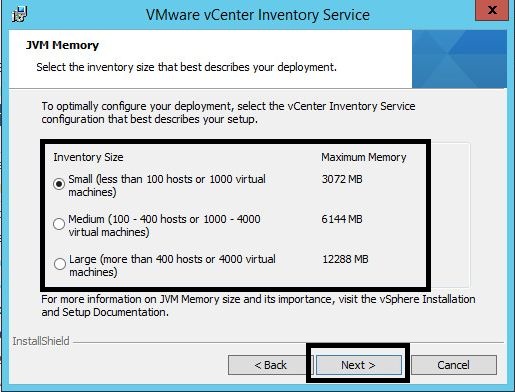
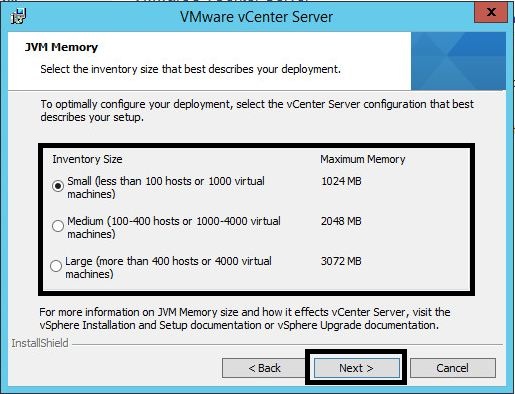
- Select the “Inventory Size” and press “Next”. “Small” is used in this case.
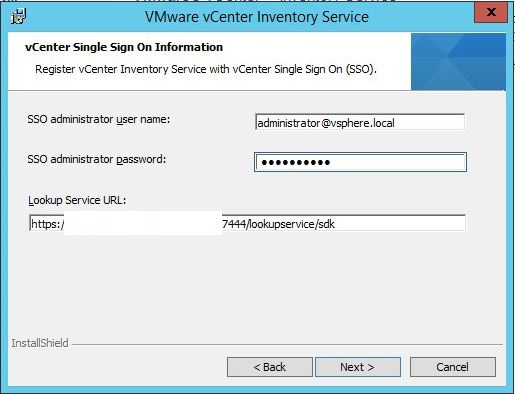
- Enter the “administrator@vsphere.local” password and select “Next”.
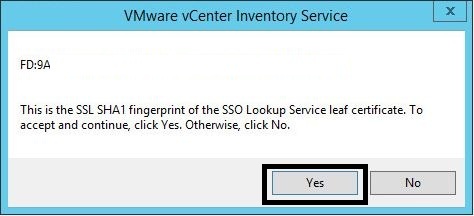
- Accept the SSO leaf certification by pressing “Yes”.
- Select “Install”.
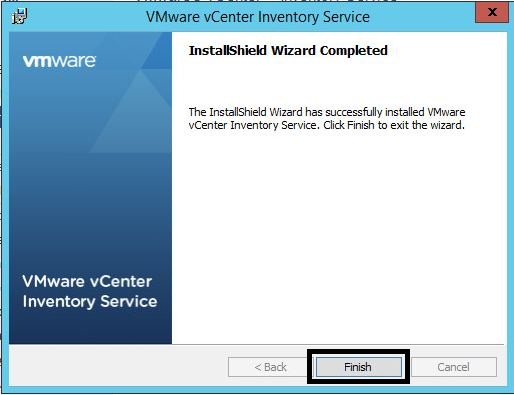
- Select “Finish”.
- Open the Services application and verify that the VMware “vCenter Inventory” service is installed and running.


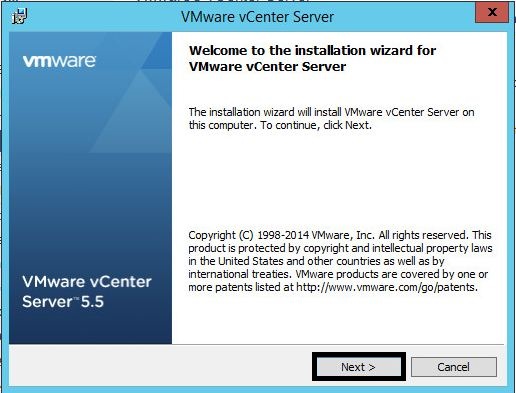
Install the vCenter Server
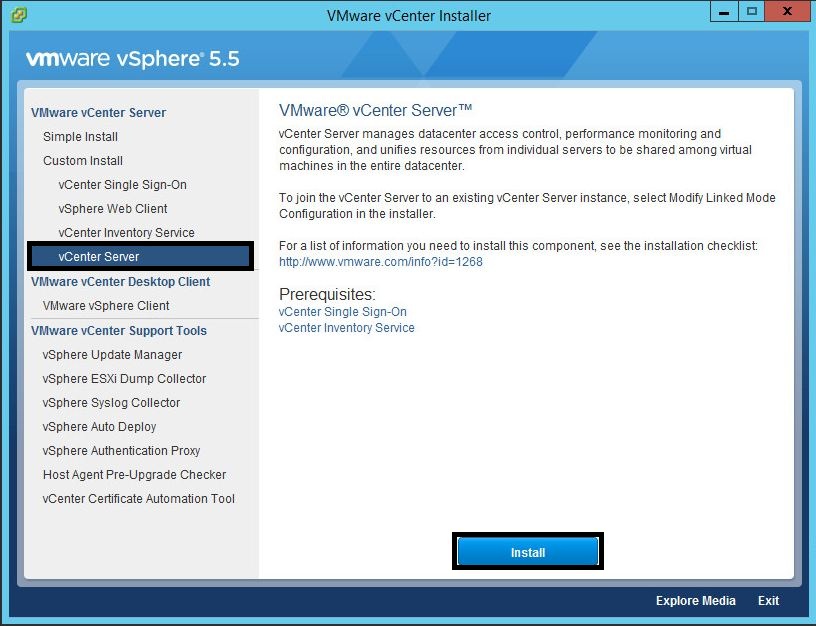
- In the VMware vSphere 5.5 vCenter Installer window, select “vCenter Server” from the “Custom Install” and press “Install”.
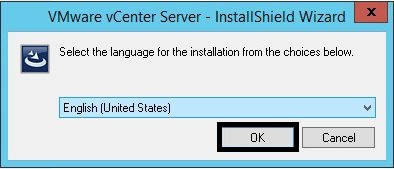
- Select “OK”.
- Select “Next”.
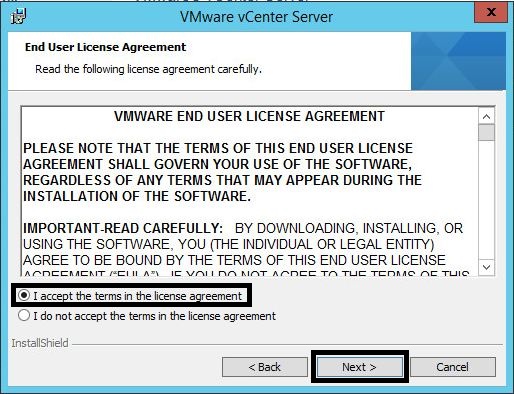
- Accept the licence agreement and select “Next”.
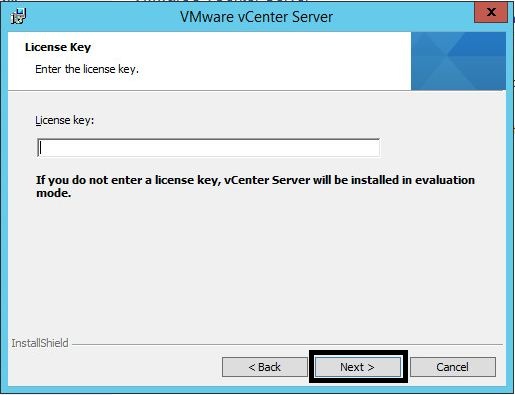
- Skip the “Licence key” and press “Next”. The licence key is already stored in the SQL Server Database.
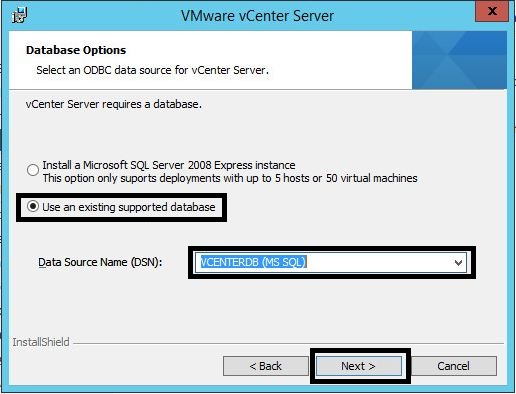
- Select “Use an existing supported database” and select “VCENTERDB (MS SQL)” from the DSN list. Then press “Next”.
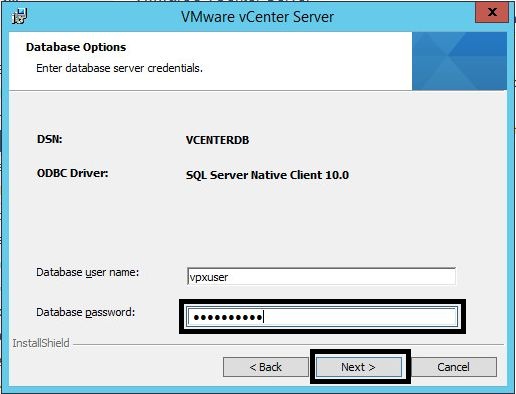
- Enter the “vpxuser” “Database password” and press “Next”.
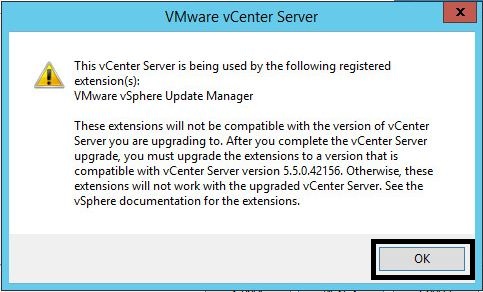
- Press “OK” for the VUM “registered extensions” message.
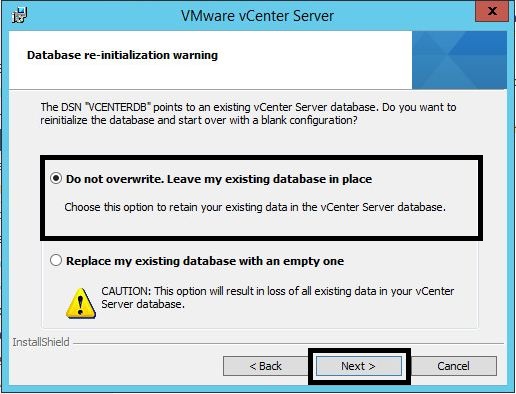
- Select “Do not overwrite. Leave my existing database in place” and press “Next”.
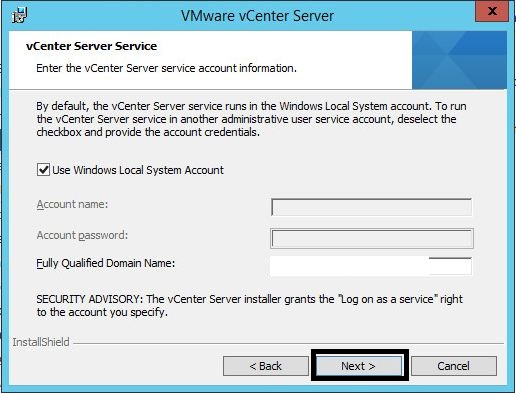
- Select “Next”.
- If you use custom ports, configure it here. Select “Next”.
- Select the “Inventory Size” and press “Next”. “Small” is used in this case.
- Enter the “administrator@vsphere.local” password and select “Next”.
- Accept the SSO leaf certification by pressing “Yes”.
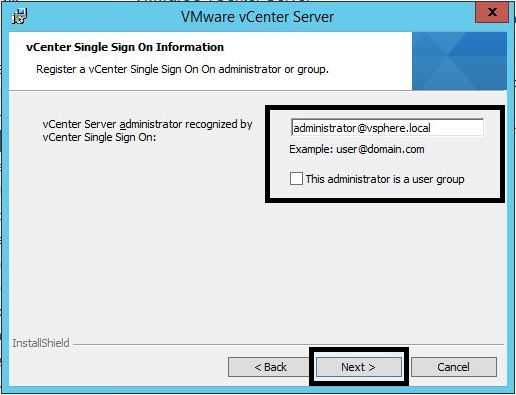
- Enter the Active Directory username or group that will be configured as an administrator of vCenter. Select “Next”.
- Select “Next”.
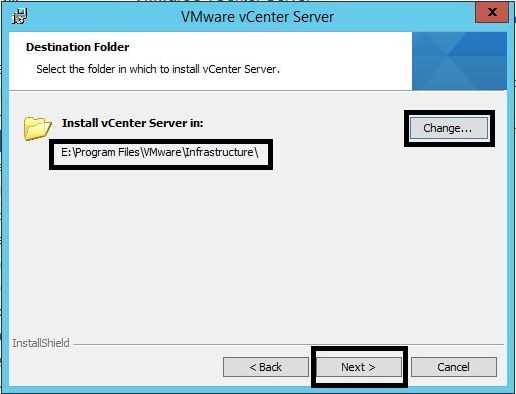
- Change the “Destination folder” to E:\ and select “Next”.
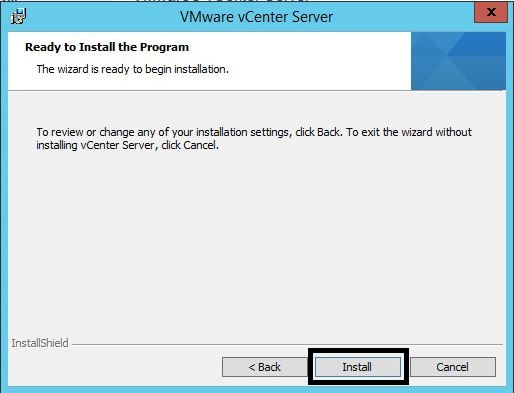
- Select “Install”.
- Select “Finish”.
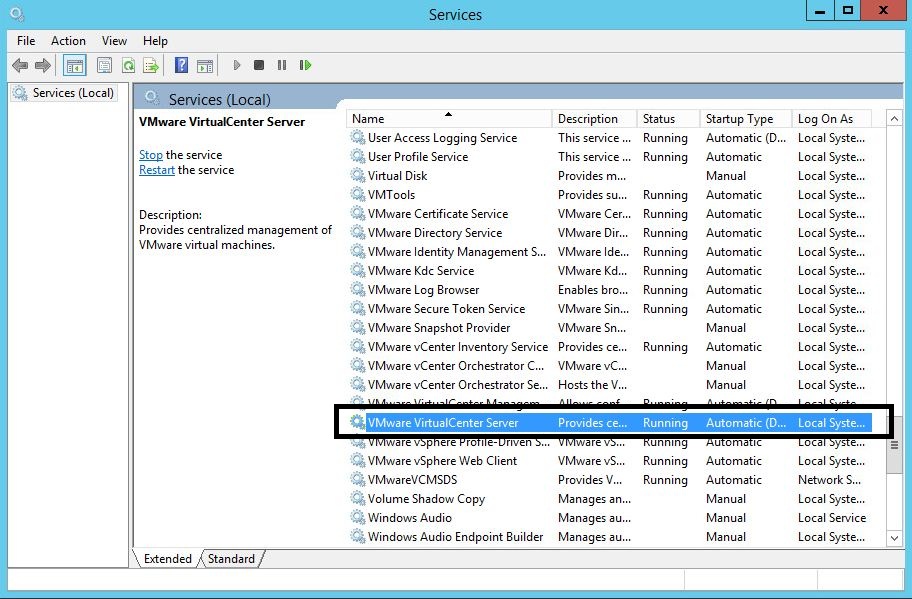
- Open the Services application and verify that the VMware “VirtualCenter Server” service is installed and running.

Install the vSphere Client
-
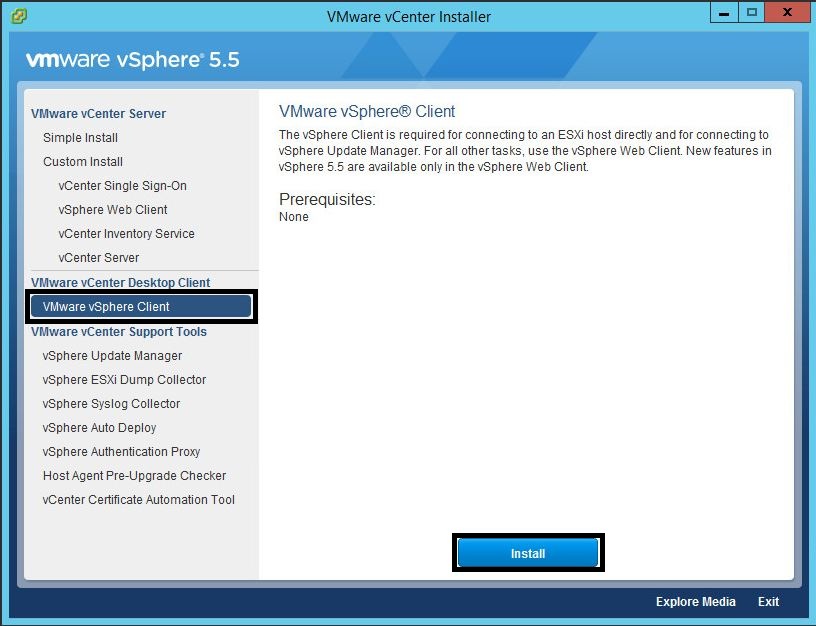
- In the VMware vSphere 5.5 vCenter Installer window, select “VMware vSphere Client” from the “VMware vCenter Desktop Client” and press “Install”.
- Complete the vSphere Client installation and run the vSphere Client.
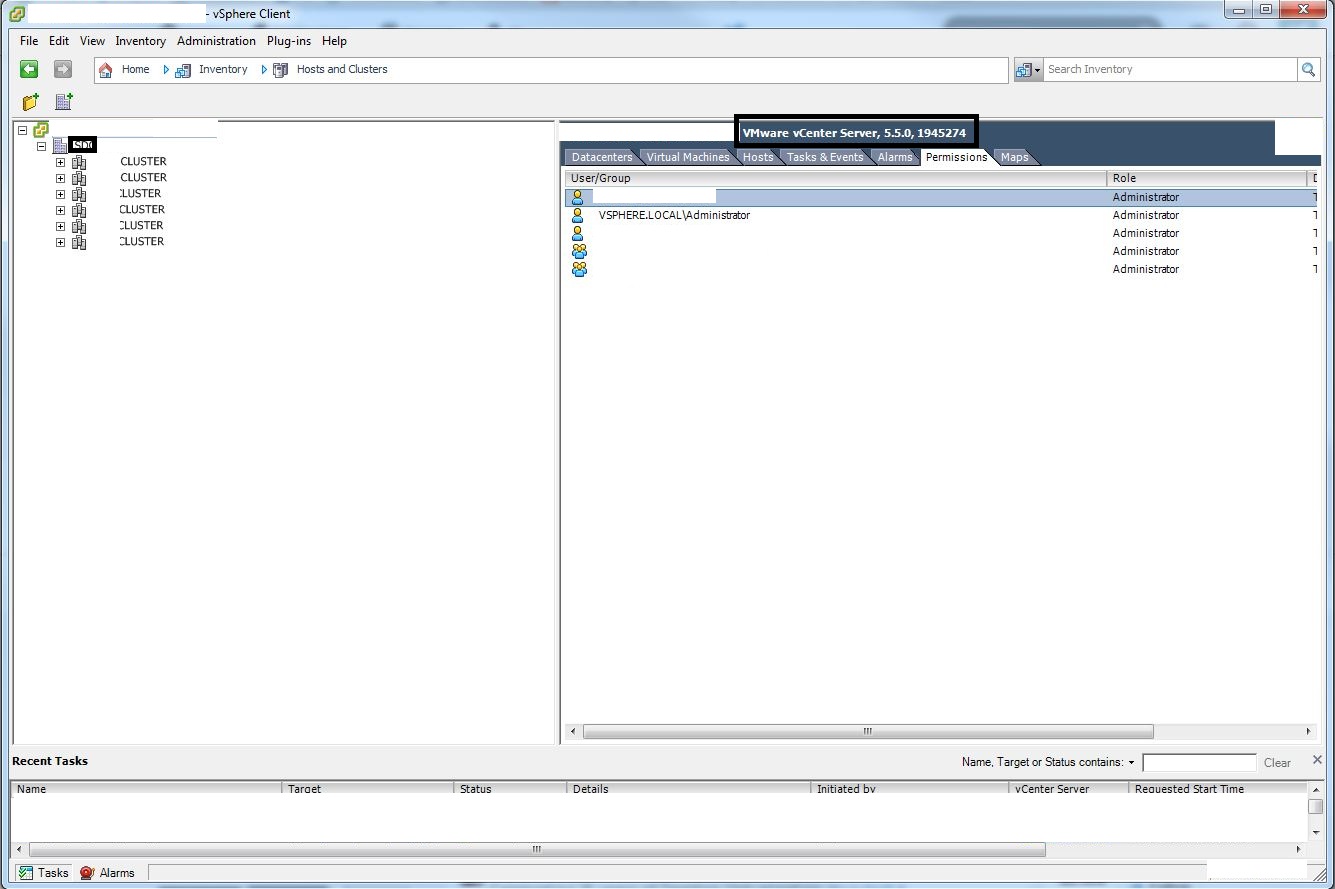
- Connect to the vCenter server with the vCenter server 5.5 hostname and login.
- Check that all hosts are connected and that all alarms are accounted for.
- Recreate the original RBAC permissions that were recorded from the vCenter 5.1 server.
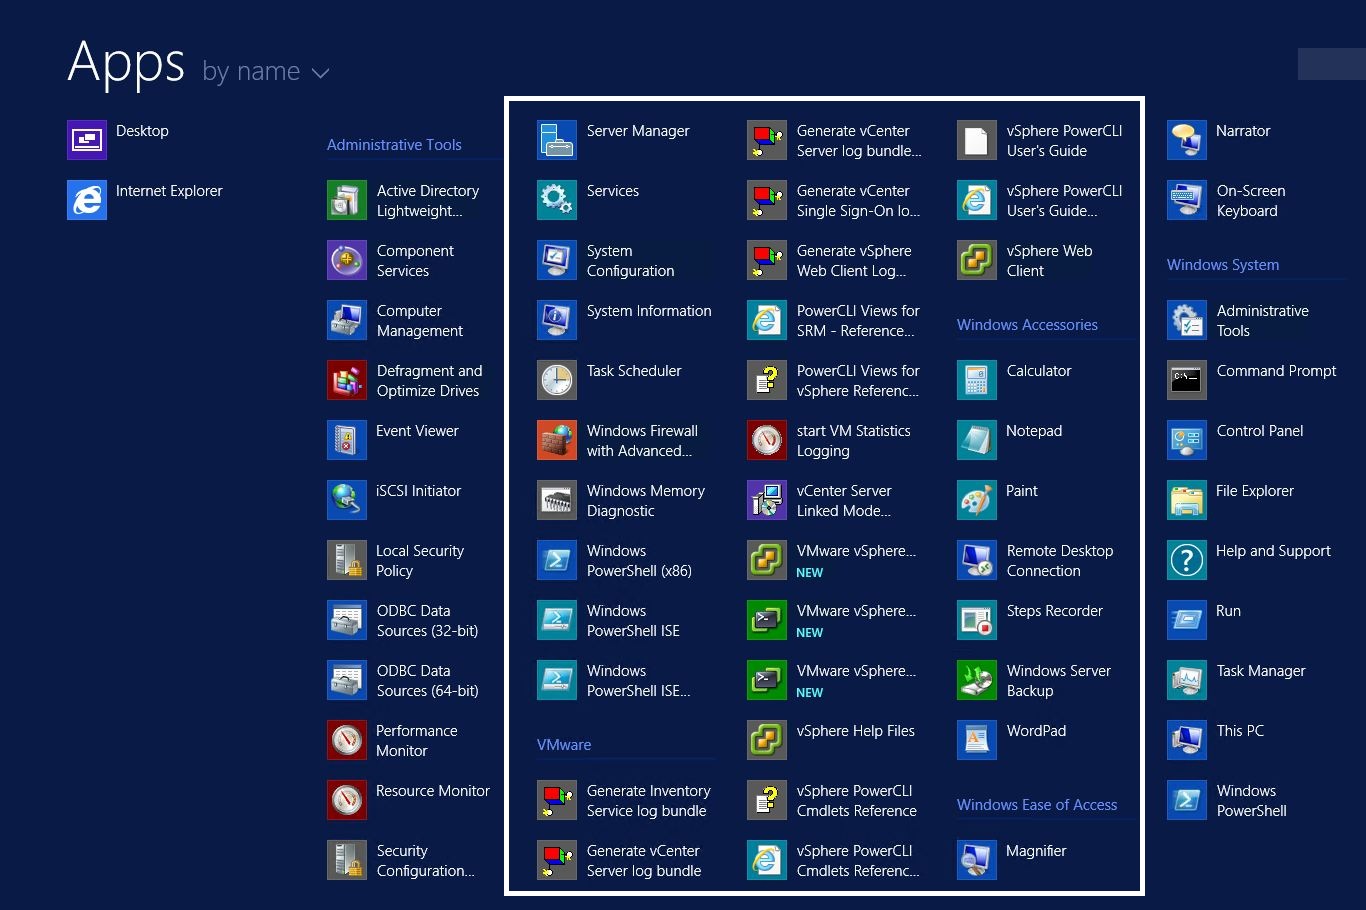
- From the Windows Server Start menu, select the vSphere Web Client and login.
- Verify that the vSphere Web Client is functioning correctly.
- On your Desktop close all consoles and disconnect the vSphere Client from the Management host.
- Install the vSphere Client 5.5 on your Desktop and connect to the vCenter server 5.5 and login.
- Take a vSphere Snapshot of the vCenter and Database servers. This provides a roll-back if any part of the Cloud Management re-integration process fails.
You can now move to Part 4 of the Configuration Guide.
