 This is part 6 of the Cisco UCS Configuration Guide, covering the advanced management features of the Cisco UCS (AD integration, DNS, Cisco Call Home, UCS Central integration, Time Zone, NTP & Port Licencing).
Eight part series, describing how to configure a Cisco UCS from start to finish for a vSphere deployment:
- Cisco UCS Configuration Guide – Part 1 – Overview
- Cisco UCS Configuration Guide – Part 2 – Equipment
- Cisco UCS Configuration Guide – Part 3 – LAN
- Cisco UCS Configuration Guide – Part 4 – SAN
- Cisco UCS Configuration Guide – Part 5 – Server
- Cisco UCS Configuration Guide – Part 6 – Admin
- Cisco UCS Configuration Guide – Part 7 – Firmware Upgrade
- Cisco UCS Configuration Guide – Part 8 – ESXi Driver Upgrade
The UCS Manager Admin configuration has nine areas: Faults, Events & Audit Log, User Management, Key Management, Communication Management, Stats Management, Time Zone Management, Capability Catalog, Management Extension & Licence Management.

DNS
1. In the “Communications Management” section of the “Admin” tab, select the “DNS Management” object, right mouse click and select “Specify DNS Server”. Enter the “DNS Server” IP Address and then press “OK”.

2. Perform this step for each DNS server in your network.
3. Press the “Save Changes” button.
NTP & Time Zone
1. In the “Time Zone Management” section of the “Admin” tab, select the “General” tab and select you time zone from the “Time Zone” drop-down list.
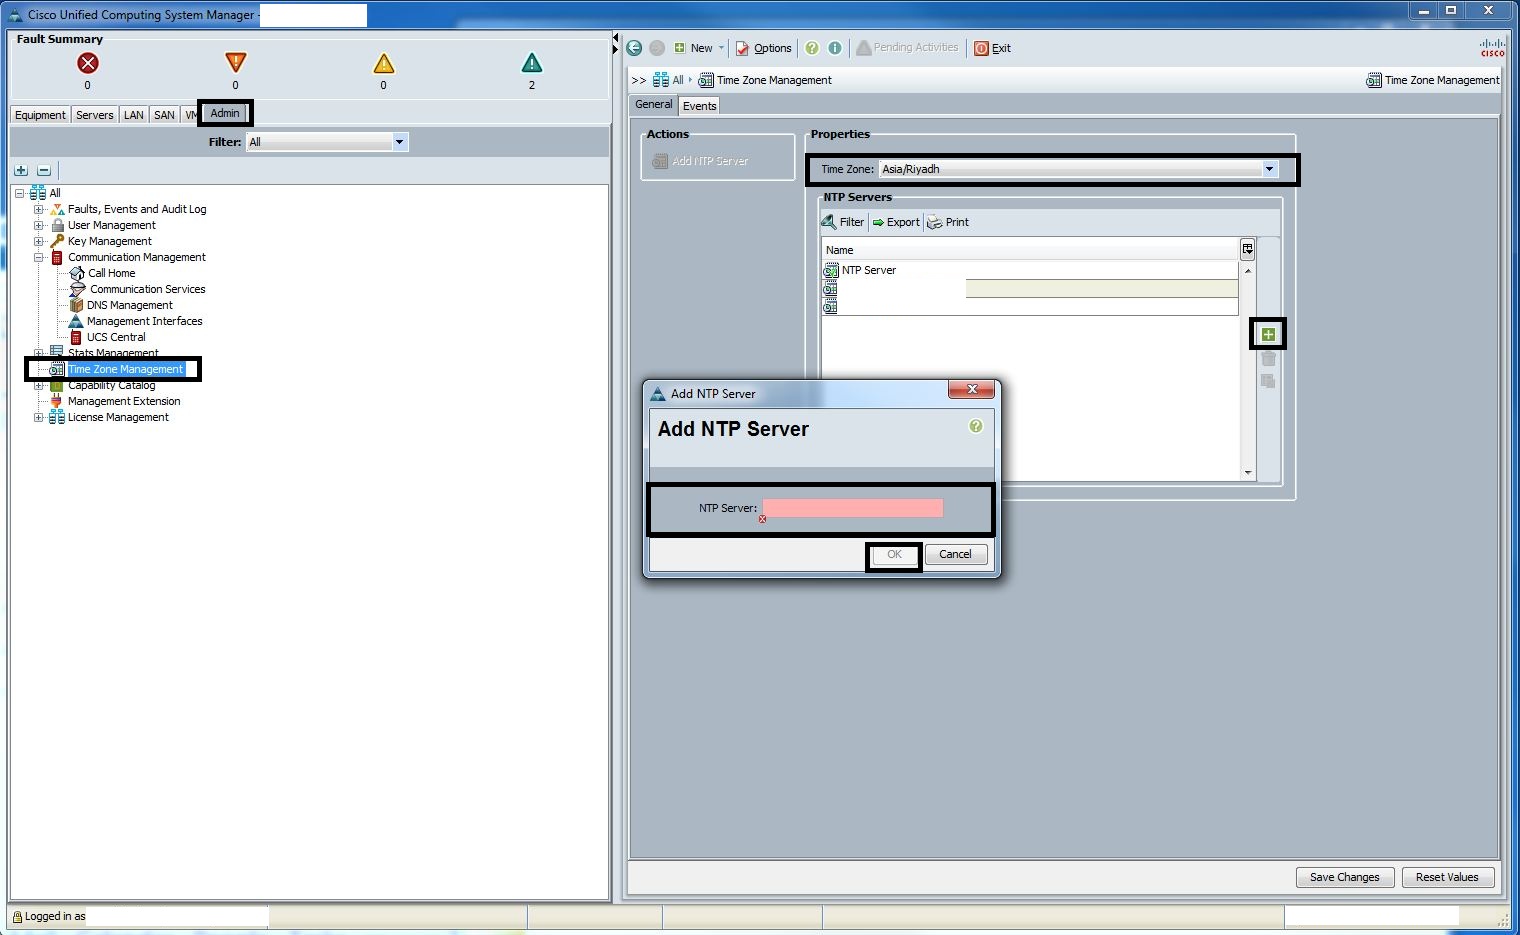
2. In the “NTP Servers” window, select the green “+” button and enter the “NTP Server” IP Address in the “Add NTP Server” window that appears. Then press “OK” and repeat for each NTP server in your network.
3. Press the “Save Changes” button.
AD Integration
1. In the “User Management” section of the “Admin” tab, select the “LDAP Provider” object, right mouse click and select “Create LDAP Provider”.

2. In the “Create LDAP Provider” screen, enter the “Hostname”, “Order”, “Bind DN”, “Base DN”, “Port”/”SSL”, “Filter”, “Attribute” and “Password”. For Active Directory integration, make sure the “Vendor” is set to “MS AD”. Press the “Next” button.
3. Configure the “LDAP Group Rules” for “Group” Authorisation and Recursion with the “Target Attribute”. Repeat this for each Active Directory server in your network for redundancy.

4. In the “User Management” section of the “Admin” tab, select the “LDAP Provider Groups” object, right mouse click and select “Create LDAP Provider Group”.
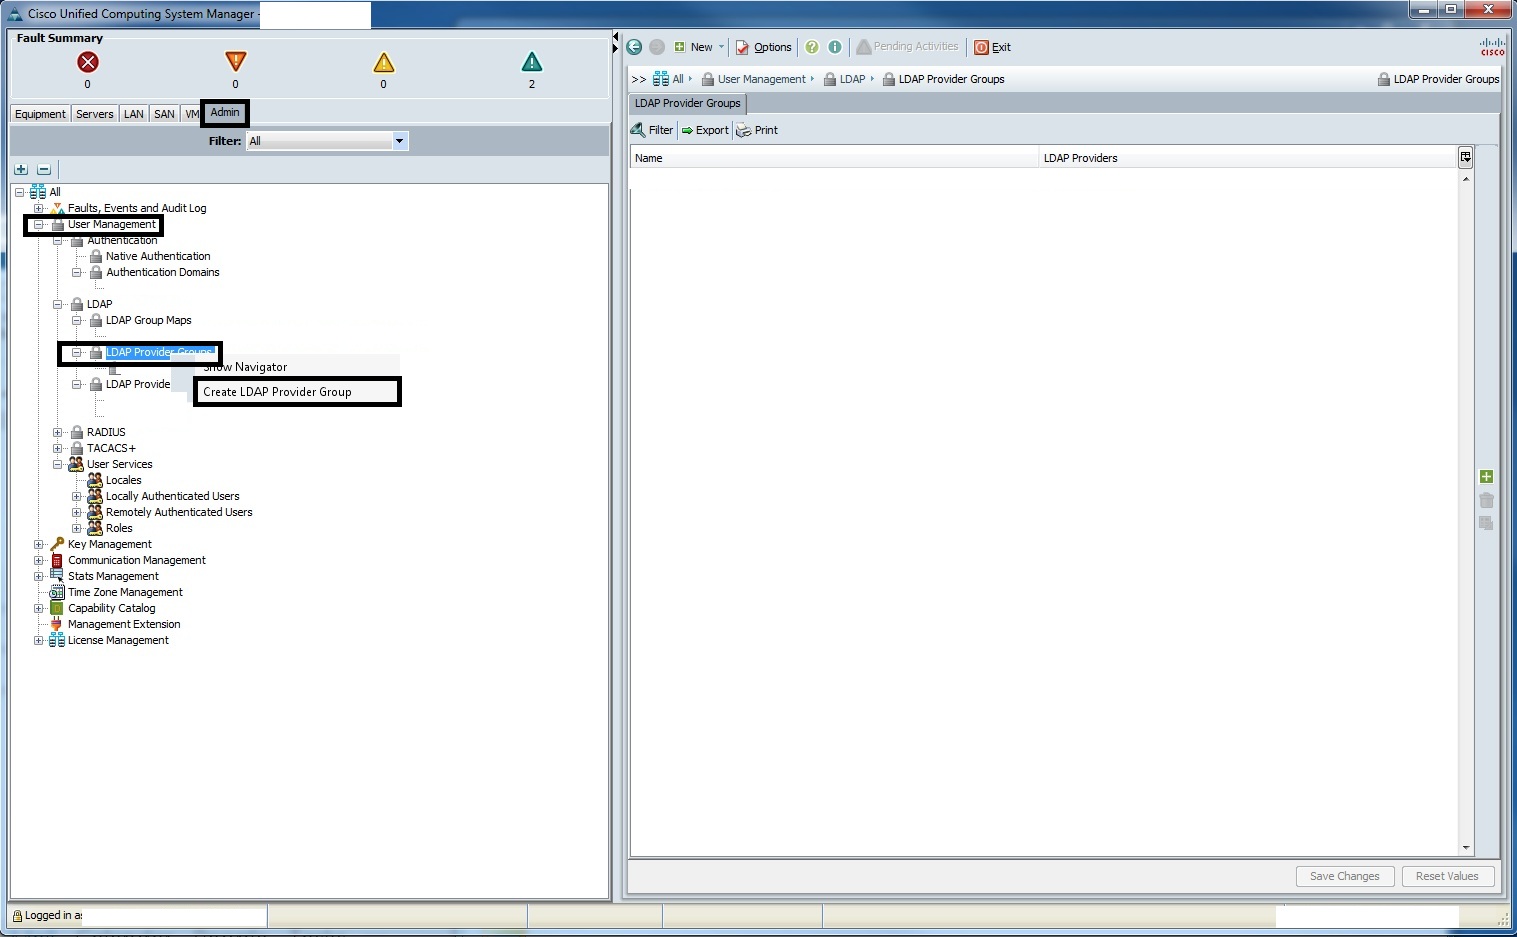
5. In the “Create LDAP Provider Group” screen, enter the “Name”, select the “LDAP Providers” and press the “>>” button to map them to the “Included Providers” section. Press the “OK” button.

6. In the “User Management” section of the “Admin” tab, select the “Authentication Domain” object, right mouse click and select “Create a Domain”.

7. In the “Create a Domain” screen, enter the “Name” of the AD Domain, select the “LDAP” “Realm” and select the “LDAP Provider Group” from the “Provider Group” drop-down list. Press the “OK” button.

8. In the “User Management” section of the “Admin” tab, select the “LDAP Group Map” object, right mouse click and select “Create LDAP Group Map”.

9. In the “Create LDAP Group Map” screen, enter the “LDAP Group DN” and select the equivalent “Role” for that DN. Press the “OK” button. At a minimum, you should have “Admin” and “Read-Only” LDAP Group Maps.
10. When you login to the UCS Manager, enter your AD credentials and select the AD “Domain” from the drop-down list.

Cisco Call Home
1. In the “Communication Management” section of the “Admin” tab, select the “Call Home” object and select the “General” tab. Set the “Admin” “State” to “On”. Enter the “Contact Information”, “Ids” (Cisco Contract information) and “SMTP Server”/”Email” information.
2. Press the “Save Changes” button.

3. In the “Communication Management” section of the “Admin” tab, select the “Call Home” object and select the “Profiles” tab. Press the green “+” button with the “Create Call Home Profile” option.
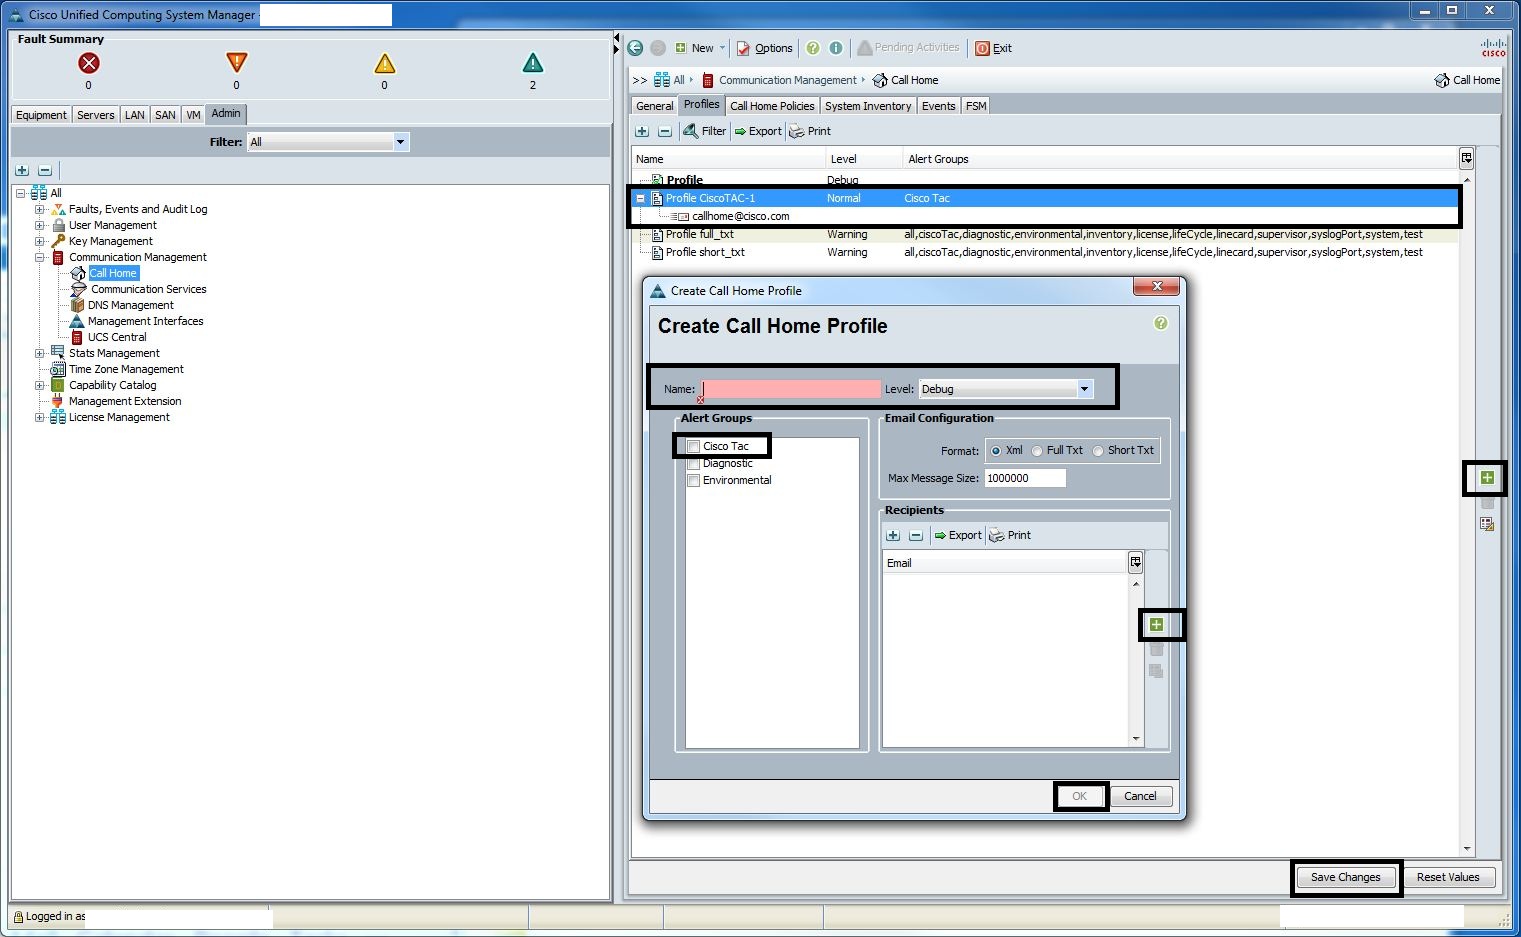
4. In the “Create Call Home Profile” screen, enter the “Name” (eg. Cisco TAC), “Level” “Normal”, select “Alert Group” “Cisco TAC” and press the green “+” button within the “Recipients” area.
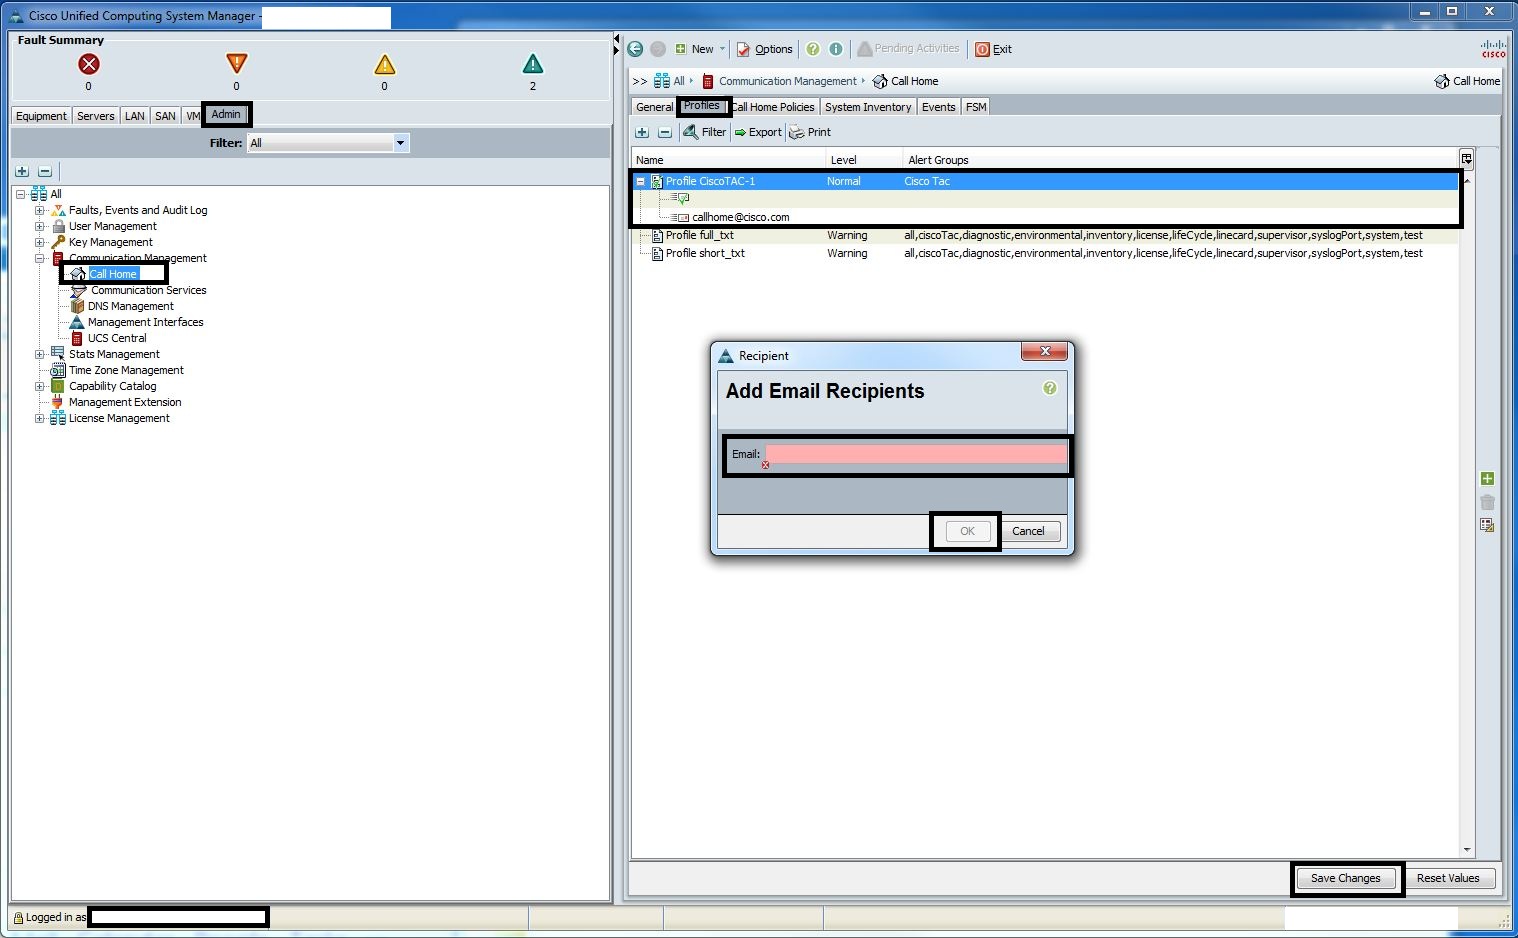
5. In the “Add Email Recipients” screen, enter the “Email” “callhome@cisco.com”.
6. Press the “Save Changes” button.
UCS Central Integration
1. In the “Communication Management” section of the “Admin” tab, select the “UCS Central” object and select the “UCS Central” tab. Press the “Register with UCS Central” action.
2. In the “Register with UCS Central” screen, enter the “Hostname/IP Address” and “Shared Secret” for the UCS Central virtual appliance. Also set the “Policy Resolution Control” and then press “OK”.
3. Press the “Save Changes” button. This UCS Manager should now appear within UCS Central.

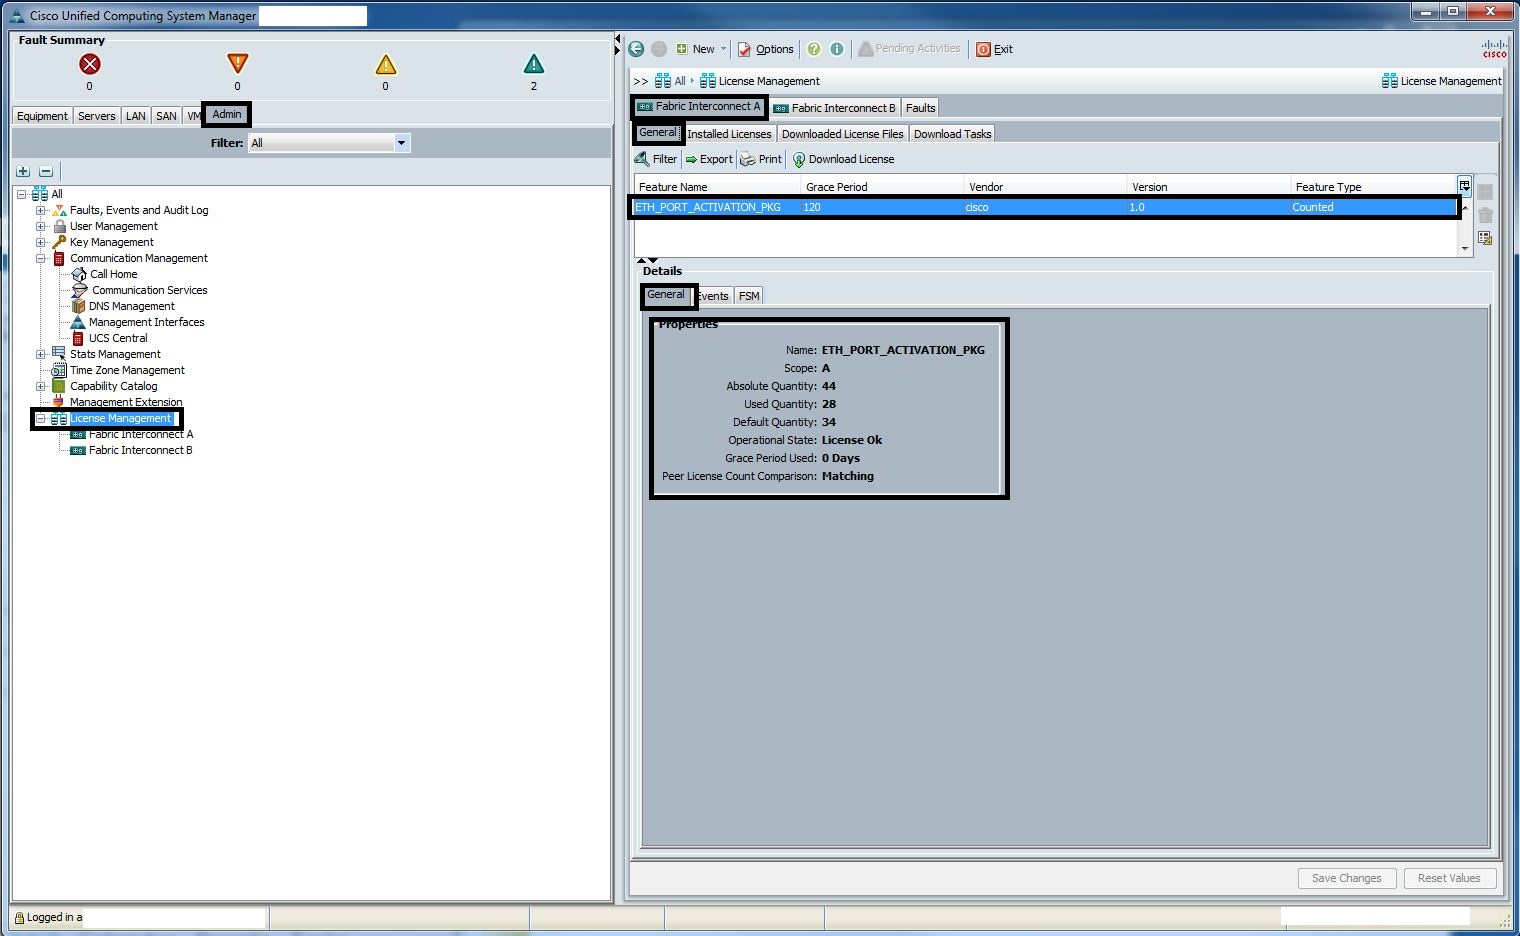
Licence Management
1. In the “Licence Management” section of the “Admin” tab, select the “Fabric Interconnect A” tab and then the “General” sub-tab. This page displays your total port licence status. Be mindful that you need to purchase additional port licences as your Fabric Interconnect grows in capacity.
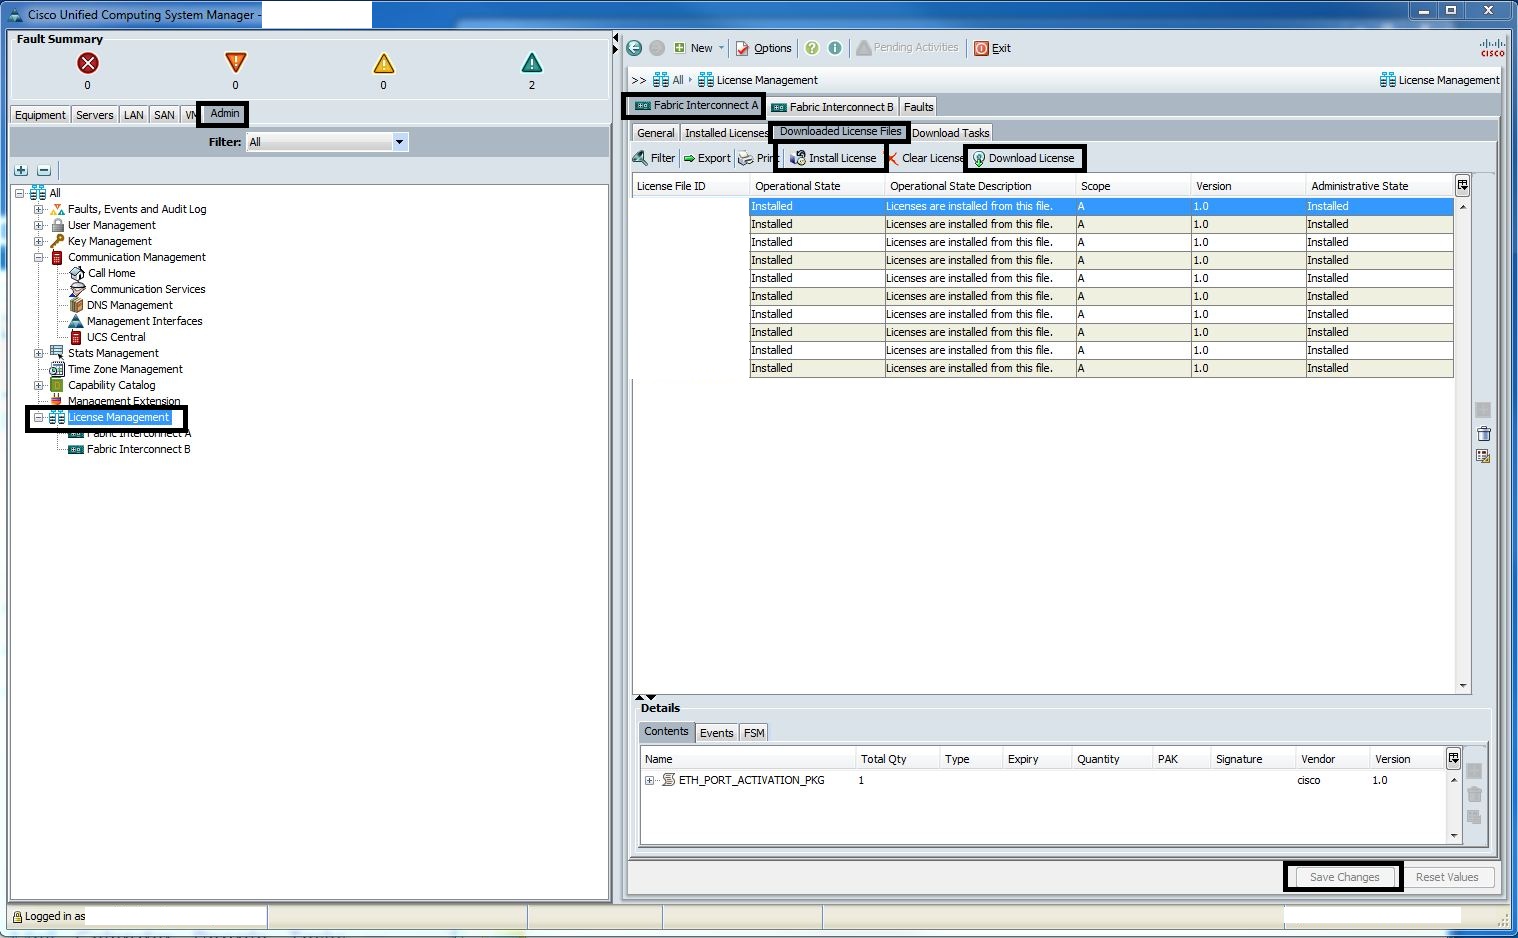
2. The “Download Tasks” sub-tab has the “Download Licence” button, which is used to upload the “UCSFEATnnnnnnn.lic” files to the Fabric Interconnect. These licences must be purchased from Cisco and then downloaded from the Cisco “TAC tool” portal.

3. In the “Downloaded Licence Files” sub-tab, each downloaded “Licence File ID” must be selected and the “Install Licence” button pressed. Answer “Yes” to “Are you sure you want to install File?”
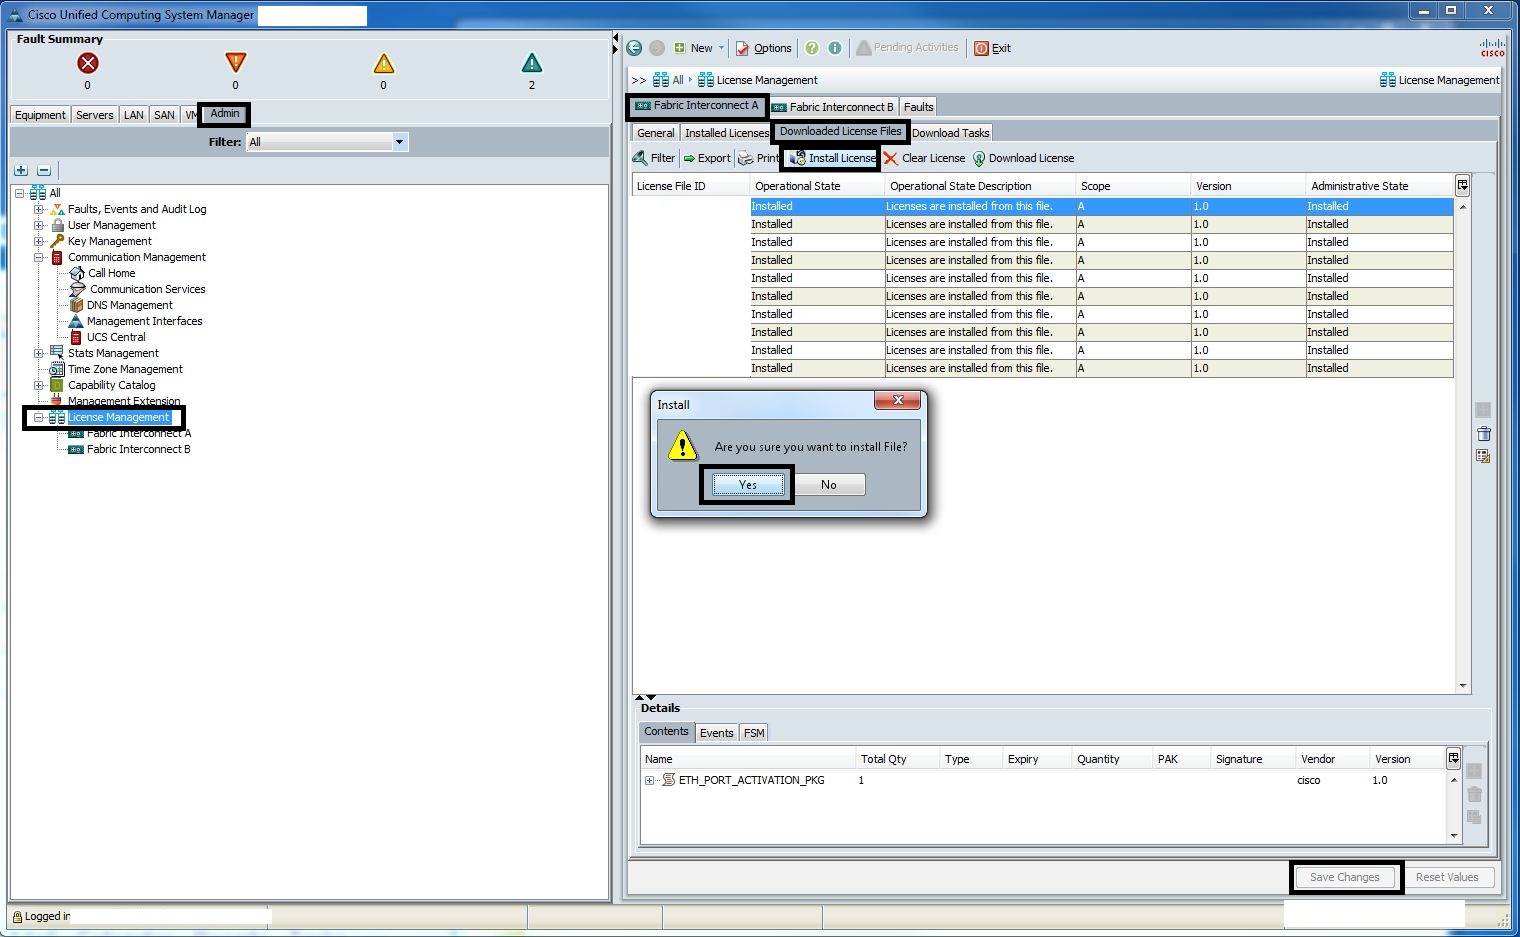
4. Press the “Save Changes” button.
