Recently I added additional SSDs to a Starter XtremIO X-Brick in the RoundTower DemoLab that was partially populated with drives. There are a series of steps you need to execute to bring the added storage online.
Objective
- You want to add 12 additional SSDs to an existing Starter X-Brick (10TB with only 5TB installed) in your environment (less than 12 is not supported, however it is technically possible).
Prerequisites
- Valid support contract with Dell-EMC, you will need to access documentation that requires a valid login to Dell-EMC support.
- X-Brick is fully functional and connected to an XMS.
- Have a copy of the default passwords for XtremIO, I cannot list them here due to the Dell-EMC partner agreement. The accounts you will be using are: tech and xmsadmin. You have to access Dell-EMC support and search for Article number “332100”.
- Have access to the XtremIO Management System (XMS).
- The “EMC XtremIO Storage Array Software Installation and Upgrade Guide”, “Chapter 9, Expanding a 10TB Starter X-Brick (5TB)” from Dell-EMC support covers this in detail. This procedure does cover the mechanism from the UI and SSH. I had problems with the UI method and was forced to use the SSH procedure.
Step 1 – Install the additional SSD drives into the X-Brick Chassis
- Open the rack that houses the X-Brick you want to add storage to.
- Remove the 12 plastic SSD fillers from slots 13 to 24.
- Install the 12 SSD drives into slots 13 to 24.
Step 2 – Login to the XMS UI
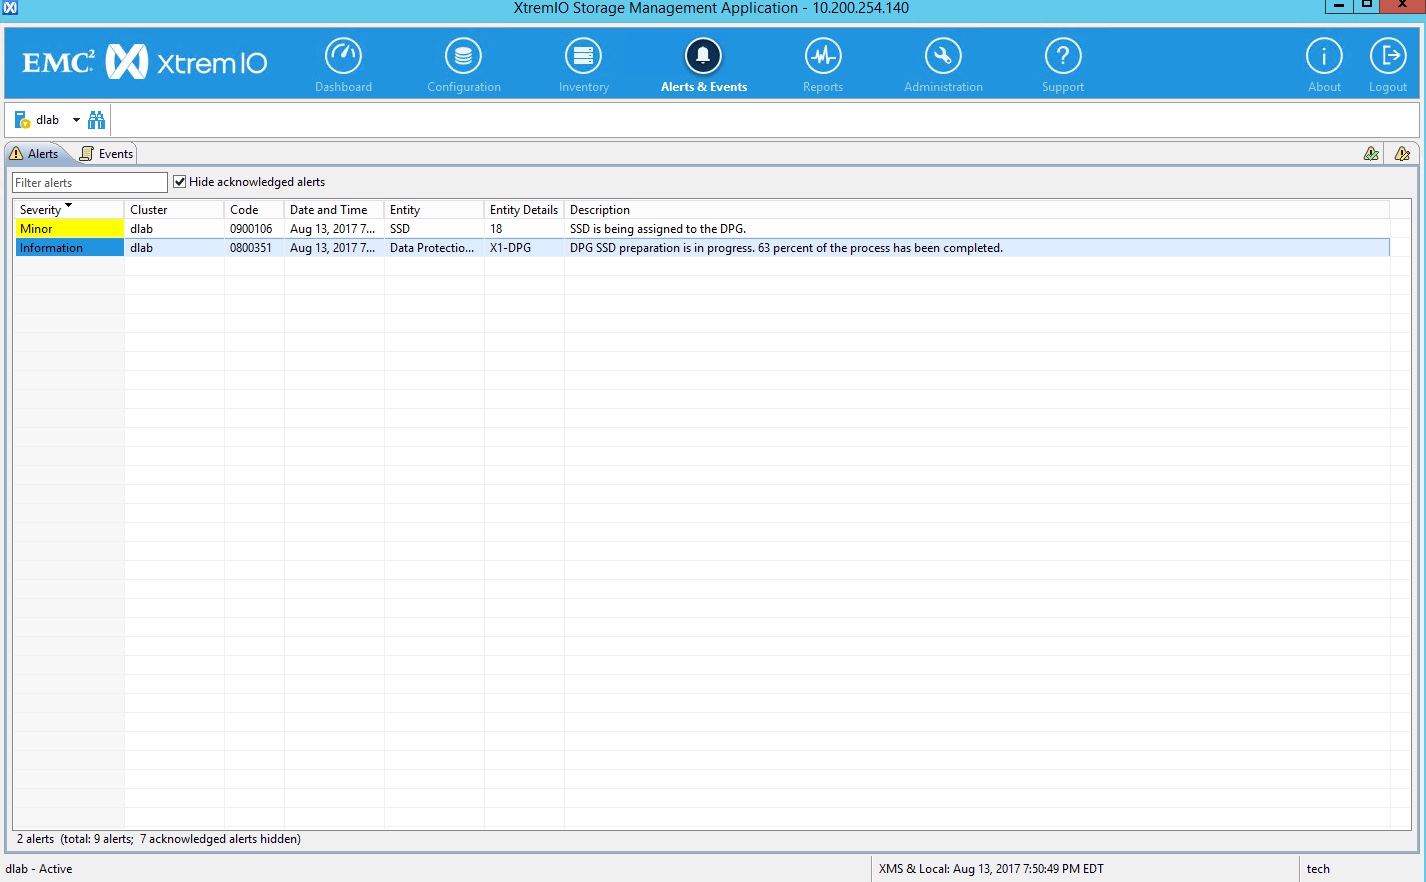
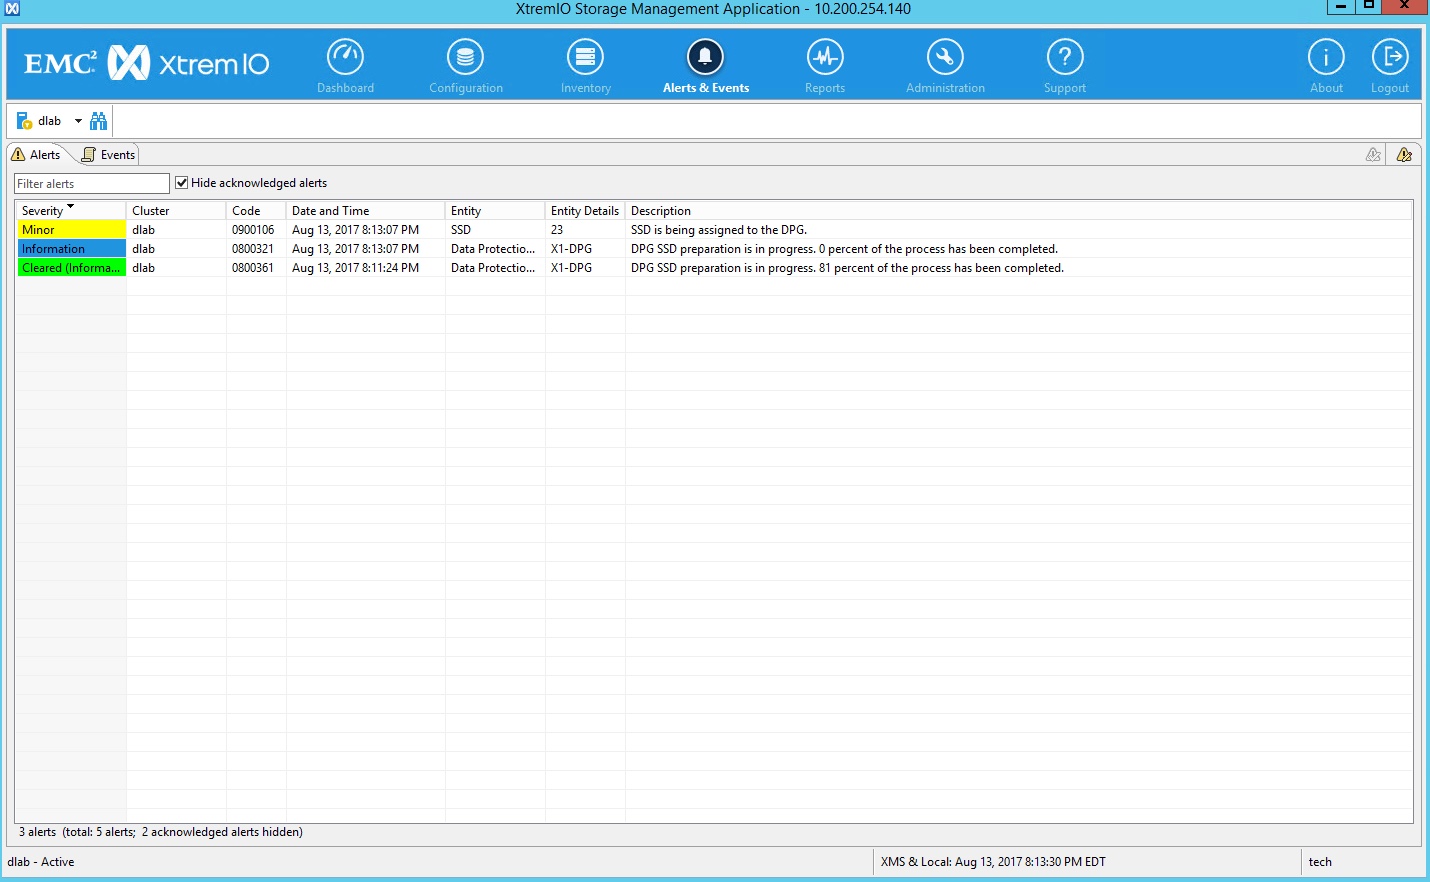
- The XMS UI will be used to track the SSD drives being brought online via the Alerts & Events screen.
- The SSH session in Step 3 will be used to issue the commands to bring each SSD online. It takes approximately 3 minutes per SSD.
- Access the XMS UI by opening a browser and entering https://<XMS IP address> from your JumpBox/Laptop. Download the Java applet and launch it. Accept any Java warnings and login as “tech” (get default password from Dell-EMC support). This is a configured XMS instance, you should see the X-Brick cluster in the UI.
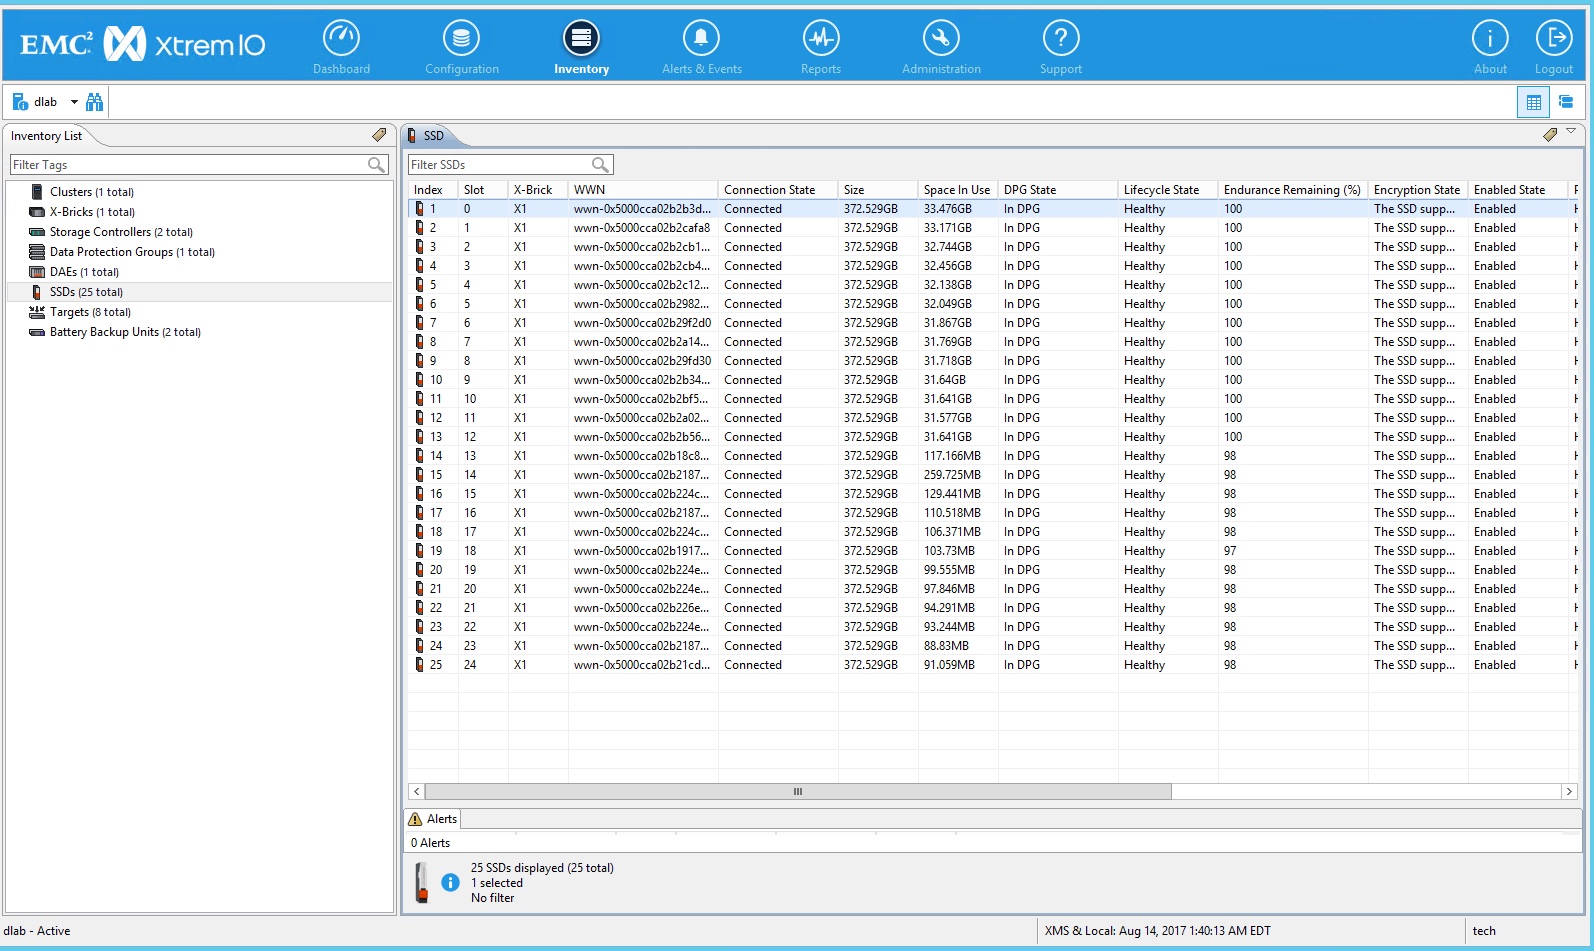
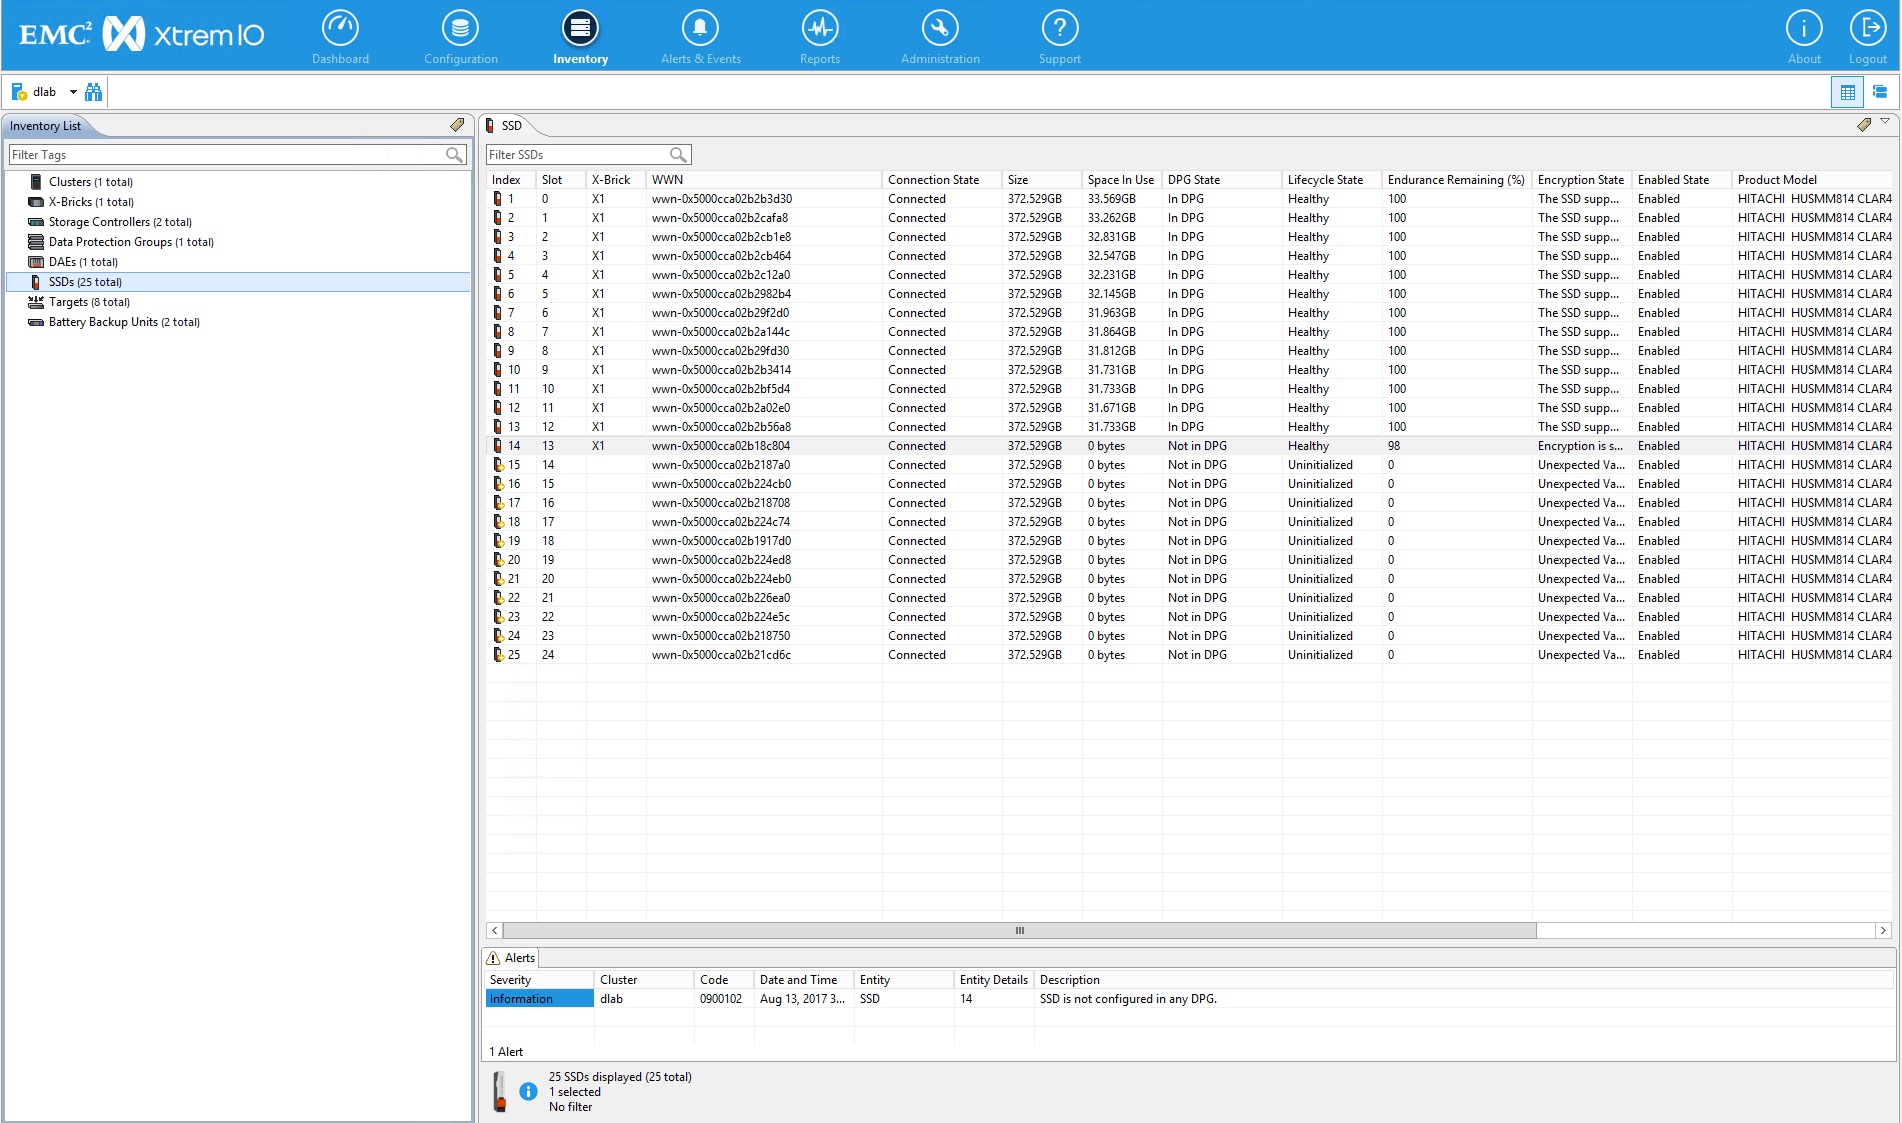
- Select the Inventory pane of the UI, select the Table View and then select the SSD object. The new SSDs should have a “DPG State” of “Not in DPG” and “Lifecycle State” of “Uninitialized”. The existing SSDs will be “In DPG” and “Healthy” respectively.
- Make a note of the X-Brick ID, the DPG ID and the DPG “Useful SSD Space” and “User Space”.
- Keep the XMS UI open with the Alerts & Events window selected. This is how the status of each SSD addition will be tracked.
Step 3 – Initialize each SSD and bring Online
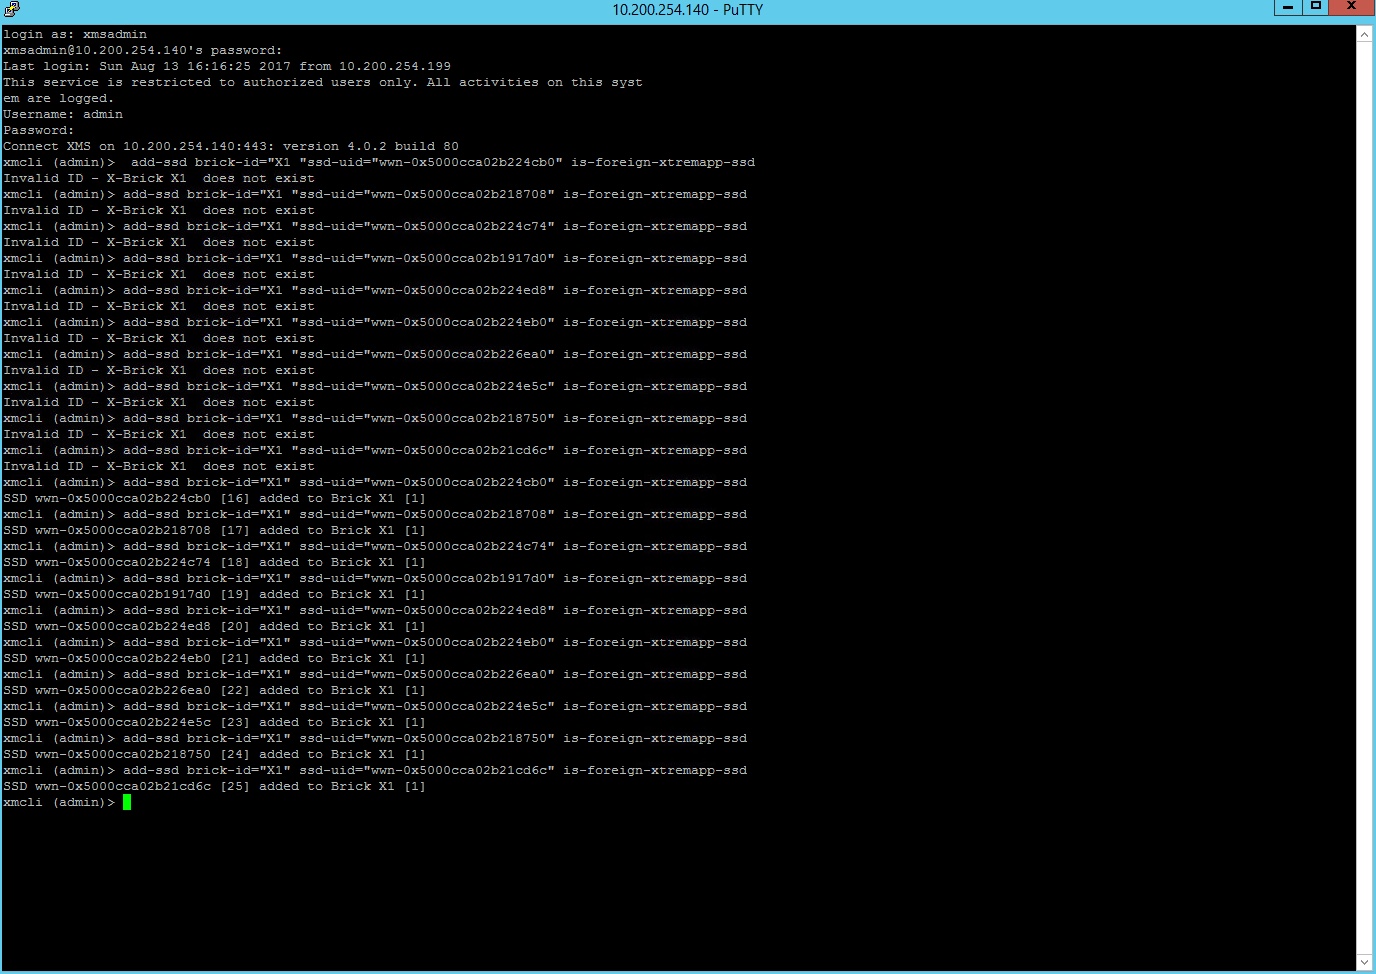
- Open Putty and SSH to the XMS IP address and login with “xmsadmin” and then with username “tech” (get default password from Dell-EMC support).
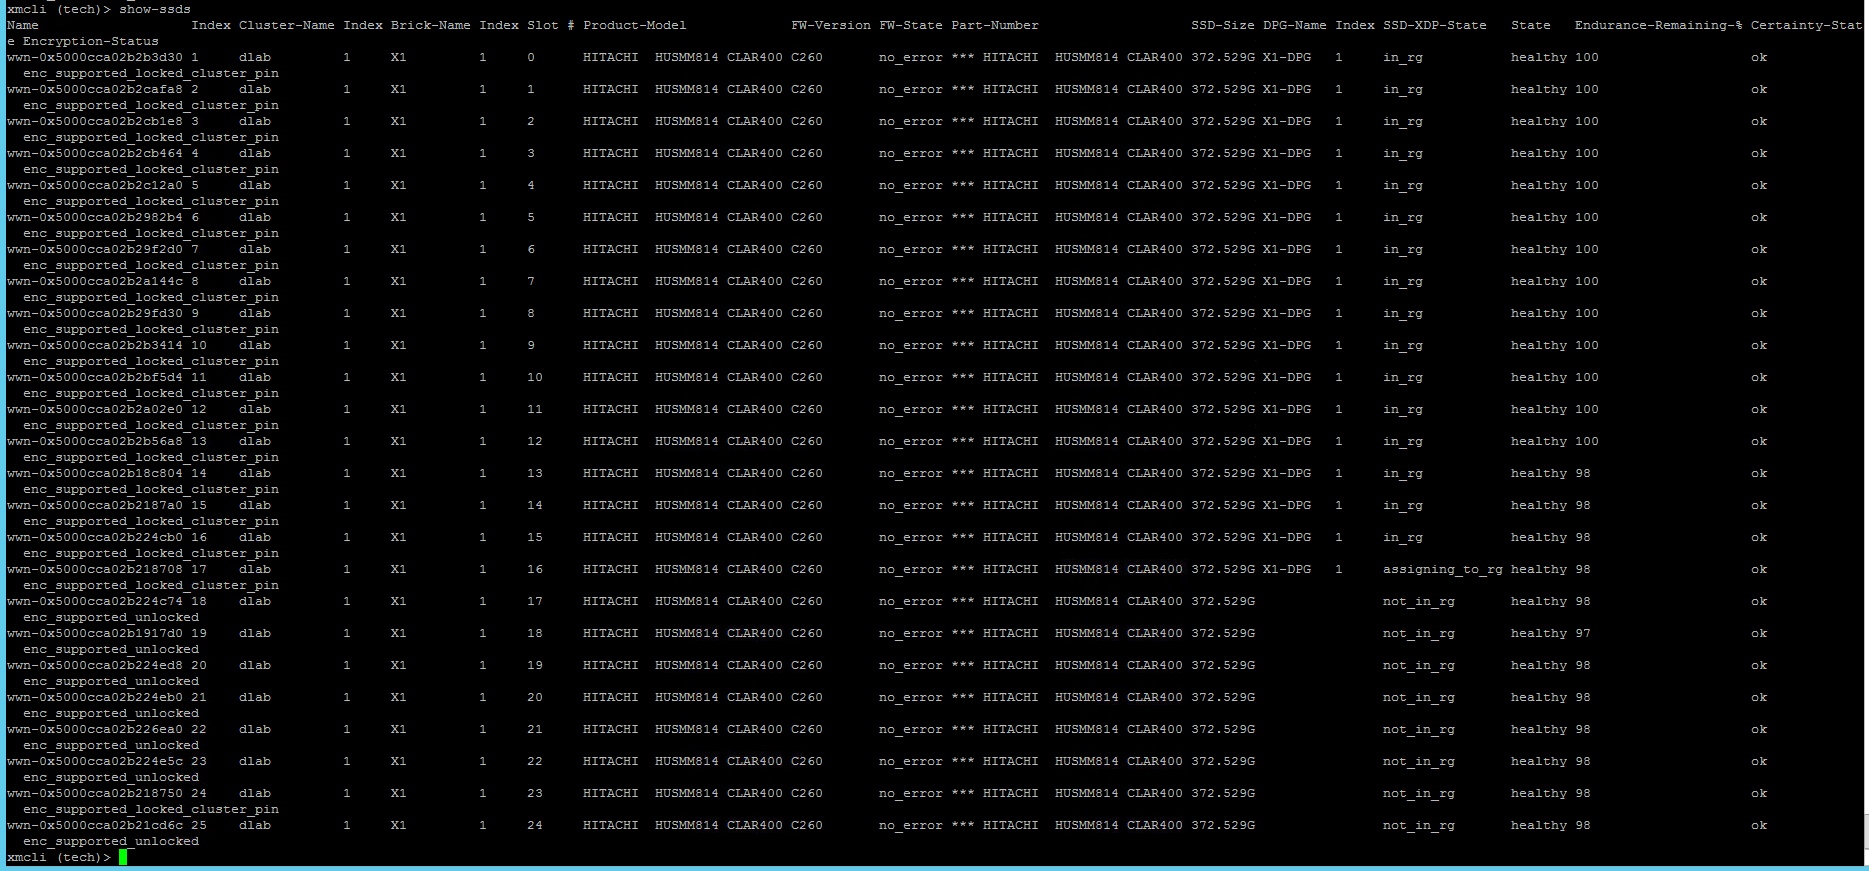
- Use the command “show-ssds” to get the SSD list of the X-Brick, including the WWN identifiers. The WWN identifier for each slot will be used in the following steps.
- Starting from Slot 13, sequentially execute the following commands. Use the X-Brick, DPG and WWN IDs recorded earlier.
- Use the command “add-ssd brick-id=”<X-Brick ID>” ssd-uid=”<SSD-WWN>” is-foreign-xtremapp-ssd” to initialize the SSD in the X-Brick. My use-case had SSDs from another X-Brick, so I had to force the command by using the “is-foreign-xtremapp-ssd” flag.
- Use the command “assign-ssd dpg-id=”<DPG ID>” ssd-uid=”<SSD-WWN>”” to add the SSD to the Data Protection Group (DPG).
- Check the XMS Alerts and Events UI to track the percentage of completion for this task.
- As each event has completes (it will turn Green with a “Cleared” state), proceed to the next slot, until Slot 24 is reached and completed.
- Select the Inventory pane of the XMS UI, select the Table View and then select the SSD object. All 25 SSDs should have a “DPG State” of “In DPG” and a “Lifecycle State” of “Healthy”.
- Then select the Data Protection Groups object and verify the DPG “Useful SSD Space” and “User Space” have doubled.
- The XMS Dashboard will also show a doubling of Physical Capacity.
- Your XtremIO X-Brick solution is now ready to provide additional storage services: EMC XtremIO – Provisioning a LUN.